Connect provides you with the ability to create and edit content for your messages using an HTML editor. Connect creates a blank document on the repository on the content server that is the storage place for the content that you create in the HTML editor. For more information on how to use the HTML editor to create content, please see Editing Content in Connect.
Creating New Content Using Connect
To create content in Connect:
- Navigate to the Edit Content URLs page for the appropriate content
that you wish to create. For more information, please see Managing Content URLs
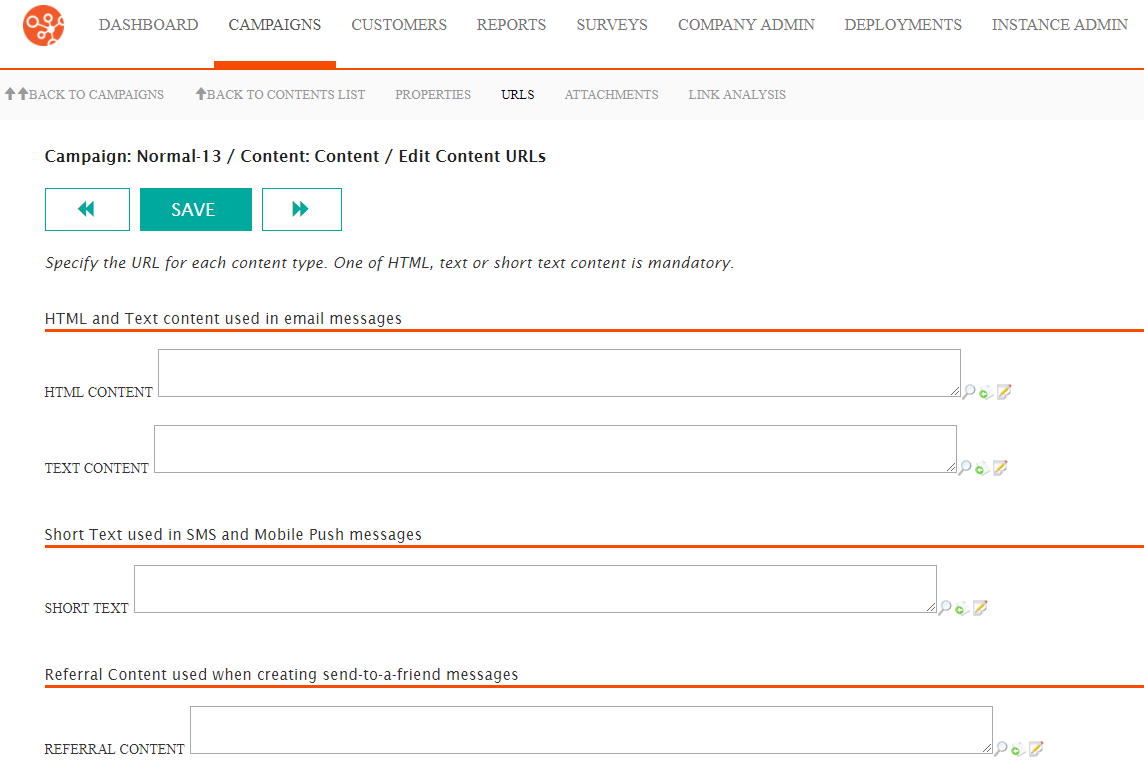
- Beside the desired message field that you wish to create content for, click
the 'Create Content' icon (
 ). The Create Content on Repository page
appears.Note: The type of content that Connect allows you to upload is driven by the content type and the type of content that is being uploaded. That is:
). The Create Content on Repository page
appears.Note: The type of content that Connect allows you to upload is driven by the content type and the type of content that is being uploaded. That is:- If the content type is 'Static Content', 'Static Scripted Content' or 'Dynamic Content', only HTML content can be uploaded into the HTML Content URL and only text content can be uploaded into the Text Content URL.
- If the content type is 'XSL Template' only XSL content can be uploaded into any of the URLs
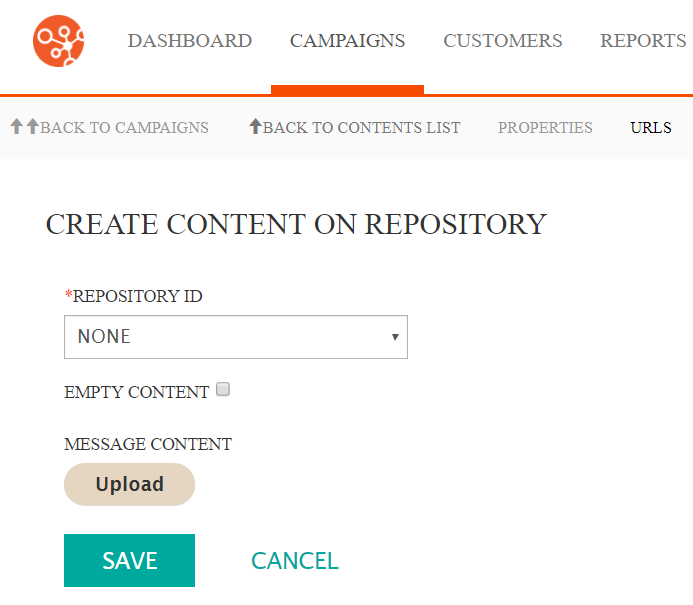
- Select the desired content repository where you wish the content to be stored in the Repository ID dropdown.
- Check the Empty Content checkbox. This indicates that you will be creating the content that will be stored in the repository. The Upload button disappears.
- To cancel and not create an empty content page in the content repository, click the Cancel button. You are returned to the Edit Content URLs screen. No content has been created.
- Click the Save button. The empty content page is created and saved on
the content server in the selected repository. The Edit Content URLs
screen appears with the URL displayed that is the location of the content in
the repository.
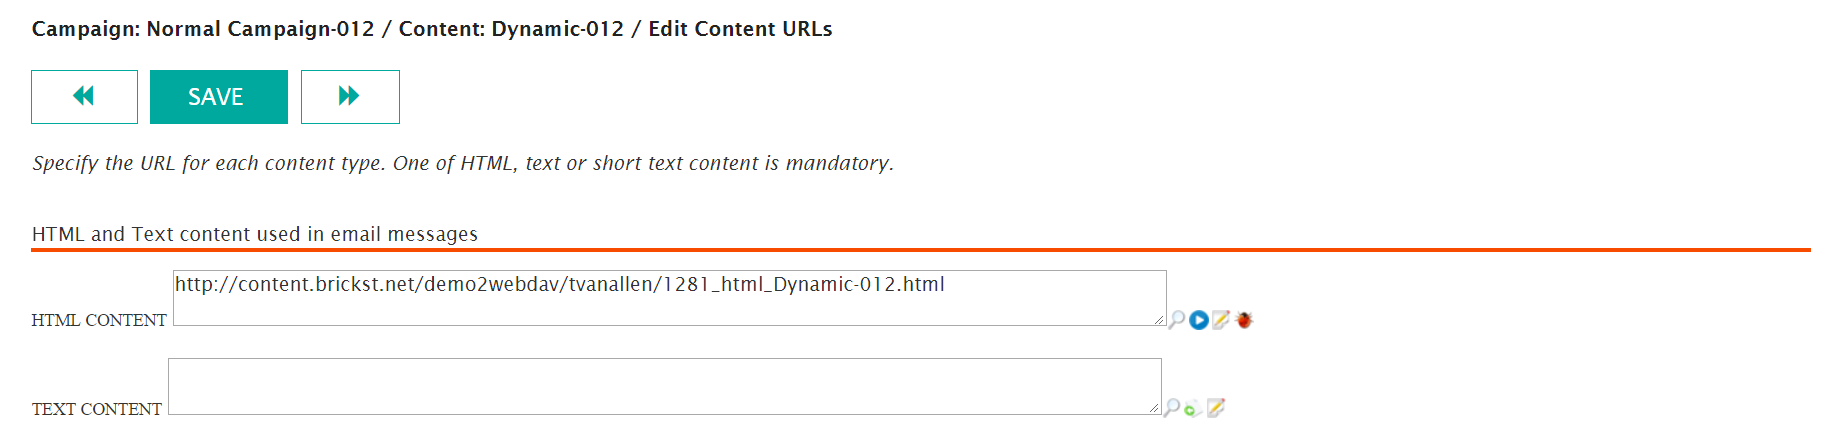
- To preview the content, click the Preview icon (
 )
beside the content you wish to view. The content displays in a new browser
tab.
)
beside the content you wish to view. The content displays in a new browser
tab. - To edit the content, click the Message Content Editor icon (
 ). The Message Content Editor screen
appears. For more information, please see Editing Content in Connect.
). The Message Content Editor screen
appears. For more information, please see Editing Content in Connect. - To preview the content, click the Preview icon (
 ). A webpage opens displaying the content as it
will appear to the customer in the message.
). A webpage opens displaying the content as it
will appear to the customer in the message. - To debug the content, click the Message Debug icon (
 ). The XSL Content Debug screen appears. This is available for
dynamic content or XSL content. For more information on debugging content,
please see Debugging XSL Content.
). The XSL Content Debug screen appears. This is available for
dynamic content or XSL content. For more information on debugging content,
please see Debugging XSL Content.
