Static or static scripted content sent to targeted customers contains information that is unchanging to the reader. That is, one customer will receive the exact same content as another. Mail merge tags are able to be added for personalization of messaging, but the content will remain the same for the reader. An example of static content is a newsletter that subscribers receive each month. The content would remain the same for all subscribers regardless of location or customer attributes. By subscribing to the newsletter, each customer receives the same content.
Creating Static or Static Scripted Content
To create static or static scripted content:
- In the Campaigns list screen, select the appropriate campaign. The campaign's Properties screen appears, displaying the campaign information.
- Click the Content sub-tab for the campaign. The Define Content for
Campaign screen appears.
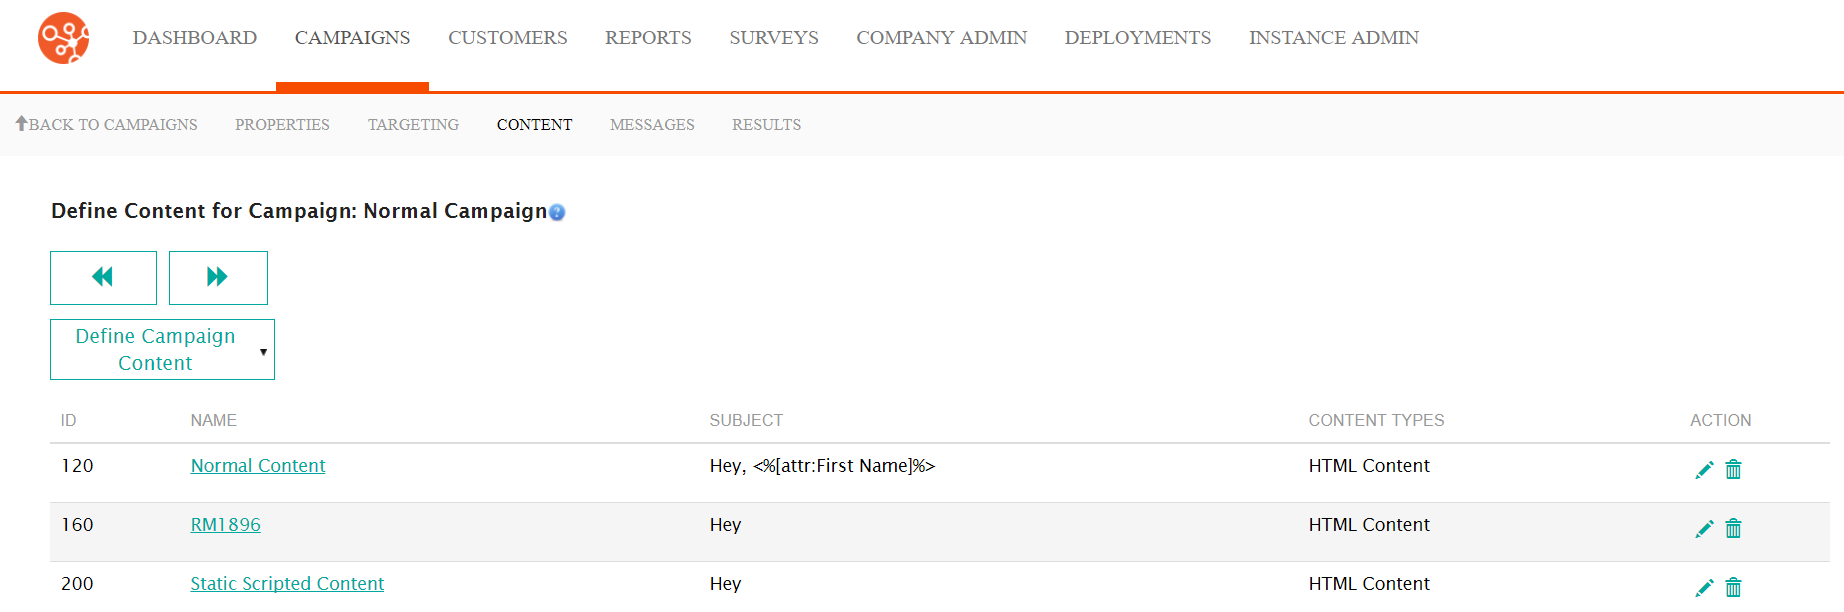
- From the Define Campaign Content dropdown, select New Content.
The New Content screen appears.
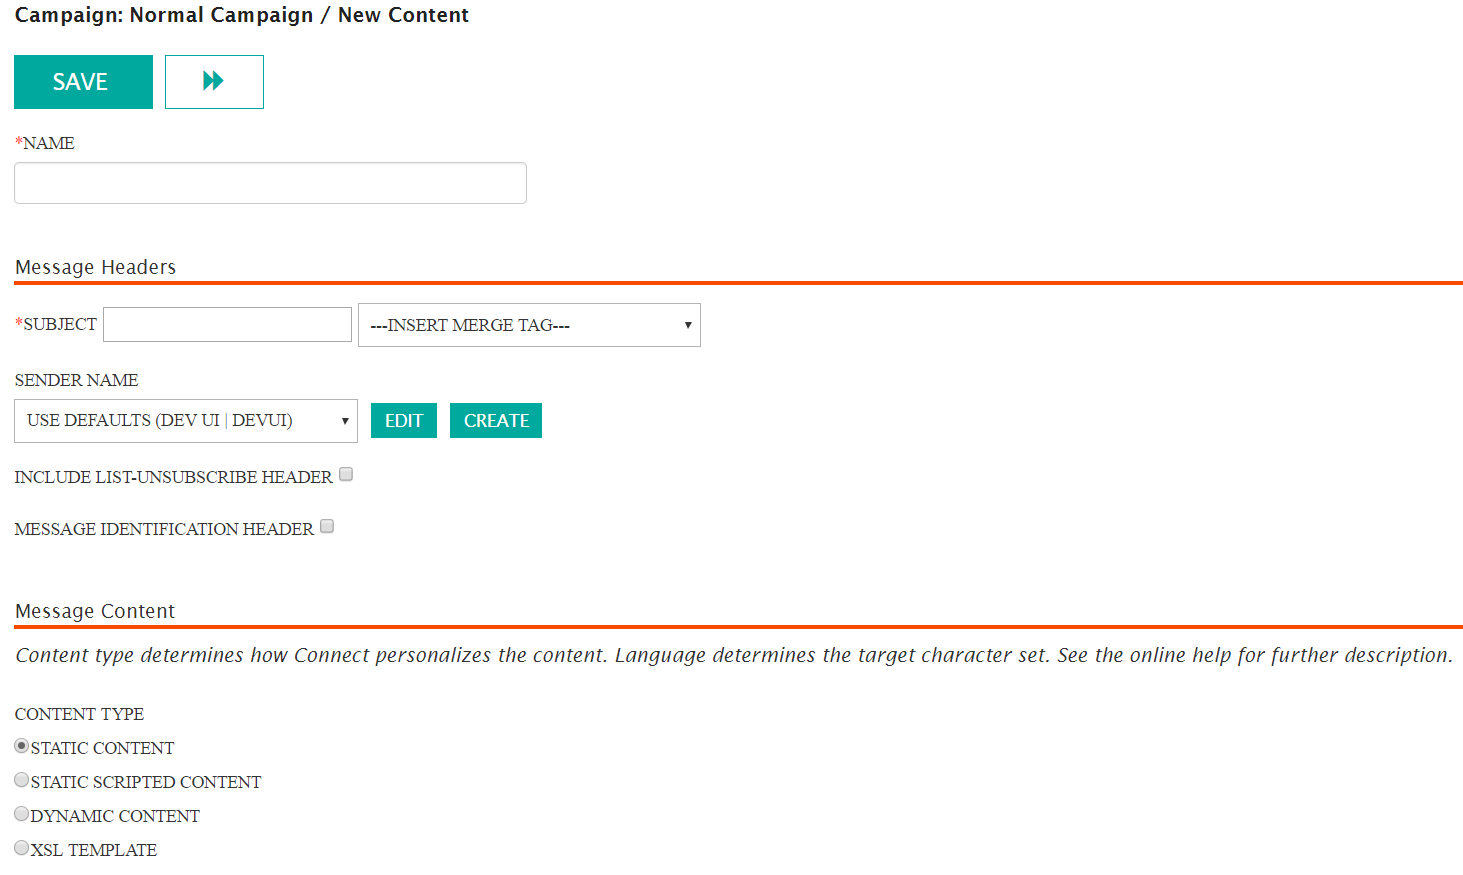
- Enter a name for the content in the Name: field. This is an internal name used to describe the content and is not seen by the customer.
- Enter the message header information in the Message Headers
section:
- Subject: The subject line of the message that will be sent to the customer. The customer will read this as the subject line of the message (e.g. "Happy Holidays from MyCompany!")
- --Insert Merge Tag--: Allows you to insert a merge tag to personalize the message's subject line to the customer using customer attributes (e.g. "Happy Holidays, <%[attr:First Name]%>" which would display the customer's first name)
- Sender Name: The sender that will appear in the name and
email address from your organization (e.g. "MyCompany" as the name,
"[email protected]")Note: You are able to create a new sender if the one that you wish to use is not displayed in the Sender Name dropdown. To do so, click the Create button. For more information, see Creating Sender Names.Note: You are able to edit the sender name if the one that you wish to use in the Sender Name dropdown is not configured as you prefer. To do so, click the Edit button. For more information, see Editing Sender Names.
- Include List-Unsubscribe Header: Checkbox that when selected will include the unsubscribe header into the message
- Message Identification Header: Checkbox that when selected will include the message identification header to help identify the campaign in the message
- In the Message Content section:
- In the Content Type section, select either the Static Content or Static Scripted Content
- Select the desired language for the email in the Language dropdown.
- Check the Archive Message checkbox if you wish to archive the message
- In the Secure Message Transmission section:
- Select the desired level of encryption in the Send Using Secure
Channel dropdown:
- No Encryption: No encryption will be used
- Force TLS: Transport Layer Security (TLS) is forced to ensure privacy between your organization and the customer. If the recipient is not configured or able to accept TLS, the message will fail.
- Opportunistic TLS: If a TLS connection cannot be established, Connect will send the message using SMTP
- Select the desired send mode override in the Send Mode
Override dropdown:
- Default: The default override defined for the instance of Connect
- Use DMS: Use Defence Message System (DMS) protocols
- Select the desired level of encryption in the Send Using Secure
Channel dropdown:
- Return to the top of the screen and click the Save button. The New
Content/Edit Content URLs screen appears.
For more information, please see Managing Content URLs
