Sender names are the email addresses that will be visible to the customer in the messages
sent to them. Ensure that you create a sender name that is appropriate to not only the
internal organization that will be associated with the email, but also ensure that the
name is appropriate for the audience.
Note: Once a sender name is created it cannot be
deleted. Ensure that the sender name that you create is valid for your organization
and that the information you are about to add for the sender name is correct. You
are, however, able to deactivate a sender name as necessary.
Creating a New Sender Name
To create a new sender name:- In the Campaigns screen, click on the Senders sub-tab. The
Senders screen appears.
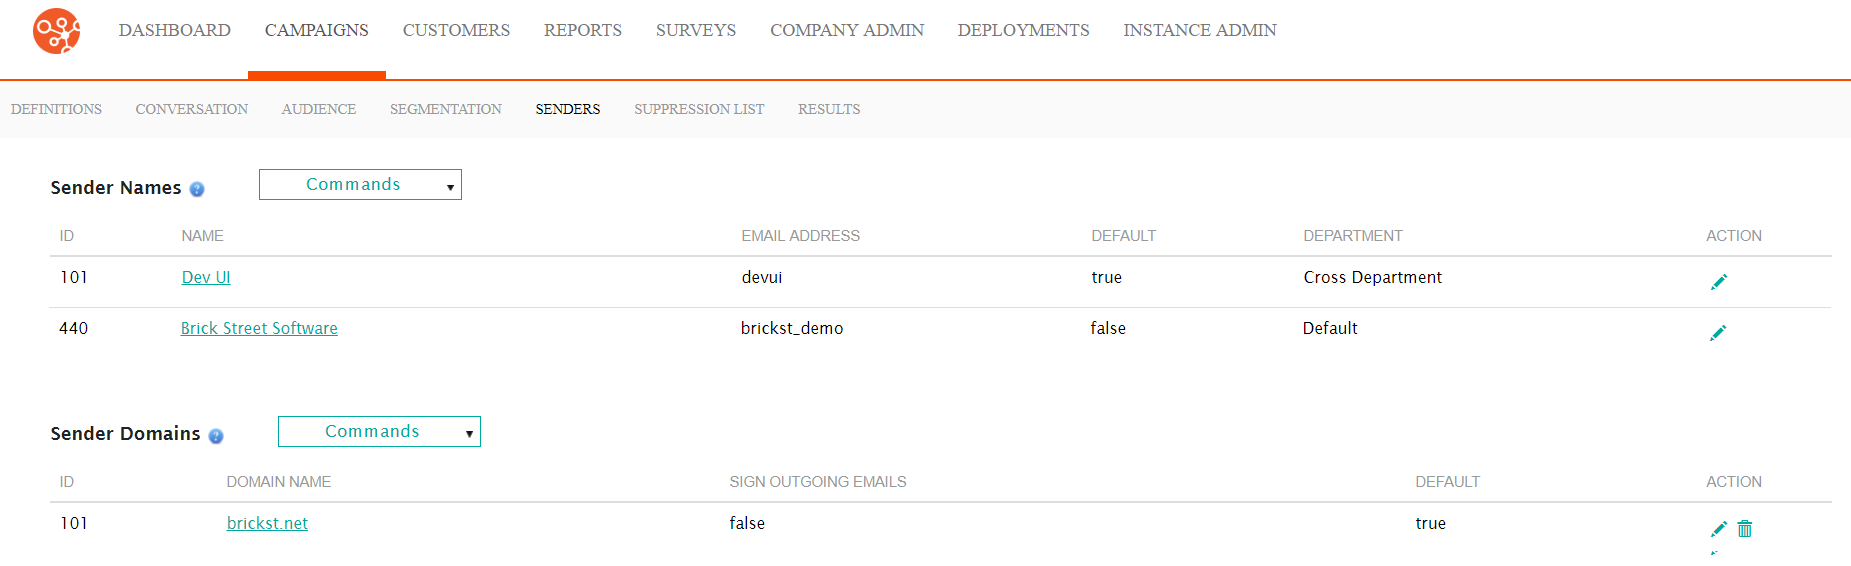
- From the Sender Names section, click the Commands dropdown.
The Define Sender screen appears.
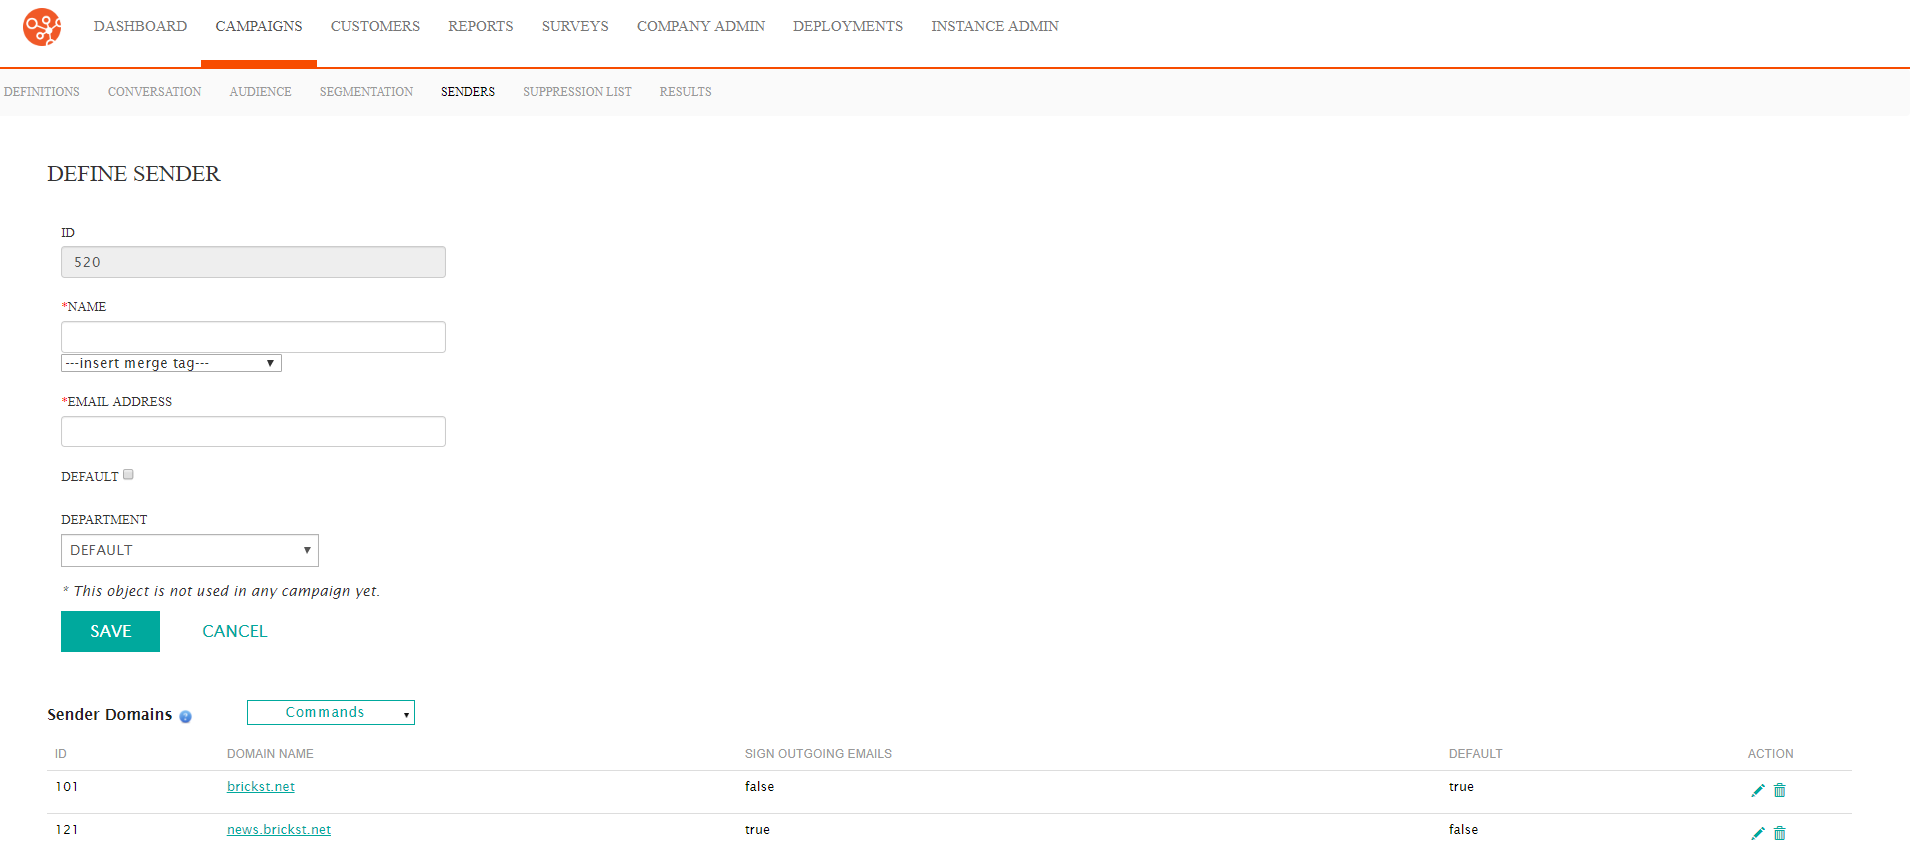
- Enter the sender name basic information:
- Name: The name associated to email address that the customer will see (e.g. "MyCompany Newsletter")
- --insert merge tag--: A customer attribute merge tag that can be placed in the Name field to customize the name to the customer (e.g. "Offers for [Customer Name]")
- Email Address: The email address from which the message will be sent
- Default: Marks the email address as the default for this
senderNote: Marking this email address as the default sender will remove the default status from the existing default sender email. Ensure that you wish to use this email address as the default.
- Department: The department to which the sender is associated
- To cancel without saving the sender, click the Cancel button. The Senders screen appears with the newly entered information not added to a new sender entry.
- Click the Save button. The new sender name is saved and displays in the Senders screen in the Sender Names section.
