Normal campaigns are one-time campaigns sending a single message to an audience at a scheduled point in time. These messages are sent only once to the selected audience unlike recurring or event-triggered campaigns that send messages on a periodic schedule or a triggering event. Common uses for normal campaigns are one-off product promotions or update messages to purchasers of event tickets on schedule updates, for example.
You can also schedule one or more follow-up messages to be sent to customers based on the actions they take with the primary message, such as clicking on a link in the message.
Creating a Normal Campaign
- Click the Campaigns top menu. The campaigns screen appears.
- From the campaign list window, click the Commands > New Campaign. The
Create New Campaign window appears.
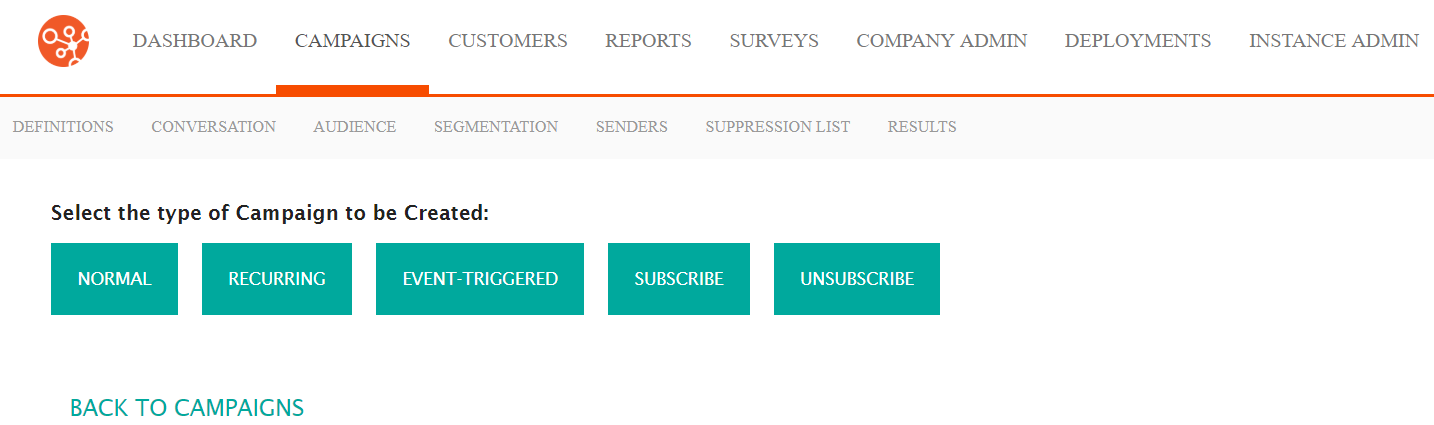
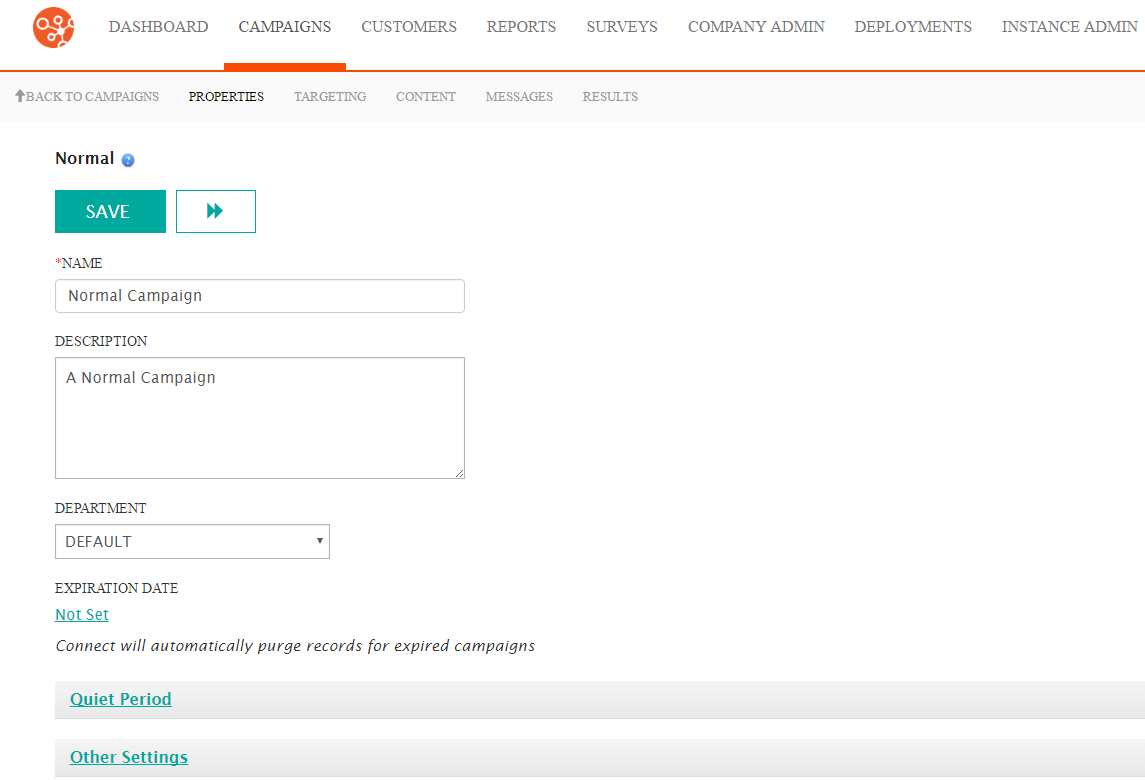
- Click the Normal button. The Normal Campaign, Properties window appears.
- Enter the following information:
- Name: The name of the campaign. This name will show up in the campaign list and in reports and must be unique.
- Description: A short description for the campaign, 240 characters maximum.
- Department: The department associated with the campaign. The department has a security profile that will override the security profile of the user. This security profile will have to be used instead of the one associated with the user.
- Expiration Date: The expiration date is the date the campaign
will expire and no longer be active. Connect will purge the records
after the expiry date has passed. To enter the expiration date:
- Click the Not Set hyperlink. The Enter Campaign Expiry Date section opens.
- To ensure the campaign does not expire, check the Does Not Expire checkbox.
- To enter an expiry date, remove the checkbox from the
Does Not Expire checkbox and click in the Date
& Time field.
The date/time widget appears.
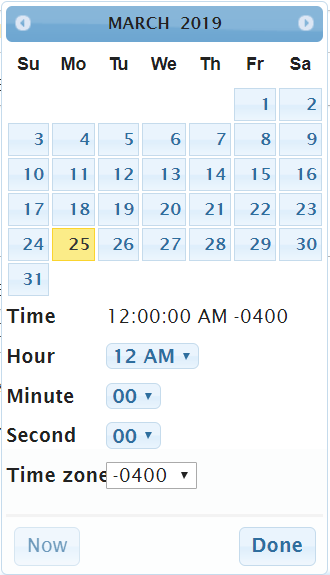
- To expire the campaign immediately, click the Now button.
- Select the desired expiry date and time and click the
Done button.
The date and time displays in the Date & Time field.
- To cancel the setting of the expiration date, click Cancel. The Enter Campaign Expiry Date section closes.
- Click Done. You are returned to the Campaign Properties screen with the expiry date displayed.
- The quiet period defines the times when messages will not be sent to the
campaign's audience. To define a quiet period for the campaign:
- Click the Quiet Period hyperlink. The Quiet Period section opens.
- Select one of the following options using the associated radio
button:
- Use System-Wide Quiet Period: The campaign will use the quiet periods that are defined at the system level. If no other quiet period definition is used, the system-wide periods are used as defined for the Connect instance. See System Quiet Periods for more information.
- Use Company-Wide Period: The campaign will use the quiet periods that are defined at the company level. See Company Quiet Periods for more information.
- Define Campaign Quiet Period: User-defined quiet
period that override the system and company-wide periods. To
configure quiet periods:
- Click the Create Quiet Period button.The Create Quiet Period section opens.
- Select the start time hours, minutes and seconds for the start time using the dropdowns in the Start Time field.
- Select the end time hours, minutes and seconds for the end time using the dropdowns in the End Time field.
- Select the specific day for the quiet period, or 'Everyday' to have the start and end times execute every day in the Day field.
- To close the Create Quiet Period section without saving, click the Cancel button.The Create Quiet Period section closes.
- Click the Save button.The Create Quiet Period section closes and the quiet period is displayed.
- To create another quiet period, repeat steps i through vi.
- To delete a quiet period entry:
- Click the Delete icon (
 ). Connect displays a
confirmation message "Are you sure you want
to delete this object?"
). Connect displays a
confirmation message "Are you sure you want
to delete this object?" - To keep the quiet period and not delete it, click the Cancel button. You are returned to the Campaign Properties screen.
- Click the OK button. The quiet period is deleted.
- Click the Delete icon (
- Click the Other Settings hyperlink. The Other Settings section displays.
- To select the language for the campaign, select the desired language from the Language dropdown field.
- To select the priority of the message, select the desired priority from the Priority dropdown field. The priority ranks campaigns that may be launched at the same time. The higher the priority campaign will be processed first. The smaller the number the higher the priority. For example, a campaign with a priority of '5' will have a higher priority than a campaign with a priority of '10'.
- To save the campaign, click the Save button. The campaign is now saved.
- To save the campaign and advance to the Targeting screen, click the
Next Page button (
 ). The campaign is saved and you are navigated to the Targeting
screen. Note: Targeting a campaign requires an understanding of the relationship between conversations, audiences and segmentations. For more information on the relationship between conversations, audiences and segmentations, please see Defining Campaign Targets
). The campaign is saved and you are navigated to the Targeting
screen. Note: Targeting a campaign requires an understanding of the relationship between conversations, audiences and segmentations. For more information on the relationship between conversations, audiences and segmentations, please see Defining Campaign TargetsFor information on how to use the Targeting screen to associate the appropriate conversations, audiences and segmentations to your campaign, please see Managing Campaign Targets
