Campaigns that are externally triggered react to an external event that requires an immediate response. An example would be an order receipt that should be sent immediately in response to a purchase transaction.
It is important to note that subscribe and unsubscribe campaigns are also triggered externally, but are defined separately from other externally triggered campaigns. For more information on subscribe and unsubscribe campaigns, see the section Subscribe and Unsubscribe Campaigns.
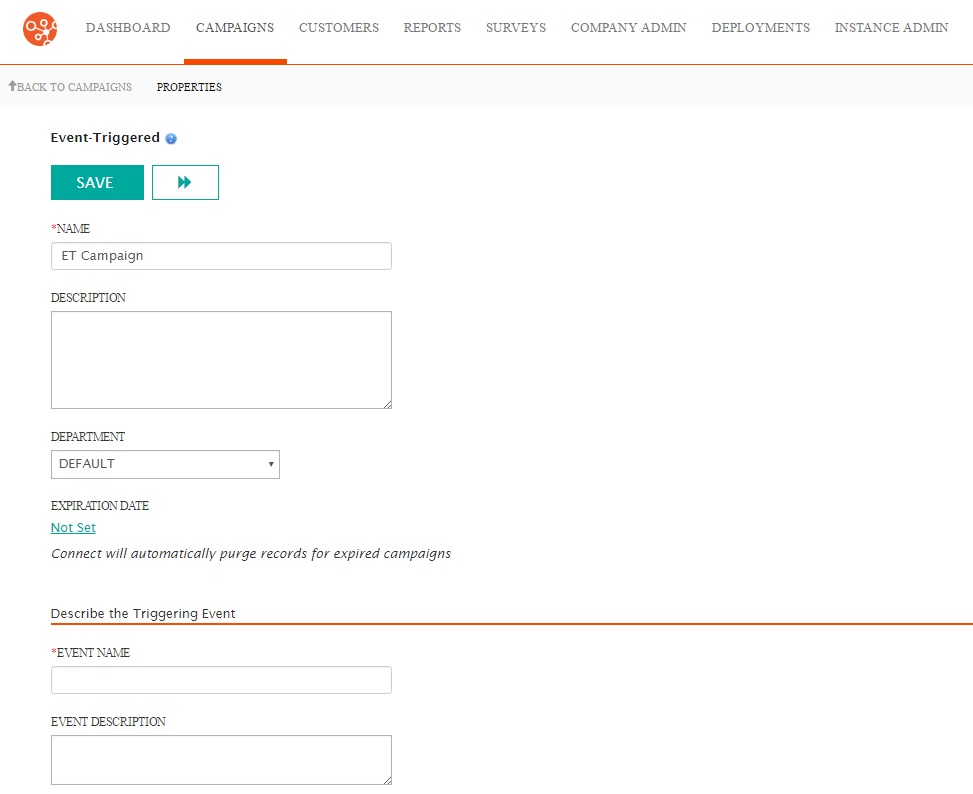
After selecting the Externally Triggered campaign type on the Create New Campaign page, the system will bring you to the Event-Triggered page, where you can enter additional detail on an externally triggered campaign.
Because event-triggered campaigns are triggered by an external event, event-triggered campaigns differ from other campaigns in that you define the triggering event that will enact the campaign. You are also able to include XML data parameters that better define the event.
Creating an Event-Triggered Campaign
- Click the Campaigns top menu. The campaigns screen appears.
- From the campaign list window, click the Commands > New Campaign. The
Create New Campaign window appears.
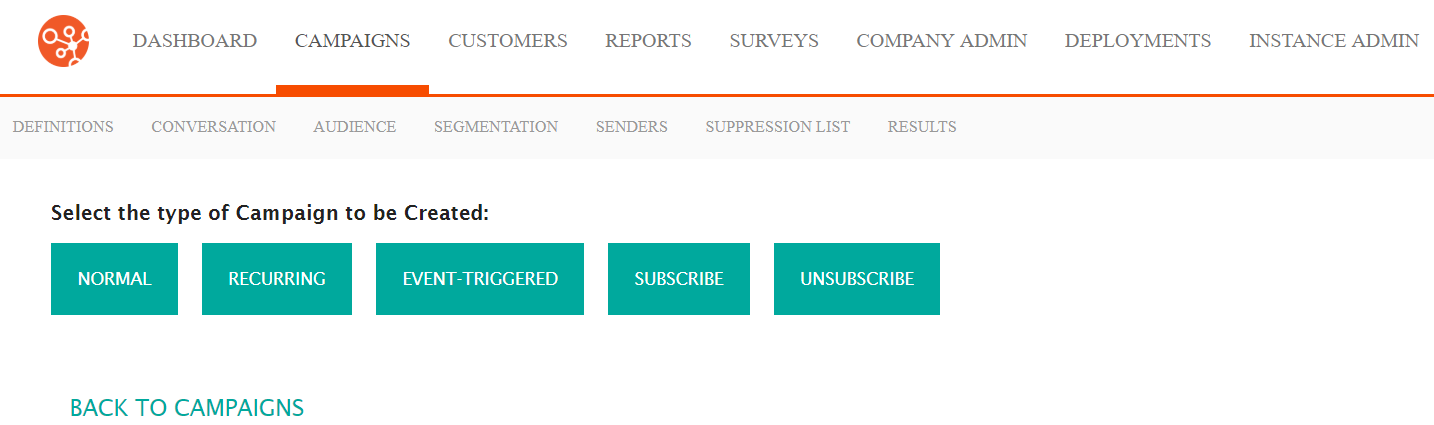
- Click the Event-Triggered button. The Event-Triggered campaign window appears.
- Enter the following campaign information:
- Name: The name of the campaign. This name will show up in the campaign list and in reports and must be unique.
- Description: A short description for the campaign, 240 characters maximum.
- Department: The department associated with the campaign. The department has a security profile that will override the security profile of the user. This security profile will have to be used instead of the one associated with the user.
- Expiration Date: The expiration date is the date the campaign
will expire and no longer be active. Connect will purge the records
after the expiry date has passed. To enter the expiration date:
- Click the Not Set hyperlink. The Enter Campaign Expiry Date section opens.
- To ensure the campaign does not expire, check the Does Not Expire checkbox.
- To enter an expiry date, remove the checkbox from the Does Not Expire checkbox and click in the Date & Time field. The date/time widget appears.
- To expire the campaign immediately, click the Now button.
- Select the desired expiry date and time and click the Done button. The date and time displays in the Date & Time field.
- To cancel the setting of the expiration date, click Cancel. The Enter Campaign Expiry Date section closes.
- Click Done. You are returned to the Campaign
Properties screen with the expiry date displayed.
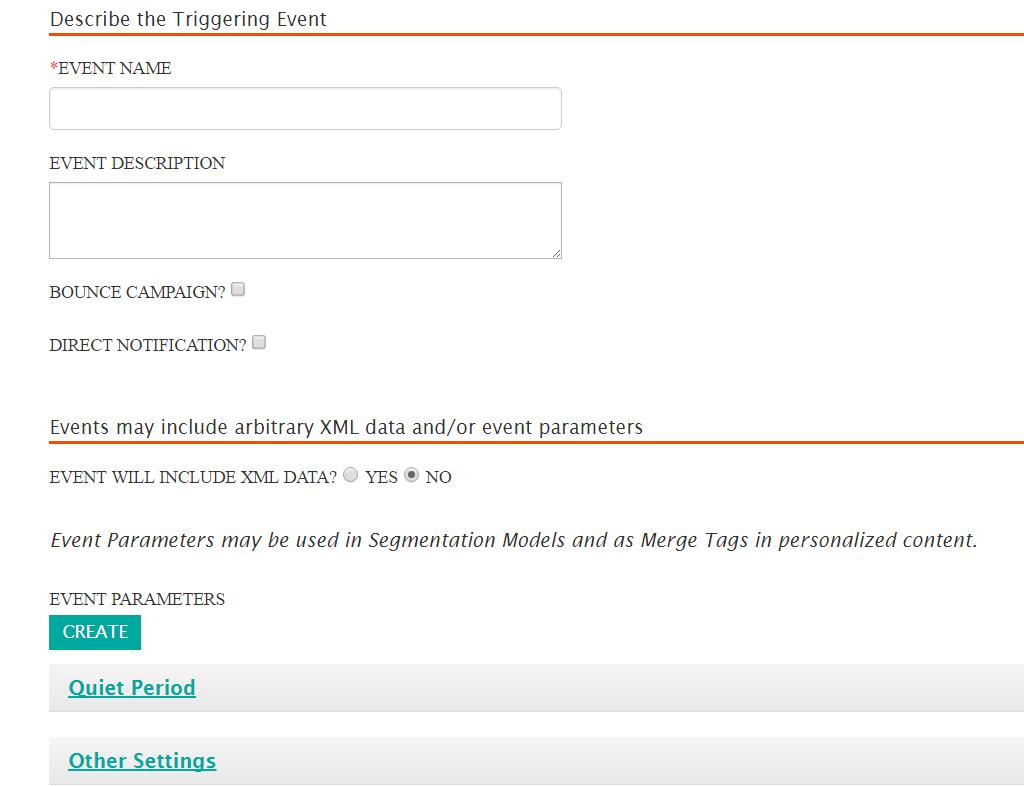
- In the Describe the Triggering Event section, enter the following
information describing the event:
- Event Name: The name of the event. This name must be unique.
- Description: A verbose description for the event, providing details to define the triggering event
- Bounce Campaign?: Checkbox describing whether the campaign is a bounce campaign or not, meaning that the message is in response to a message bounce or reply
- Direct Notification?: Checkbox describing whether the campaign is a direct notification, meaning that the generating event will be notified immediately at the point of the trigger
- In the Events may include arbitrary XML data and/or event parameters
section, enter the following event information:
- Event Will Include XML Data?: Indicates whether the event
will include XML data or not. Note: "External XML" is a bundle of event-related XML data sent outside of Connect. Connect's Event Listener component receives the XML package and passes it as event information to the Connect database, which sends a command to the Mail Composer to generate one or more e-mails as appropriate. Only event-driven campaigns use external XML.
For detailed information about how Connect uses its Event Listener component to help it identify, process, and initiate actions in response to events, please refer to the Event Listener Overview and Connect XML DTD.
- To create a new event parameter to be used when the event is
triggered (such as an external application alert):
- Click the Create button. The Create Parameter section opens.
- Enter the following parameter information:
- Parameter Name: A unique name for the parameter
- Parameter Type: The data type for the parameter (i.e. 'Single Character', 'Number', 'String', 'Date', 'URL')
- To close the Create Parameter section without saving, click the Cancel button. The Create Parameter section closes.
- Click the Save button. The parameter is listed in the Event Parameters section.
- Event Will Include XML Data?: Indicates whether the event
will include XML data or not.
- The quiet period defines the times when messages will not be sent to the
campaign's audience. To define a quiet period for the campaign:
- Click the Quiet Period hyperlink. The Quiet Period section opens.
- Select one of the following options using the associated radio
button:
- Use System-Wide Quiet Period: The campaign will use the quiet periods that are defined at the system level. If no other quiet period definition is used, the system-wide periods are used as defined for the Connect instance. See System Quiet Periods for more information.
- Use Company-Wide Period: The campaign will use the quiet periods that are defined at the company level. See Company Quiet Periods for more information.
- Define Campaign Quiet Period: User-defined quiet
period that override the system and company-wide periods. To
configure quiet periods:
- Click the Create Quiet Period button. The Create Quiet Period section opens.
- Select the start time hours, minutes and seconds for the start time using the dropdowns in the Start Time field.
- Select the end time hours, minutes and seconds for the end time using the dropdowns in the End Time field.
- Select the specific day for the quiet period, or 'Everyday' to have the start and end times execute every day in the Day field.
- To close the Create Quiet Period section without saving, click the Cancel button. The Create Quiet Period section closes.
- Click the Save button. The Create Quiet Period section closes and the quiet period is displayed.
- To create another quiet period, repeat steps i through vi.
- To delete a quiet period entry:
- Click the Delete icon (
 ). Connect displays a
confirmation message "Are you sure you want
to delete this object?"
). Connect displays a
confirmation message "Are you sure you want
to delete this object?" - To keep the quiet period and not delete it, click the Cancel button. You are returned to the Campaign Properties screen.
- Click the OK button. The quiet period is deleted.
- Click the Delete icon (
- Click the Other Settings hyperlink. The Other Settings section
displays.
- To select the language for the campaign, select the desired language from the Language dropdown field.
- To select the priority of the message, select the desired priority from the Priority dropdown field. The priority ranks campaigns that may be launched at the same time. The higher the priority campaign will be processed first. The smaller the number the higher the priority. For example, a campaign with a priority of '5' will have a higher priority than a campaign with a priority of '10'.
- To save the campaign, click the Save button. The campaign is now saved.
- To save the campaign and advance to the Targeting screen, click the
Next Page button (
 ). The campaign is saved and you are navigated to the Targeting
screen.Note: Targeting a campaign requires an understanding of the relationship between conversations, audiences and segmentations. For more information on the relationship between conversations, audiences and segmentations, please see Defining Campaign Targets
). The campaign is saved and you are navigated to the Targeting
screen.Note: Targeting a campaign requires an understanding of the relationship between conversations, audiences and segmentations. For more information on the relationship between conversations, audiences and segmentations, please see Defining Campaign TargetsFor information on how to use the Targeting screen to associate the appropriate conversations, audiences and segmentations to your campaign, please see Managing Campaign Targets
