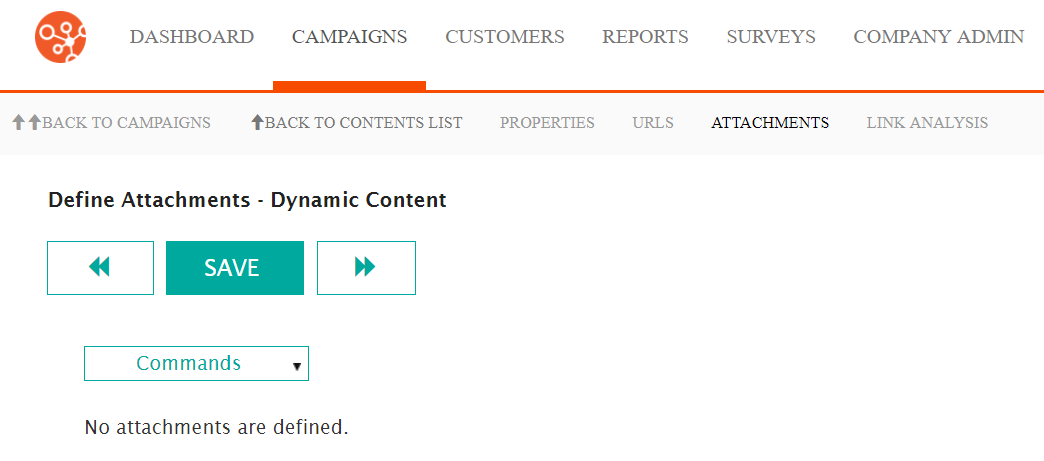
Connect allows you to create attachments that are able to be associated to the content.
Creating Attachments for Content
To create an attachment for content:
- Navigate to the Attachments page for the appropriate content to which
to add the attachment.
- Under the Commands dropdown, select the Create Attachment
command. The Message Attachment Information section appears.
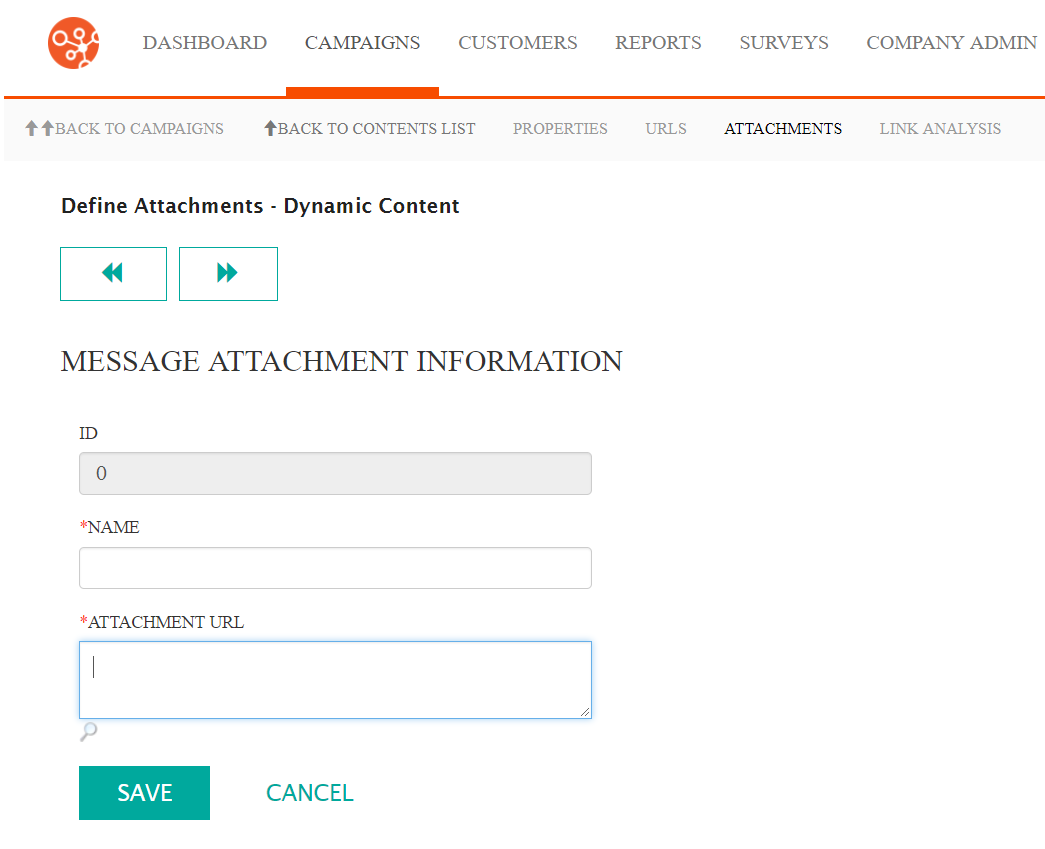
- Enter a name for the attachment in the Name field. This name is used internally and not visible to the public.
- Enter the URL for the location of the attachment in the Attachment URL field.
- To preview the attachment, click the Preview icon (
 ).
The attachment is displayed in a new tab.
).
The attachment is displayed in a new tab. - To cancel without associating the attachment to the content, click the Cancel button. The Message Attachment Information section disappears.
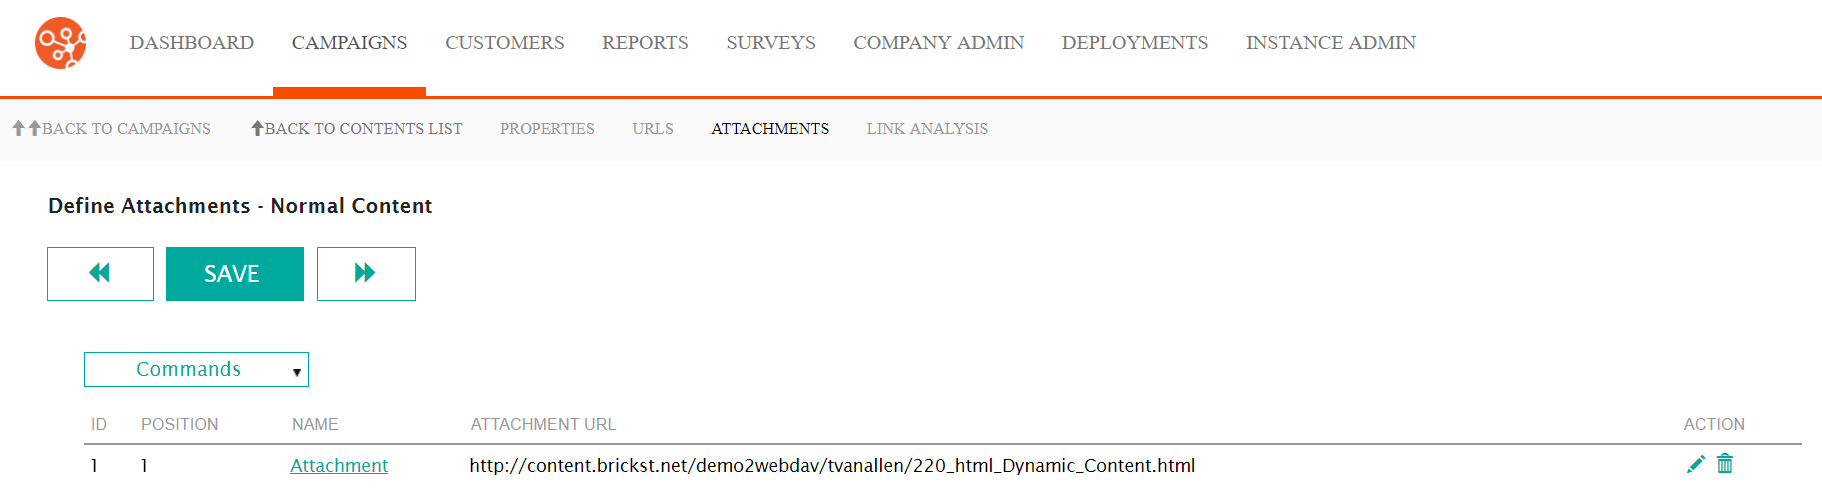
- Click the Save button. The attachment is saved and displayed in the
Attachments screen.
 Note: Parameters are only able to be added to the content once the content is saved. Once saved, you are able to edit the content and add any desired parameters. For more information, please see Editing Content Attachments.
