Conversations are associated with a campaign. Conversations are selected or created from the campaign Targeting tab as you create a new campaign or edit an existing campaign. The Add New Conversation window has several sections where you build the conversation. Each set of directions in this procedure correspond to a section in the window.

After you add all of the information you need, click the Save button to save the conversation.
Add Conversation
- In the Name field, type a unique name for the conversation.
- In the Description field, type an informative description for the conversation.
- From the Department drop-down list, select a department. This is optional.
- Continue to the next section.
Configure the FROM: address for email
- At the end of the Sender Names field, click the Edit button or the Create
button, the window expands to display the Define Sender fields.

- In the Name field, type the name to appear in the email From field.
- In the Email Address field, type the email address associated with the sender name, or, if you want to use the system-defined email address, click the Default checkbox.
- From the Department drop-down list, select a department. This is optional.
- Click the Save button. The new sender name appears in the field.
- At the end of the Sender Domain, click the Edit button or the Create
button. The window expands to display the Define Sender Domain fields.

- In the Domain Name field, type the new domain name or if you want to use the system-defined domain, click the Default checkbox.
- To sign the email, click the Sign Outgoing Emails checkbox. The window expands to display the signature fields.
- From the Sign Emails Using drop-down list, select the domain signature type. (NOTE: Domain signing is an email authentication scheme.)
- In the Selector field, type the appropriate selector.
- In the Enter signing key for outbound emails field, type the appropriate signature key for the domain.
- Click the Save button to save the new sender domain. The new domain appears in the field.
- Continue to the next section.
Sign emails with DKIM signatures
If you choose to sign email using a DKIM signature, you are associating a domain to an email message. Basically, DKIM is an authenication scheme. Changing the Sender Domain gives you the choice to sign the email and select the domain signature type. Signing email using DKIM is optional.
To sign the email with DKIM signatures, click the checkbox and continue to the next section.
Configure Tracker links
Tracker links keep track of sent emails and any links clicked in the email.
- In the Tracker Domain Name field, type the domain. Type the complete domain name.
- In the Default Tracker Link field, do one of the following:
- Type the complete link in the field.
- Click the search icon to select a tracker link.
- Continue to the next section.
Configure where incoming email replies are sent
Identify a location where email replies should go. Type the reply address in the Configure where incoming email replies are sent field and continue to the next section.

Configure the opt-out form
If a user wants to opt-out of a campaign or does not want to receive any more email, you can create a form for the user to complete.
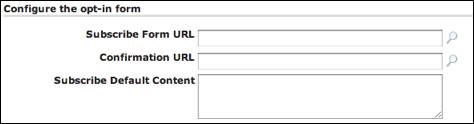
- In the Unsubscribe Form URL, type the form address or click the search icon to locate the form.
- In the Confirmation URL field, type the address for the confirmation web page or click the search icon to locate confirmation page. The confirmation page validates that the email receipient unsubscribed.
- In the Unsubscribe Default Content field, type the default content that appears in the email.
- Continue to the next section.
Configure the refer-a-friend form
Users can refer friends by clicking a link in an email.

- In the Refer Form URL, type the form address or click the search icon to locate the form.
- In the Confirmation URL field, type the address for the confirmation web page or click the search icon to locate confirmation page. The confirmation page validates that the user made a referral.
- In the Refer Default Content field, type the default content that appears in the email.