An Audience Model is associated with a specific campaign and is defined on the campaign's Targeting tab. An audience model identifies the specific customers who receive the campaign information. The Define Campaign Targets topic provides an overview for creating the audience model.
The default model is All Active Subscribers. However, if you do need to create a model, the minimum information you need is a name. To make the audience model useful, add filters to identify specific groups of customers. Different information is required depending on the filter type you select.
The Create Audience Model window has several sections where you build the model. Each set of directions in this procedure corresponds to a section in the window.
After you add all of the information you need, click the Save button to save the model.
Open Audience Model Window
To open the Audience Model window in a new campaign, from the Targeting tab, click the Create button beside the Audience Model field.
- From the Campaign list, click the campaign you want to edit. The Info tab appears.
- In the top left corner, click the Unlock link. The lock icon opens and the fields are unlocked for editing.
- Click the Targeting tab. The Targeting tab appears.
- Click the Edit or Create button beside the Audience Model field. The Audience Model window appears.
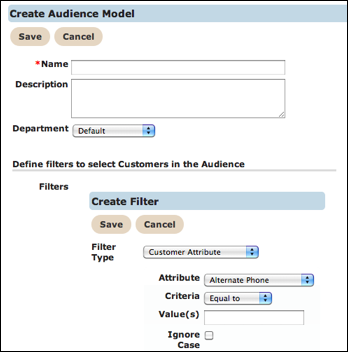
Create Audience Model
- In the Name field, type a unique name for the conversation.
- In the Description field, type an informative description for the audience model.
- From the Department drop-down list, select a department. This is optional.
- Continue to the next section.
Define filters to select Customers in the Audience
- In the Filter field, click the Add Filter button. The screen expands to display the Create Filter fields.
- From the Filter Type drop-down list, select the appropriate filter type. Options include:
- Customer Attribute
- Recency Statistics
- Frequency Statistics
- Monetary Value Statistics
- User Agent Tag
The fields that follow change based on the Filter Type selected.
- Click Save to save the Filter Type. Add as many filters as necessary.
Customer Attribute
- Attribute
- Criteria
- Value(s)
- Ignore Case
Recency Statistics
- Recency of Last
- Criteria
- Value(s)
- Days
- Before
Frequency Statistics
- Frequency Metric
- Criteria
- Drop-down list
- Value(s)
Monetary Value Statistics
- Monetary Value of
- Inferred Interest
- Criteria
- Drop-down list
- Value(s)
User Agent Tag
The User Agent Tag filter does not have any fields. The filter appears in the list.