Senders are associated with the messages so that user's see something familiar with they receive a message. Before you can activate a server, you must have at least one sender.
Add New SMPP Sender
Follow these directions to add a new sender.
- From the SMPP Senders screen, click Commands > New SMPP
Sender. The Enter SMS Sender Information screen appears.
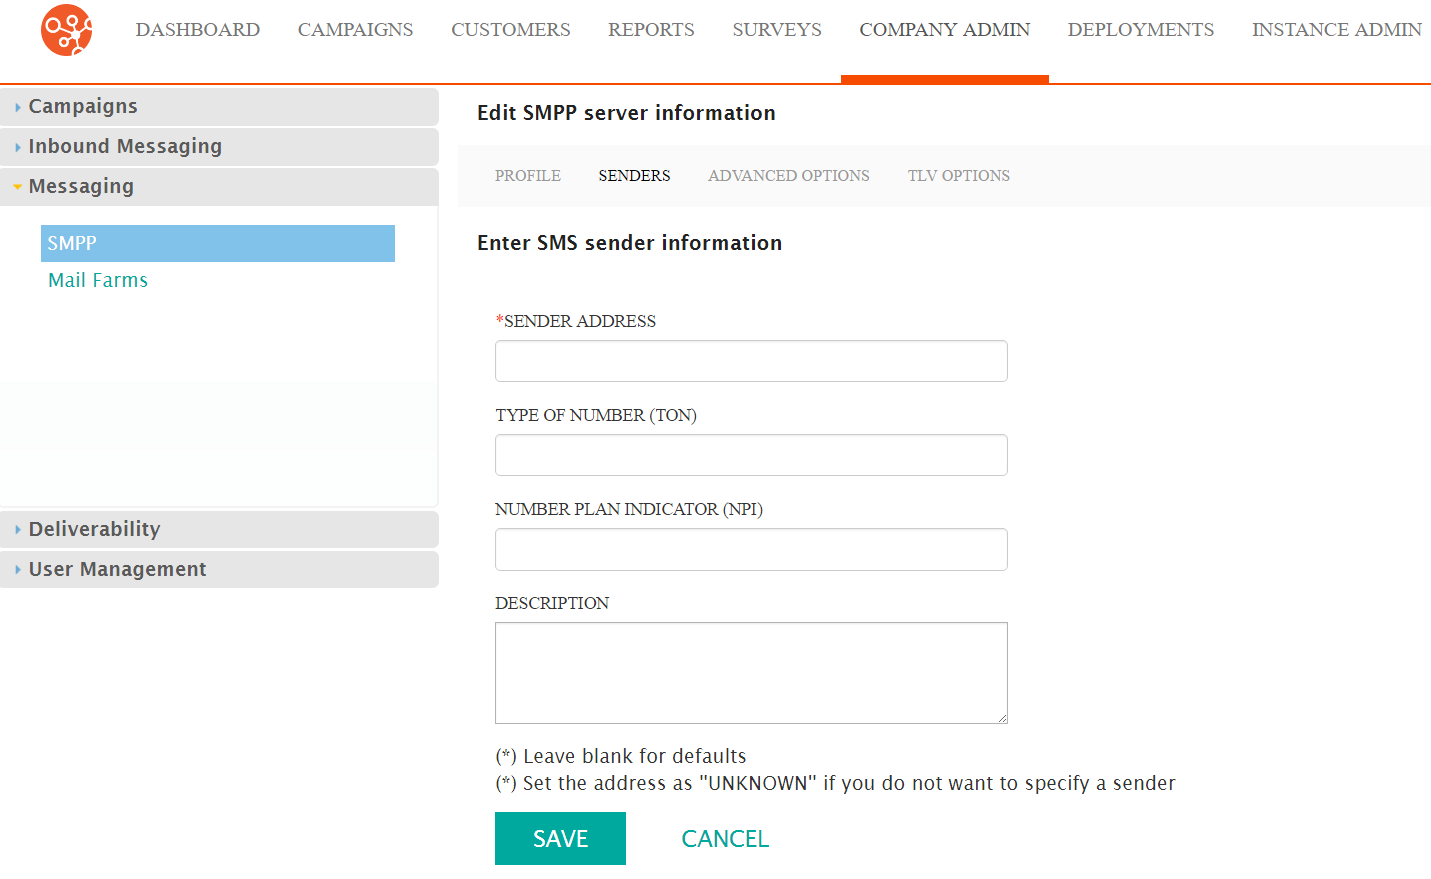
- In the Sender Address field, type the email address for the sender.
- In the Type of Number (TON) field, type the appropriate number. The
TON tells the server how to interpret telepone numbers. Options include:
- Unknown - 0
- International - 1
- National - 2
- Network Specific - 3
- Subscriber Number - 4
- Alphanumeric - 5
- Abbreviated - 6
- In the Number Plan Indicator (NPI) field, type the appropriate
number. The NPI identifies the numbering plan for the corresponding phone
number. Options include:
- Unknown - 0
- ISDN Telephony - 1 - E.164 Standard
- Generic - 2
- Data - 3 - X.121 Standard
- Telex - 4 - F69 Standrd
- Maritime Mobile - 5 - E.210 and E.211 Standard
- Land Mobile - 6 - E.212
- ISDN/Mobile - 7 - E.214 Standard
- In the Description field, type a unique description for the sender address.
- Click the Save button. The SMPP Senders screen appears with the new sender in the list.
Edit SMPP Sender
Follow these directions to edit sender information.
- From the SMPP Sender screen, click Actions > Edit on the row with the sender you want to edit. The Enter SMS Sender Information screen appears.
- Make your changes.
- Click Save. The SMPP Sender screen appears and your changes are saved.
Delete SMPP Sender
Follow these directions to delete an SMPP Sender.
- From the SMPP Sender screen, click Actions > Delete on the row with the sender you want to delete. A confirmation dialog box appears.
- Click OK in the confirmation box. The sender is removed from the list.
