Before a survey is able to gather customer data, you must create at least one deployment for the survey. The deployment creates a table in the database to store the survey results (i.e. the data collected each time a contact submits a survey). Without a deployment, there is no place in the Connect database to store this data.
To function properly, the survey must be saved on a web server before deploying it. This is performed by exporting the survey to HTML and then moving the HTML file to the web server. For more information on exporting surveys to HTML, please see Exporting the Survey into HTML.
However, you can have a survey that completely overlaps the timeframe of the original deployment. So in the above example, you are able to create a valid deployment so long as the start date is prior to the original deployment start date and after the original deployment end date. See the example below

Deploying a Survey
To deploy a survey:
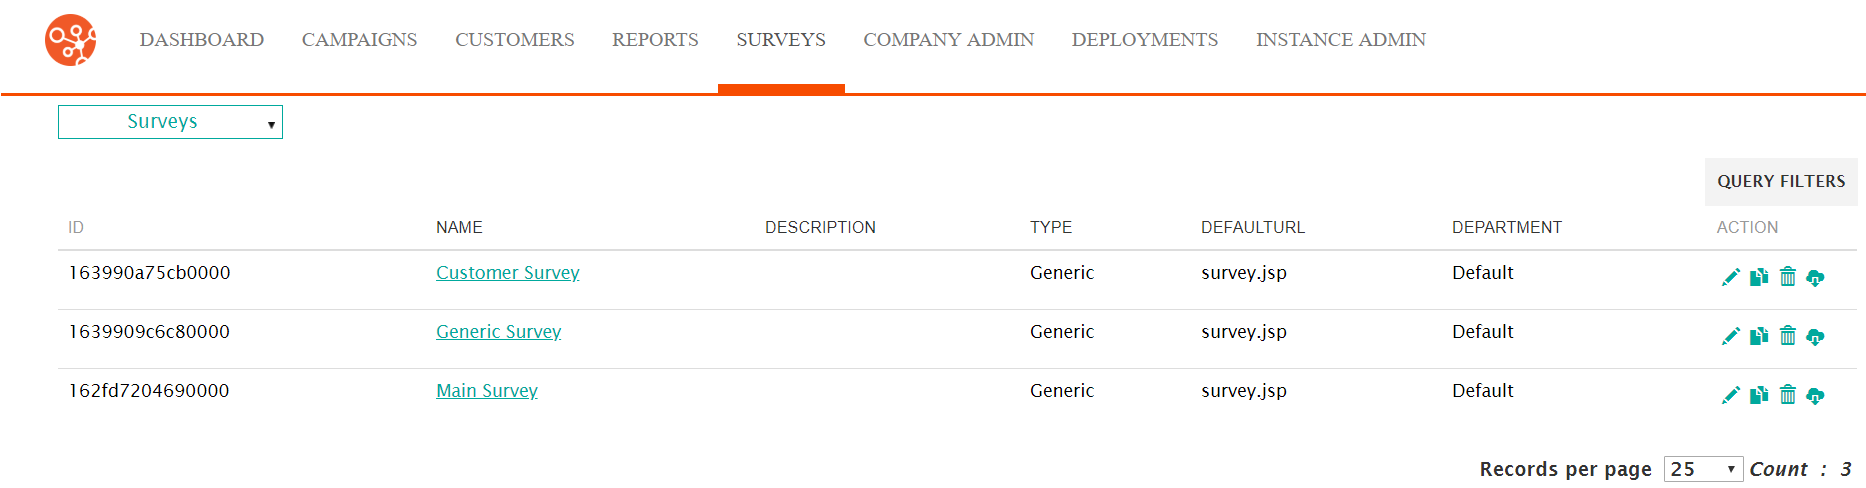
- Navigate to the Surveys screen.
- Click on the Edit Survey icon (
 )
beside the desired survey or the survey's name link. The survey details are
displayed in the Define Survey screen.
)
beside the desired survey or the survey's name link. The survey details are
displayed in the Define Survey screen.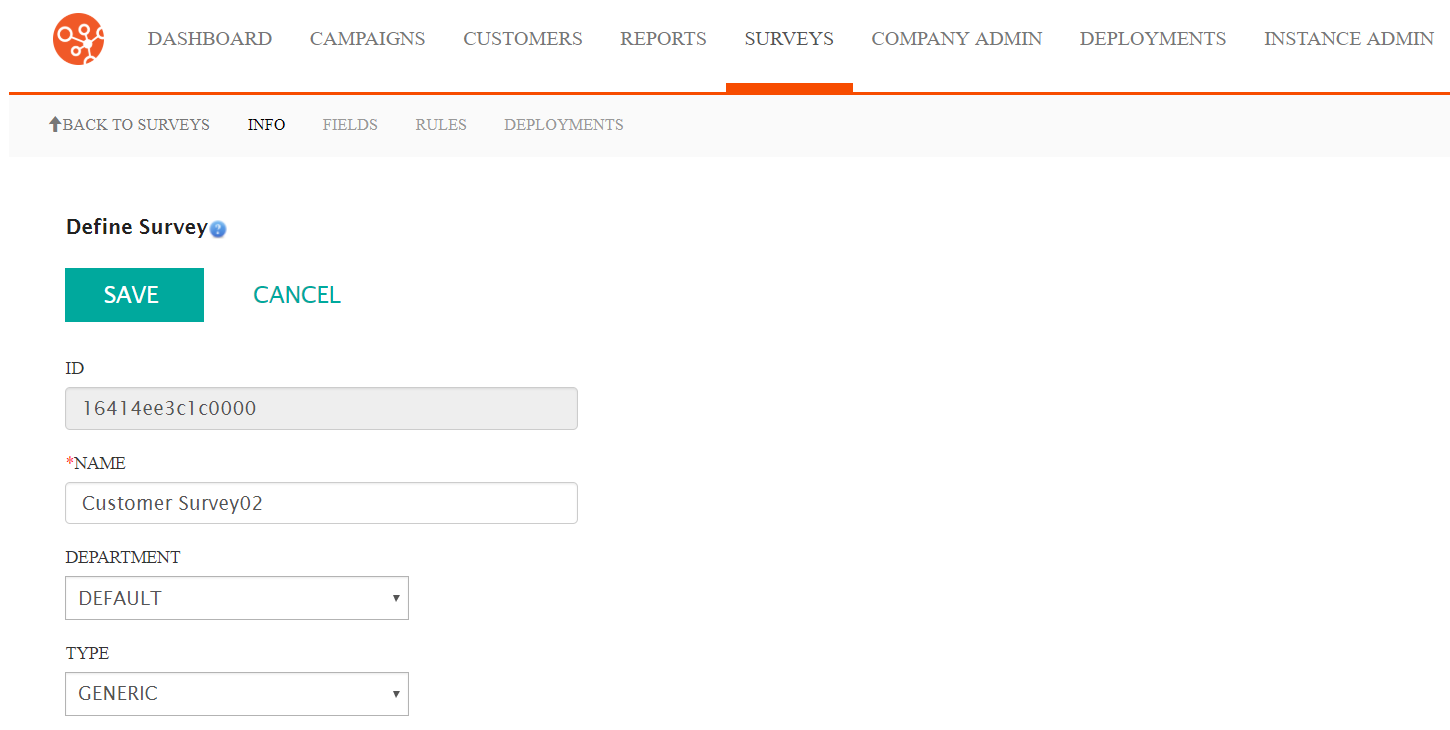
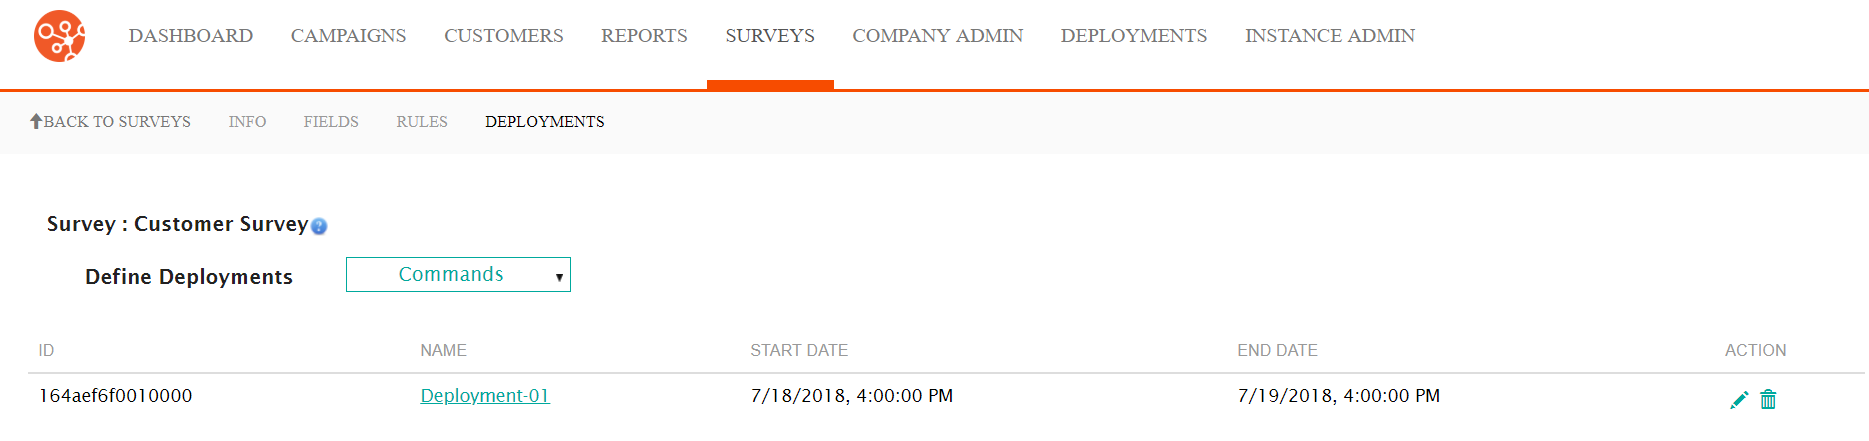
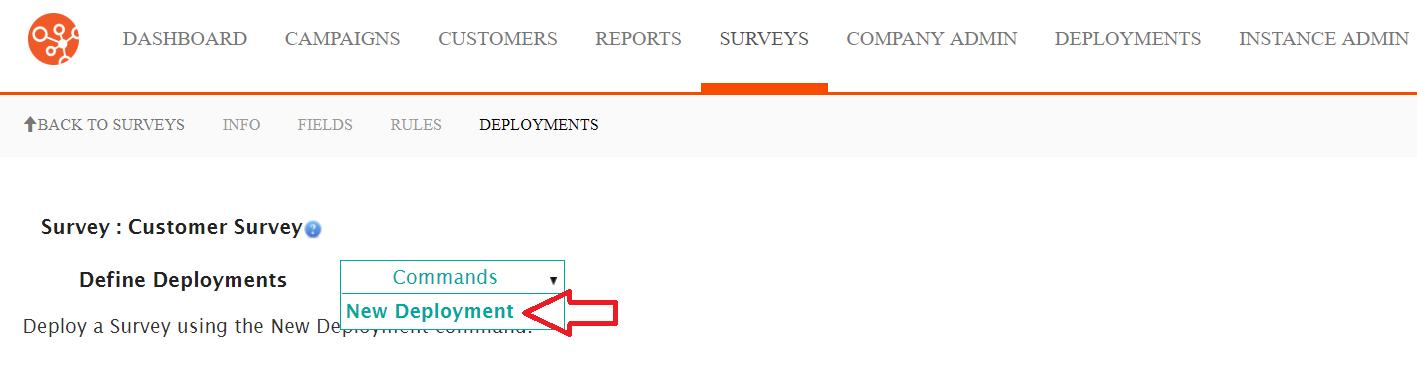
- Click on the Deployments tab heading. The Deployments screen appears.
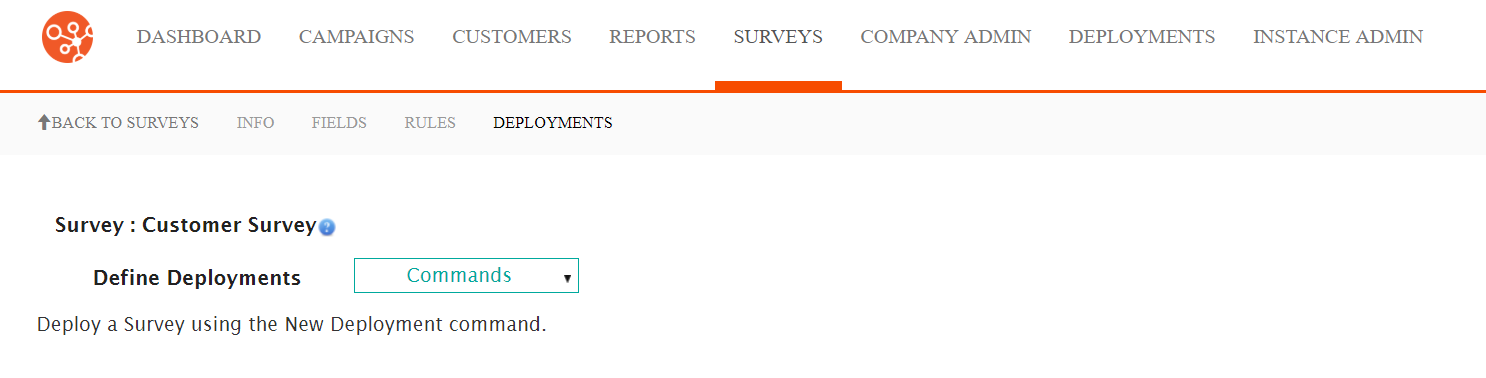
- From the Commands dropdown, select the New Deployment
action.
The Edit Deployment screen appears.
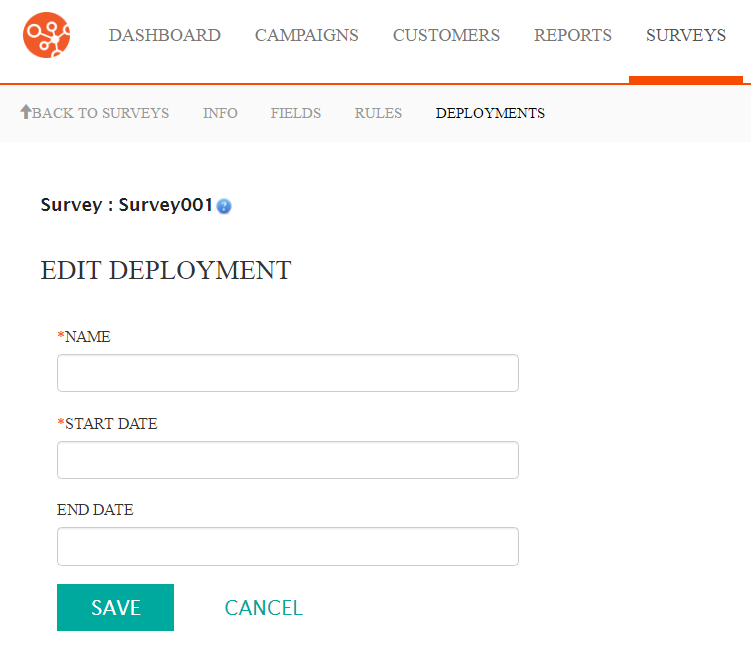
- Enter the deployment details:
- Name: Unique name for the deployment
- Start Date: The start date and time for the deployment to be active
- End Date: The end date and time for the deployment to be
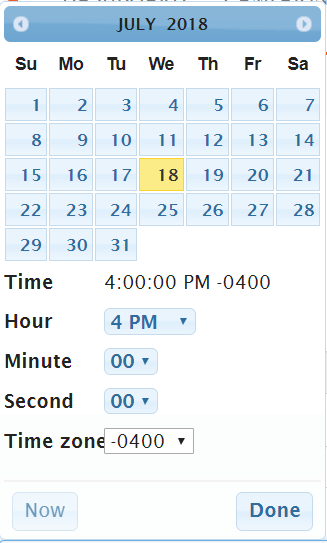
activeNote: Both the Start Date and End Date fields use the calendar picker allowing you to select the desired date and time.
- To cancel without saving the deployment, click the Cancel button. The Deployments screen appears and the deployment is not saved.
- Click the Save button. The deployment is saved and displayed in the
Deployments list.