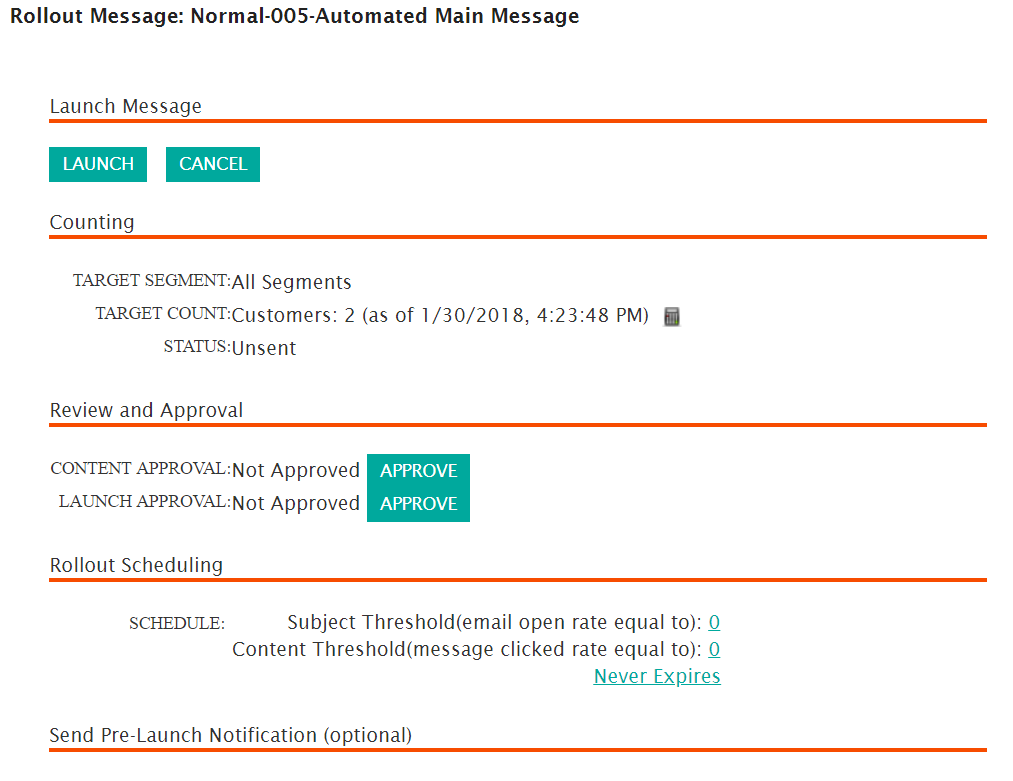
Once you have configured the criteria for the automated message, you are able to schedule the rollout of the message once the message thresholds have been reached. You are also able to configure an expiry date for the launch so that the message will not launch after a certain date.
Scheduling an Automated Main Message
- Navigate to the Messages screen for the desired campaign.
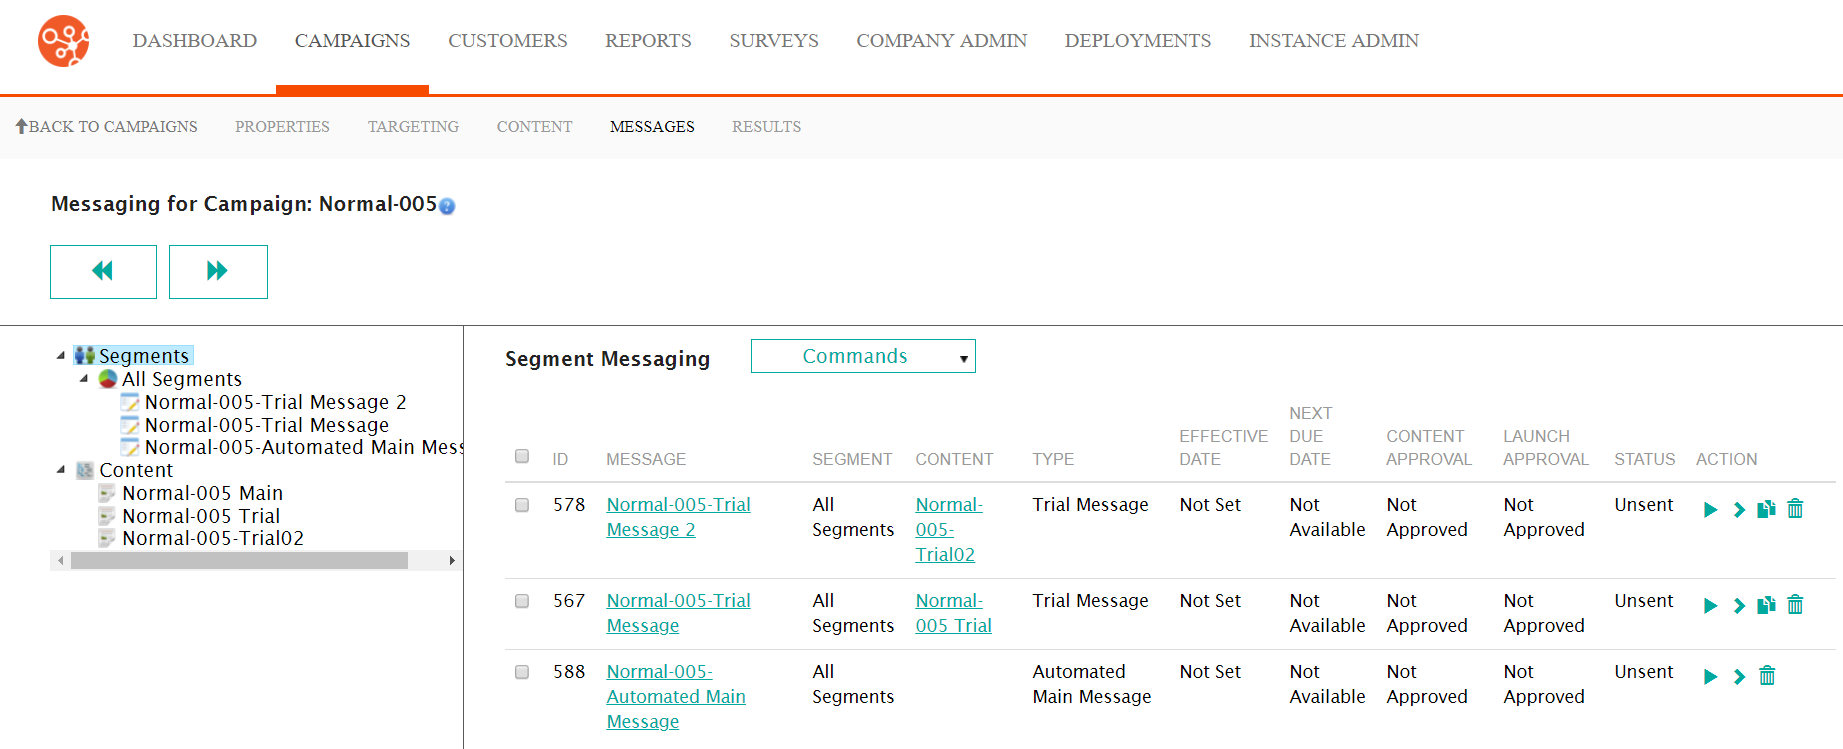
- Beside the desired automated main message, click the Rollout icon
(
 ). The Rollout Message screen
appears.Note: You can also rollout multiple unsent messages of the same type by selecting the checkboxes beside the desired messages and selecting Rollout Messages from the Commands dropdown. Ensure the messages are of the same type (e.g. all messages are main messages)
). The Rollout Message screen
appears.Note: You can also rollout multiple unsent messages of the same type by selecting the checkboxes beside the desired messages and selecting Rollout Messages from the Commands dropdown. Ensure the messages are of the same type (e.g. all messages are main messages) - To perform a final calculation on the message to see how many customers will
be targeted, click the Calculate Customers icon (
 ) in
the Counting section.
) in
the Counting section. - In the Review and Approval section, approve the following as
appropriate:
- Content Approval: Click the Approve button to approve the message content
- Launch Approval: Click the Approve button to approve
the message for launchNote: When you click the Approve button, the Remove Approval button appears in its place. If approval is revoked for any reason, you can do so by clicking the Remove Approval button. You are able to approve the message at a later time by re-clicking the Approve button.Note: The Approvals section only appears for Connect users who are assigned approval responsibilities for message content and message launch. The section will not appear for users without the appropriate permissions.
- In the Rollout Scheduling section, click any of the action links for
the Subject Threshold, Content Threshold or the Never
Expires link. The Set the Schedule For This Message section
appears.
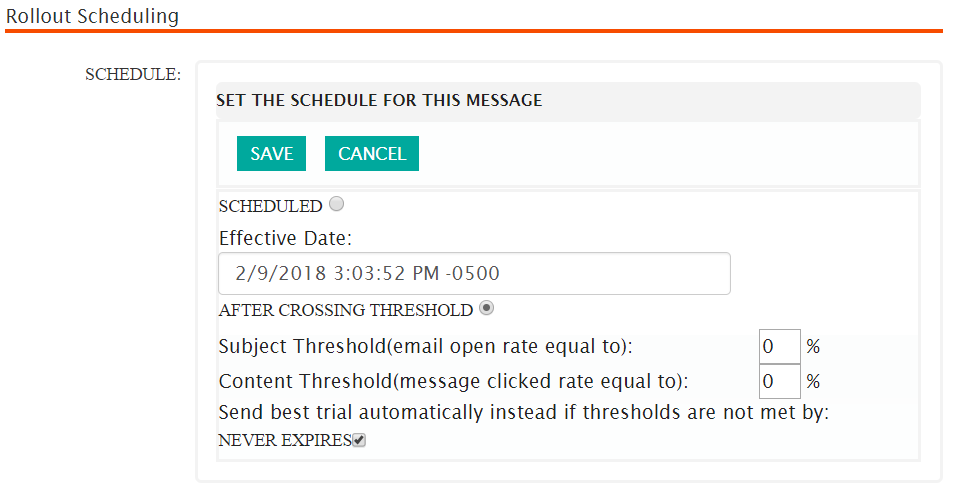
- To schedule the automated main message:
- Click the Scheduled radio button, ensuring the message will be scheduled.
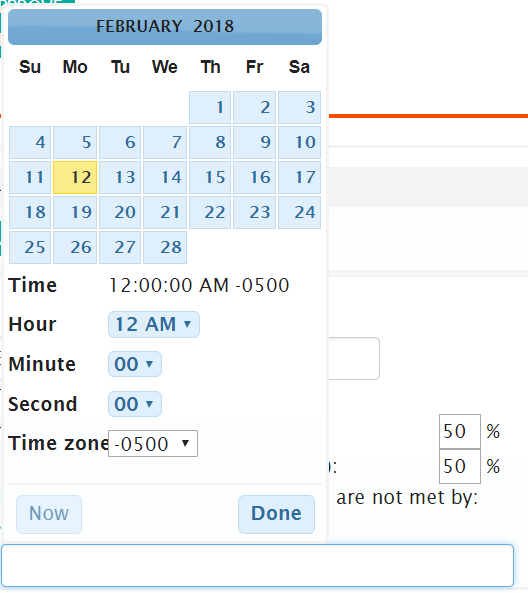
- Click on the Effective Date field. The calendar for the
effective date appears.

- Enter the appropriate date, hour, minute, second and time zone or click the Now button to send the message immediately.
- Click the Done button. The calendar disappears with the selected date and time displaying in the Effective Date field.
- To cancel the effective date without saving it, click the Cancel button. The Set the Schedule For This Message section disappears.
- Click the Save button. The Set the Schedule For This Message section disappears and the effective date for the message launch is displayed in the Schedule field.
- To have the message sent when a customer activity threshold is met:
- Click the After Crossing Threshold radio button, ensuring the message will be sent when an activity threshold amount is met.
- In the Subject Threshold (email open rate equal to) field, enter the percentage threshold of email opens by the customer that must be met (0-100)
- In the Content Threshold (message clicked rate equal to) field, enter the percentage threshold of clicks inside the message by the customer that must be met (0-100).
- For the message to never expire (i.e. the message will not be sent until the subject and content threshold percentages have been met), ensure that the Never Expires checkbox is checked in the Send best trial automatically instead if thresholds are not met by: field.
- To set a date that the message will eventually be sent by,
regardless of the subject and content threshold percentages being
met:
- Ensure that the Never Expires checkbox is not checked
in the Send best trial automatically instead if
thresholds are not met by: field. The Effective
Date field displays.
- Click on the Effective Date field. The calendar for
the effective date appears.
- Enter the appropriate date, hour, minute, second and time zone or click the Now button to send the message immediately.
- Click the Done button. The calendar disappears with the selected date and time displaying in the Effective Date field.
- To cancel the effective date without saving it, click the Cancel button. The Set the Schedule For This Message section disappears.
- Click the Save button. The Set the Schedule For
This Message section disappears and the effective
date for the message launch is displayed in the
Schedule field.Note: If the criteria selected in the Configure Message to Segment screen for the message is "Both Subject and Content", the automated main message will only be launched if both the email open rate AND the message click rate meets the corresponding threshold values.
If the criteria selected in the Configure Message to Segment screen for the message is "Content or Subject", the automated main message will only be launched when either the email open rate OR the message click rate meets the corresponding threshold values.
- Ensure that the Never Expires checkbox is not checked
in the Send best trial automatically instead if
thresholds are not met by: field. The Effective
Date field displays.
- If you wish to send a pre-launch notification to members of a seed group, in
the Send Pre-Launch Notification (optional) section:
- Select the desired seed list group or groups by checking the appropriate checkboxes.
- Enter a note to the seed list participants in the note box entitled Enter a note that you would like to include in the launch notification:
- Click the Send Notification button.
- To cancel without rolling out the message, click the Cancel button. The Configure Message to Segment screen appears for the message.
- Once all approvals and effective date is selected, the message is rolled out and able to be launched. For more information on launching messages, please see Launching Messages.
