There are several attributes that already define customer records provided in Connect. You are also able to create customized customer attributes that will capture the customer information you require to effectively target your customer base in messaging campaigns.

Adding a New Customer Attribute
To add a new customer attribute:
- On the menu bar, click Customers. The Customer Browser screen appears.
- In the Customer sub-menu, click Attributes. The Attributes screen appears.
- From the Attributes dropdown, click Attributes > New
Attribute. The Enter Attribute with ID: XXXX screen appears.
'XXXX' is the system-generated attribute number.
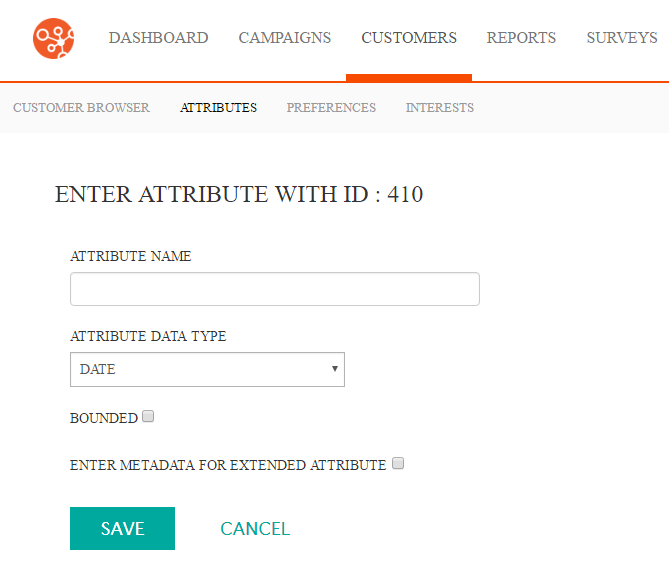
- In the Attribute Name field, type a unique and descriptive name for
the attribute. Note: Attribute names are case-sensitive, so be careful not to define the same attribute twice. For example, if you define an attribute as 'membership #' and 'Membership #', Connect considers them as two separate attributes.
- In the Attribute Data Type dropdown, select the appropriate data type
for the attribute:
- Date: Date and time format adhering to the date/time formatted described for the system
- Number: Numeric value
- String: Text value
- Single Character: A single character
- To determine whether the attribute values will be bound to a list or not,
check the Bounded checkbox to indicate that the attribute is bounded.
The Bounded Values field appears.
- Bounded: An attribute is bounded if the range of acceptable values is tied to a specific list. The user will have to select a value for the attribute from the list and will not be able to enter in another value. For example, an attribute called 'Education'' could be bounded by the list of values "High School", "College", "Post-Graduate". A bounded attribute with these values would force the user to select one of these values and no others.
- Unbounded: An unbounded field allows the user to enter any value for the attribute according to its data type. For example, a text attribute entitled 'Favourite Color' allows the user to enter the value "Orange".
- If the Bounded checkbox is checked, enter the values for the bounded value list in the Bounded Values field. Separate each list entry with a carriage return.
- To enter metadata for the extended attribute, click the Enter Metadata
for Extended Attribute checkbox. The metadata fields appear. Enter
the following information:Note: Metadata attribute should only be maintained by experienced users with a knowledge of the database schema. Incorrect information entered into Connect can cause system failure and unexpected behaviour.
- Attribute Type: Defines the type of attribute and storage
behaviour in the database
- Row per attribute: Create a single row instance in the attribute table per attribute. Note that this is similar to the normal attribute tables.
- Column per attribute: Create a column row instance in the attribute table per attribute.
- Extended Attribute Table Name: The new table the attribute
will reside in. Note the following
- Table names are case sensitive.
- Tables must be accessible in the Connect database.
- No spaces in the table name. Separate words with an underscore (_) or with a dash (-).
- Extended Attribute Field Name: The field name for the extended attribute, if applicable
- Extended Attribute Table Join Field Name: Defines the related table join name in order to co-relate the attribute value to other tables
- Customer Table Join Field: The field in the Customer table to which the attribute is joined
- Attribute Join Column: The column the attribute joins, if available
- Attribute Join Value: The attribute value for the join to another table
- Attribute Type: Defines the type of attribute and storage
behaviour in the database
- To cancel without saving the attribute, click the Cancel button. The Attributes screen displays without the attribute having been saved.
- Click the Save button. The Attributes screen displays with the attribute displaying in the list of attributes.
