By default, Connect installations support multiple languages by configuring the database to support the UTF-8 character set.
Set the Internationalization System Parameters
The system parameters Default message header charset, Default message body charset, Message header transfer encoding and Message body transfer encoding indicate the character set and transfer encoding used by default, when Connect is not configured to send multiple character sets. The same set of system parameter values are used when Connect is configured to send multiple character sets and the user selects the Default option in the Language drop-down list box at the message level.
Follow these directions to modify the system parameters:
- From the main Connect screen, select Instance Admin > Configuration > System Parameters. The System Parameter list appears.
- From the Select Category drop-down list, select Internationalization and Normal Access.
- Click Apply. The Internationalization parameters appear.
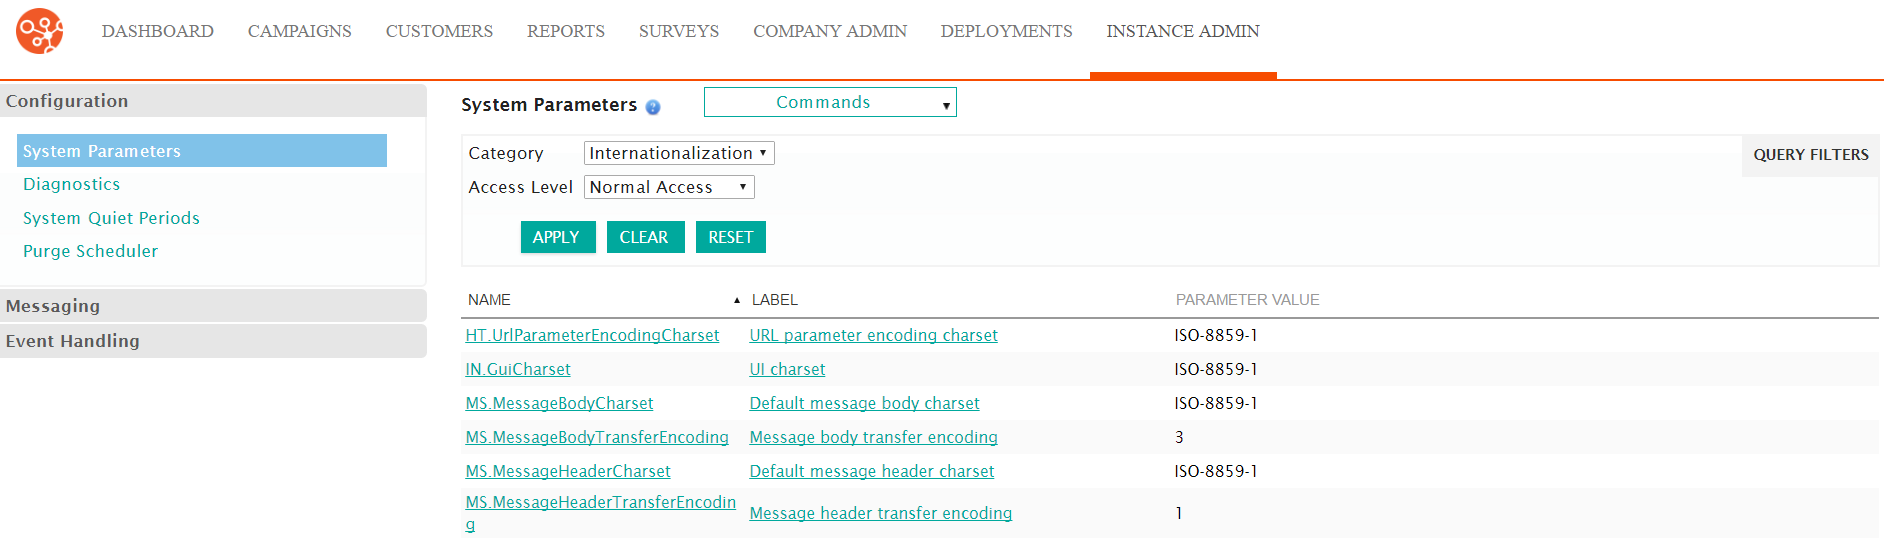
- Click the parameters to modify. Use the values in the International Settings Matrix.
- From the Access Level drop-down list, select Advanced Access. Leave the Select Category field set to Internationalization.
- Click Apply. The advanced system parameters appear.
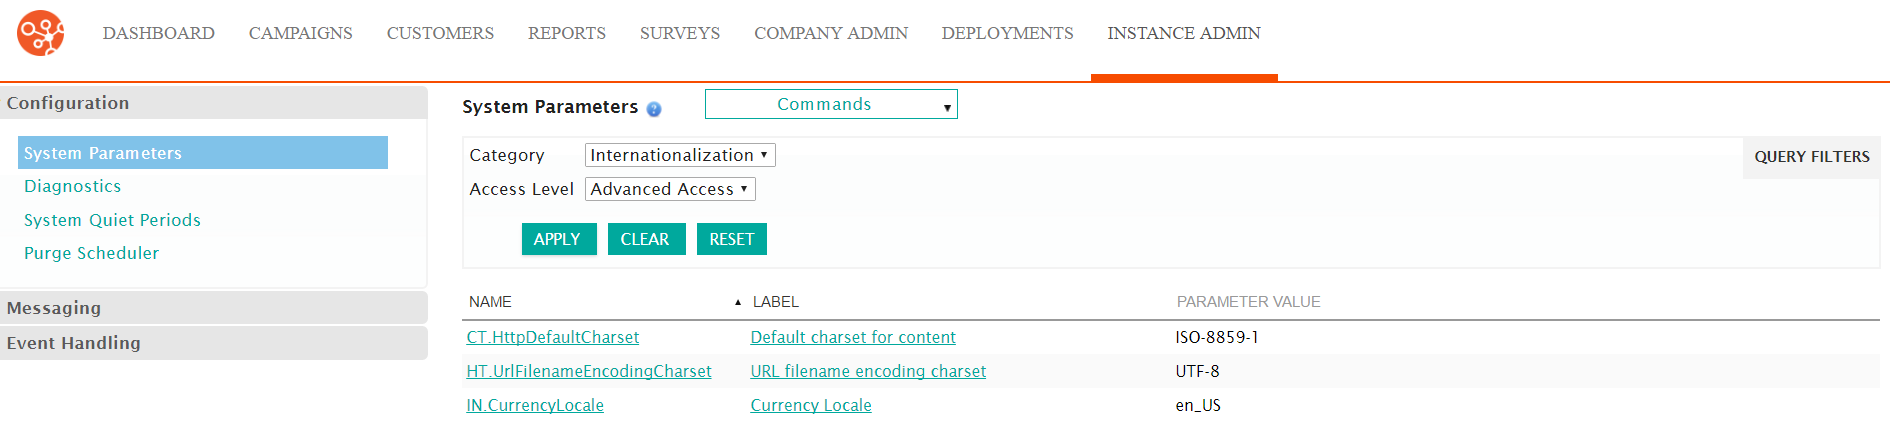
- Click the parameters to modify. Use the values in the International Settings Matrix.
Configure Languages
Connect can send e-mail in multiple languages from a single Connect instance. Administrators configure multiple languages with the appropriate character set and transfer encoding. Users can select a language, which identifies the character set and transfer encoding to be used for a particular message.
Follow these directions to configure different languages.
- From the main Connect screen, select Company Admin > Campaigns > Languages. The Languages screen appears.
- From the Languages screen, select the New Language action. The
Edit Language screen appears.
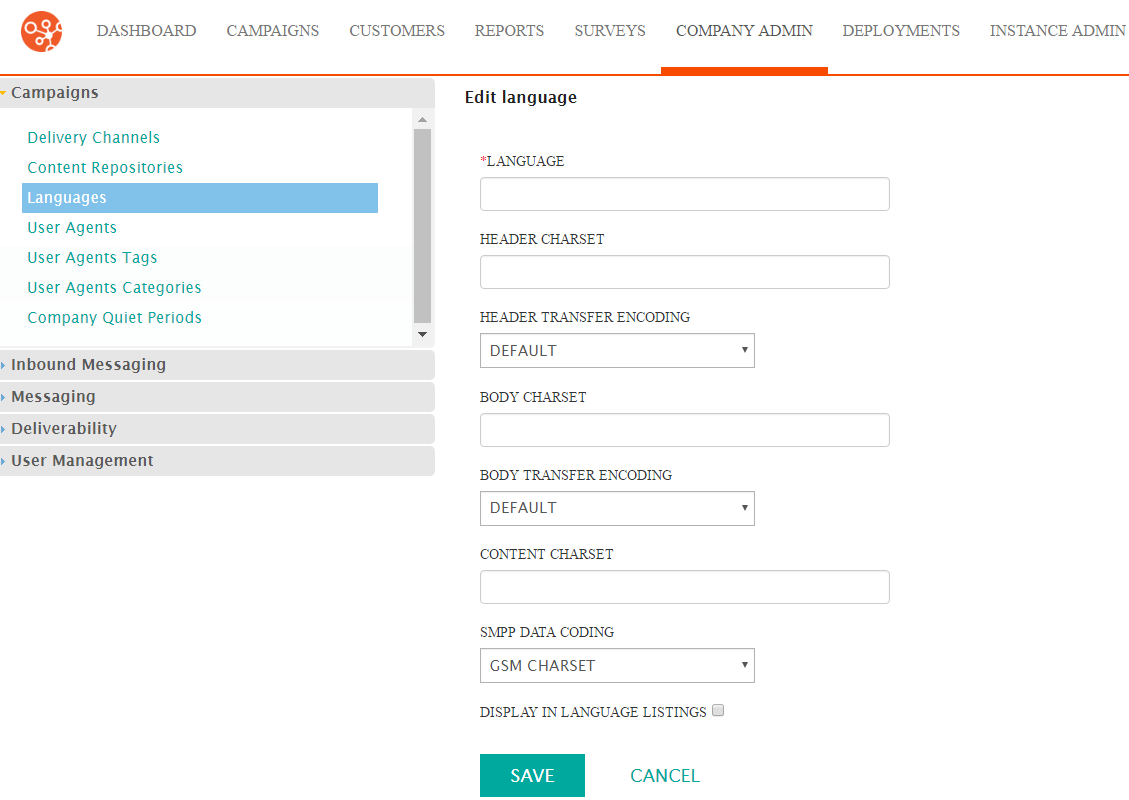
- Specify the language name.
- In each Charset field, type the appropriate character set.
- In each Encoding fields, select the appropriate encoding type.
- In the SMPP Data Coding field, select the appropriate coding.
- In the Display in Language Listings field, click the checkbox to display the newly created language in the Language list.
- Click Save to save the language. The Language list screen appears.
Set up Connect to Send Multiple Character Sets
Configure Connect for a particular locale and send e-mail using multiple character sets from a Connect instance.
You define multiple languages using the appropriate character sets and transfer encoding as described in the Configuring Languages section above. When defining a campaign or a message you can select any language. All messages are sent using the corresponding character set and transfer encoding. If you select Default from the language drop-down list, e-mail is sent using the character set defined.
Follow these directions to send email messages using multiple character sets.
- Configure the OS environment and the database.
- Configure the system parameters using the International Settings Matrix. Use the settings for multi-language support in a Connect instance.
- Create new languages as described in the Configuring Languages section.
Configure Reply Handler to Use Multiple Language
A Reply Handler processes e-mail sent by customers and takes a specific action or routes the e-mail to a designated address. Reply Handlers that come out-of-the-box have filters for handling replies in English. Modify these system parameters to add filters in the other languages to handle replies in multiple languages.
Follow these directions to configure Connect reply handlers.
- From the main Connect screeen, select Instance Admin > Configuration > System Parameters. The Parameters list appears.
- From the Select Category drop-down list, select Mail Receiving. The list of Mail Receiving parameters appear.
- From the Access Level drop-down list, select a level. The Mail
Receiving parameter list changes based on the access level.
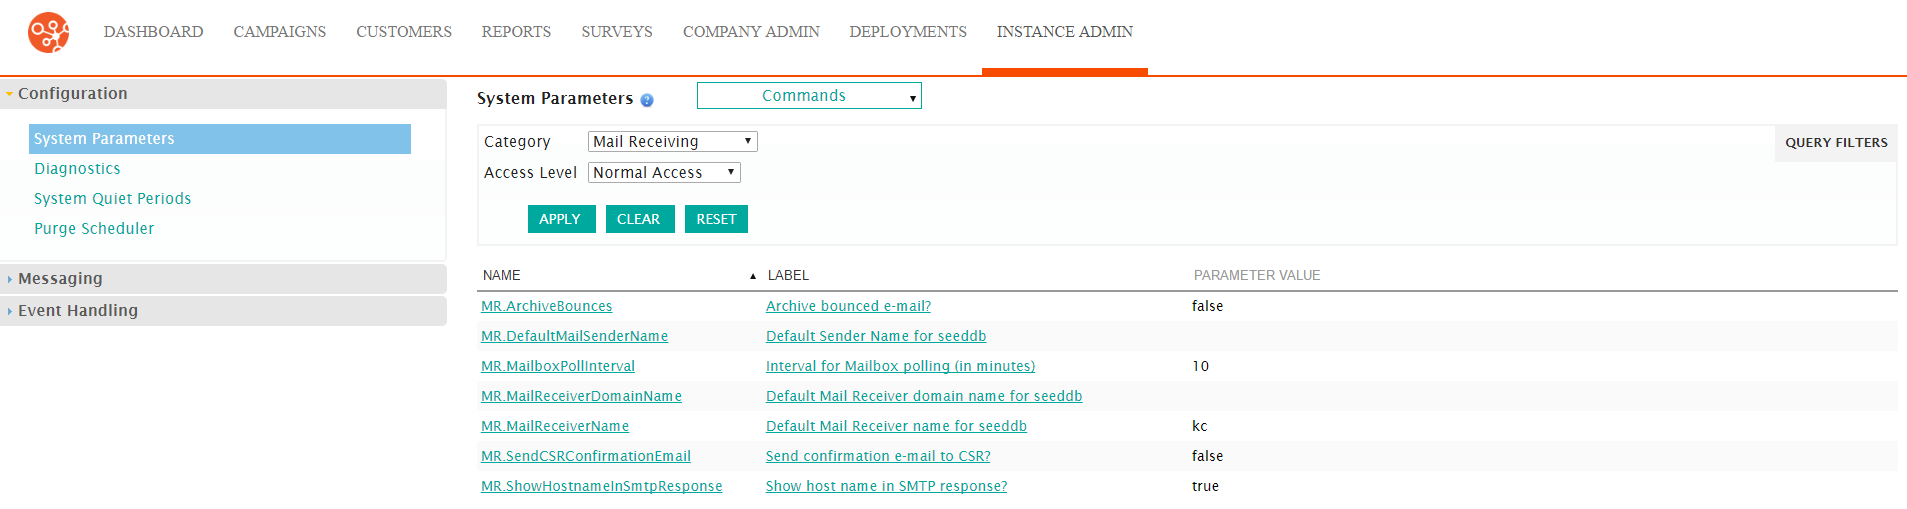
- Click the parameters you want to edit. The details screen appears.
- Make your changes.
- Click Save. The parameter list screen appears.
Create Sender Name in Multiple Languages
When sending e-mail content in multiple languages, you may want to define Sender Names in the different languages.
Follow these directions to add names.
- From the Connect main screen, click Campaigns > Senders . The
Sender Names | Sender Domains list appears.
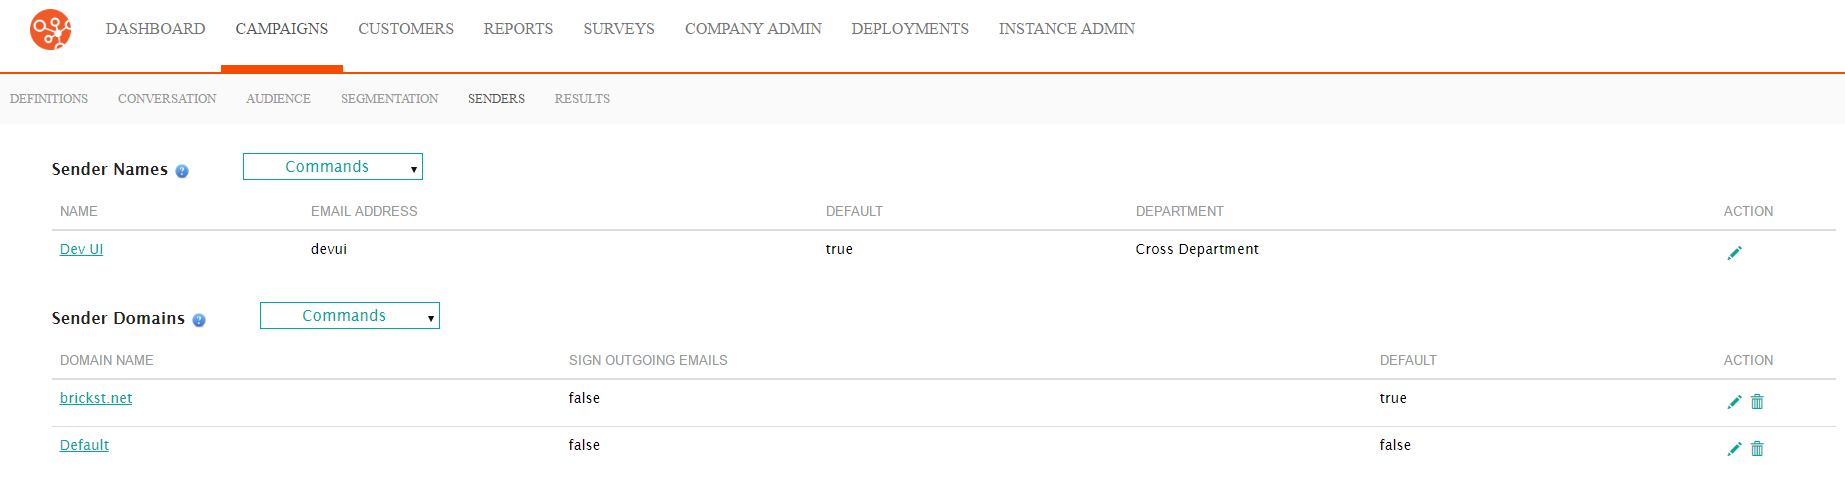
- Click the Create a New Sender Name button. The Sender Name
details screen appears.
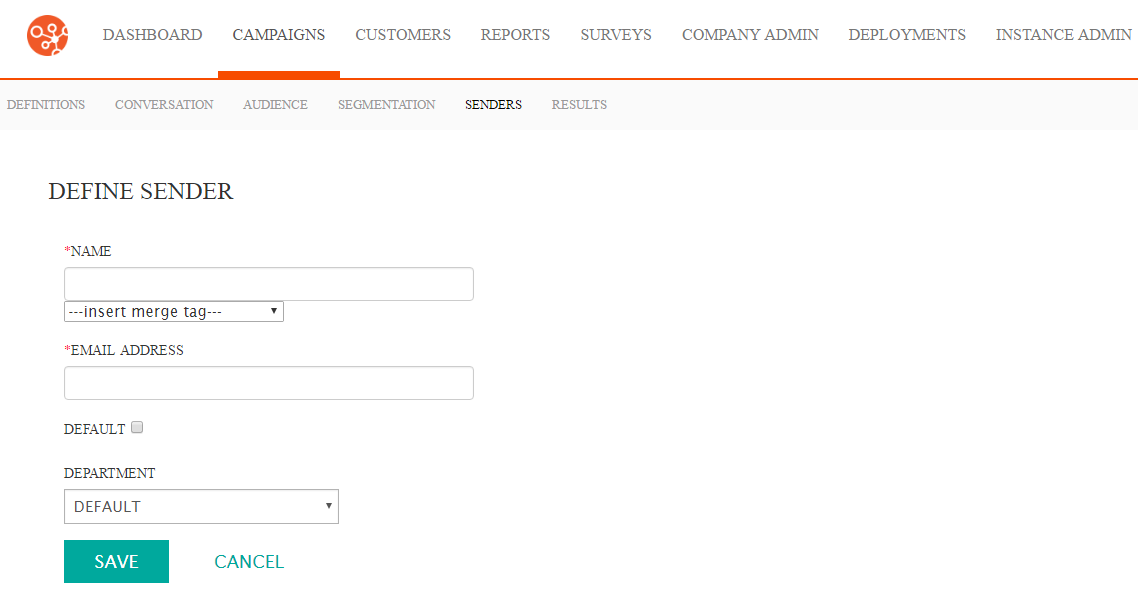
- In the Sender Name field, type the name in the appropriate language.
- Click Save to save the Sender Name.
