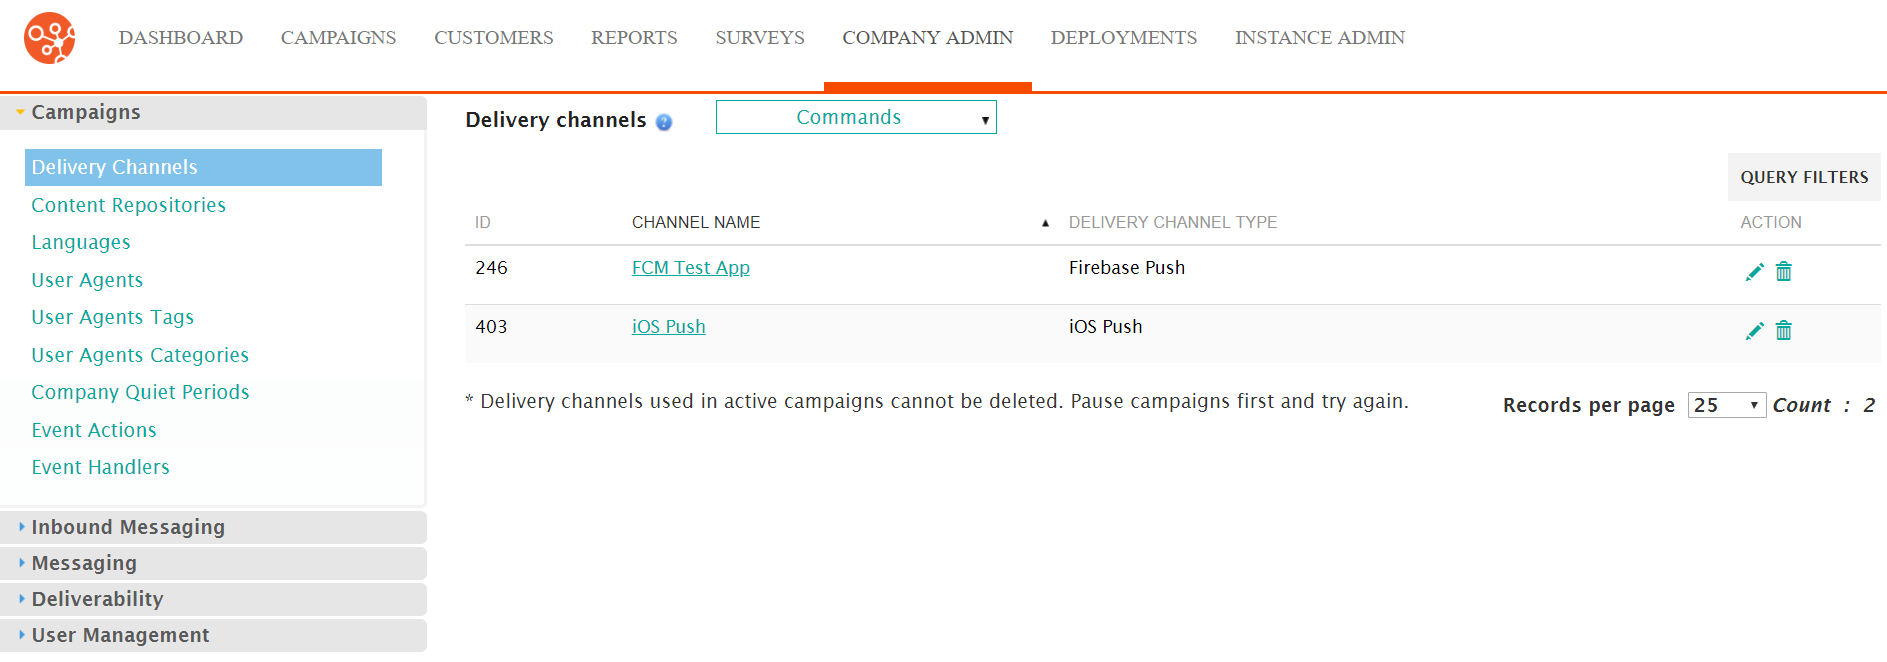
Delivery channels are configured in Connect to provide Connect with an interface to the system that is sending the messages to customers. Delivery channels configured in Connect require login and technical information to correctly interface with the system and send messages correctly.
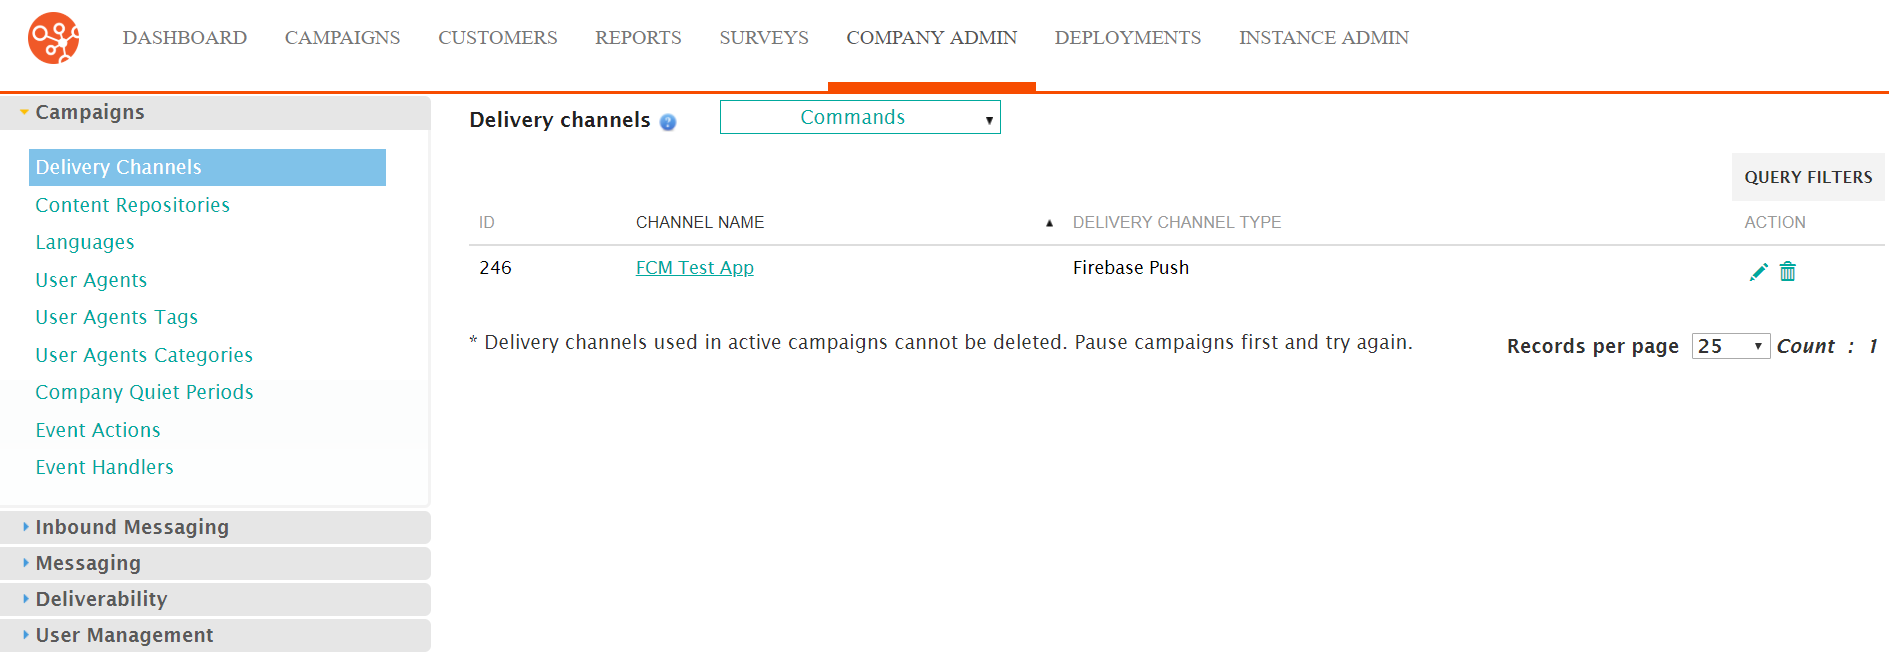
Creating a Delivery Channel
To add a new delivery channel:
- Navigate to the Company Admin screen.
- Under the Campaigns sub-menu in the menu bar on the left, click on
the Delivery Channels menu item. The Delivery Channels screen
appears.
- From the Commands dropdown, select New Delivery
Channel.
The Configure Delivery Channel screen appears.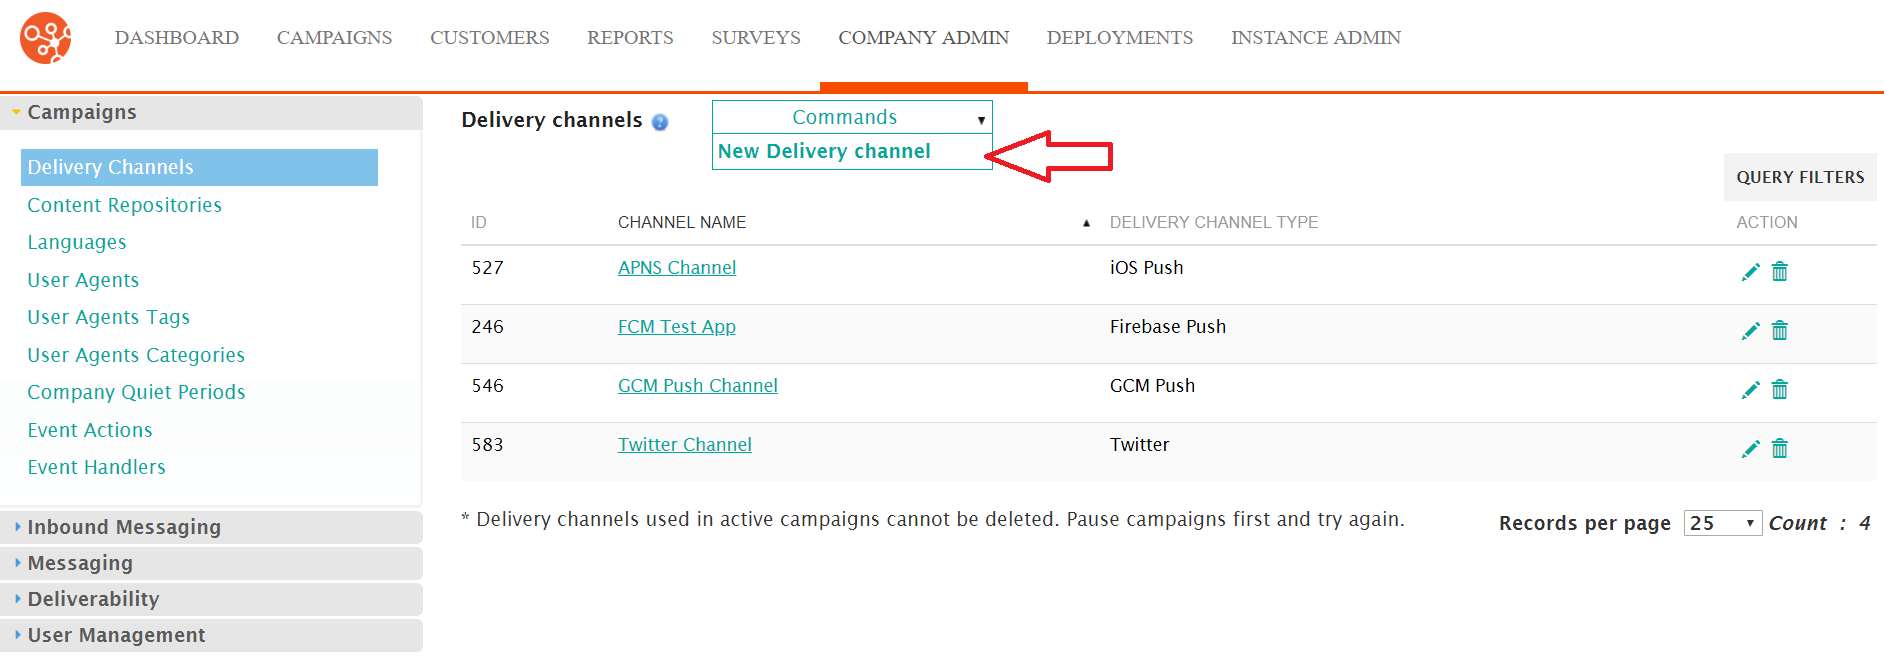
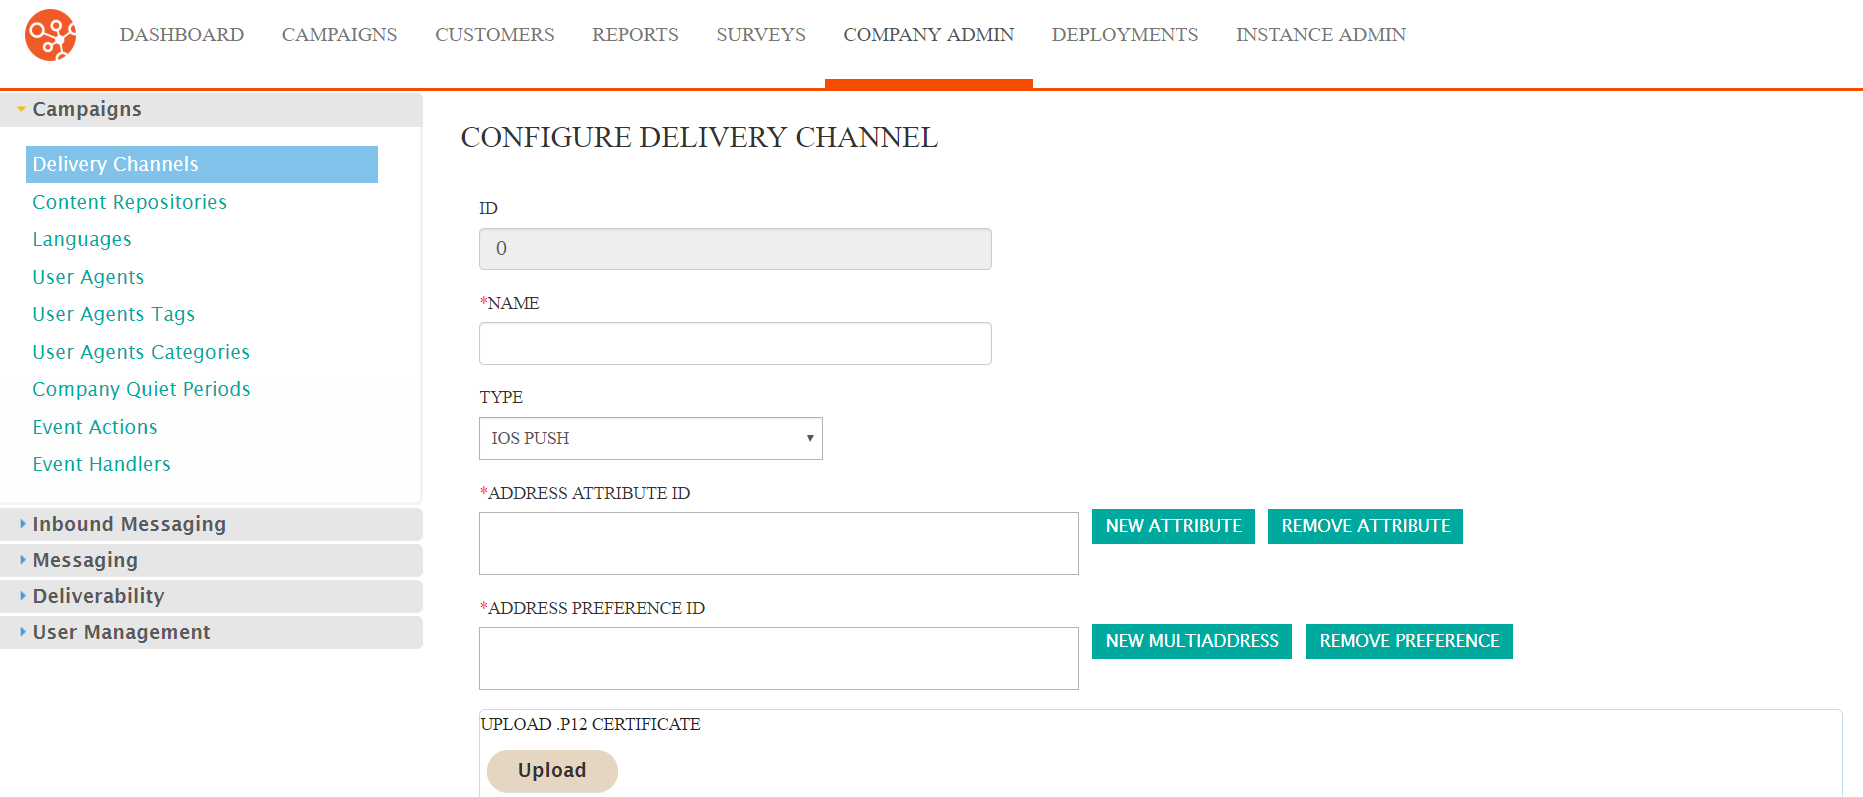
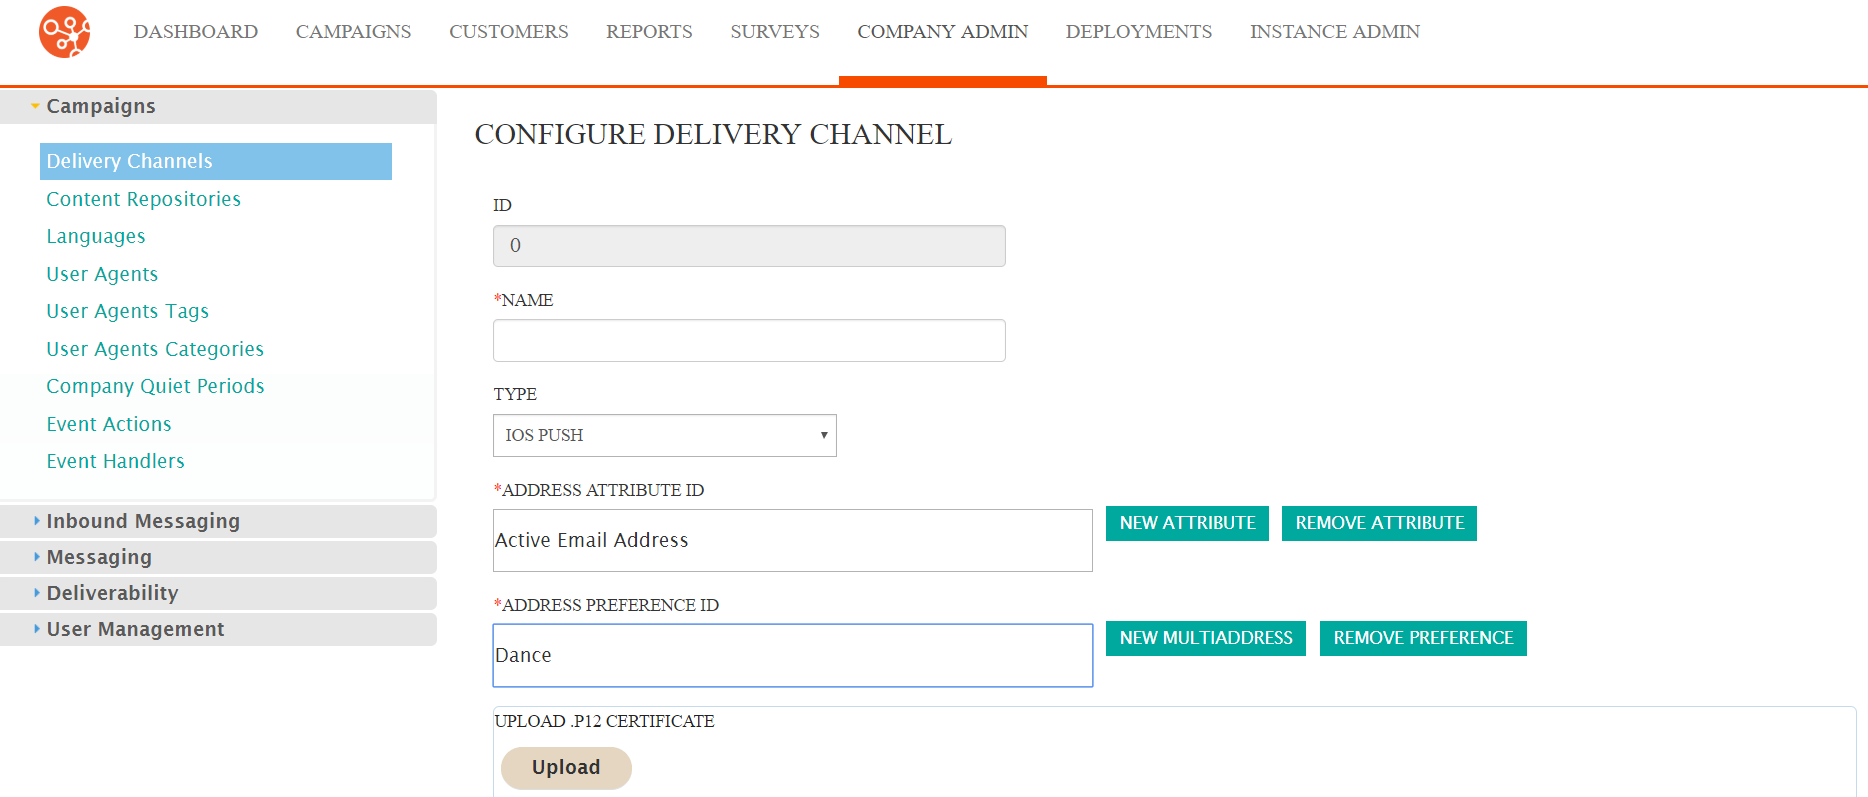
- Enter the details for the delivery channel:
- Name: A unique name for the delivery channel
- Type: The type of delivery channel (e.g. IOS Push, VXML, Twitter)
- Enter the desired customer attribute associated with the customer address in
the Address Attribute ID field.

- To edit the details of the selected Address Attribute ID:
- Click the Edit Attribute button. The Enter Attribute
section appears.
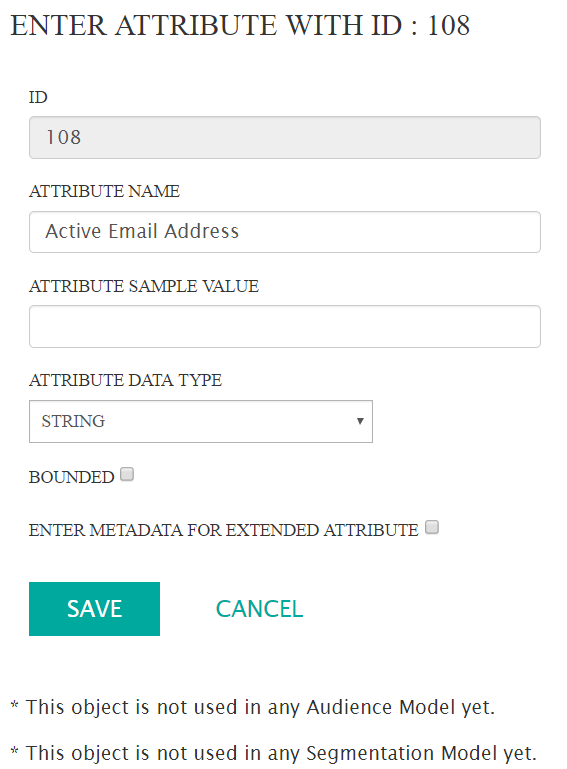
- Edit the attribute information:
- Attribute Name: The name of the attribute
- Attribute Sample Value: A valid example value for the attribute
- Bounded: Indicates whether the list is bound to a
selectable list of items or not. If checked, the Bounded
Values text box appears. Enter the valid values for
the attribute in the box. Each entry must be on a separate
line.Note: The data type and metadata values cannot be edited for the attribute. If these values need to be altered, you must create a new attribute.
- To cancel without saving changes, click the Cancel button. The Enter Attribute section disappears. The attribute changes are not saved.
- Click the Save button. The Enter Attribute section disappears. The changes to the attribute are saved.
- Click the Edit Attribute button. The Enter Attribute
section appears.
- To create a new address attribute ID:
- Click the New Attribute button. The Enter Attribute
section appears.
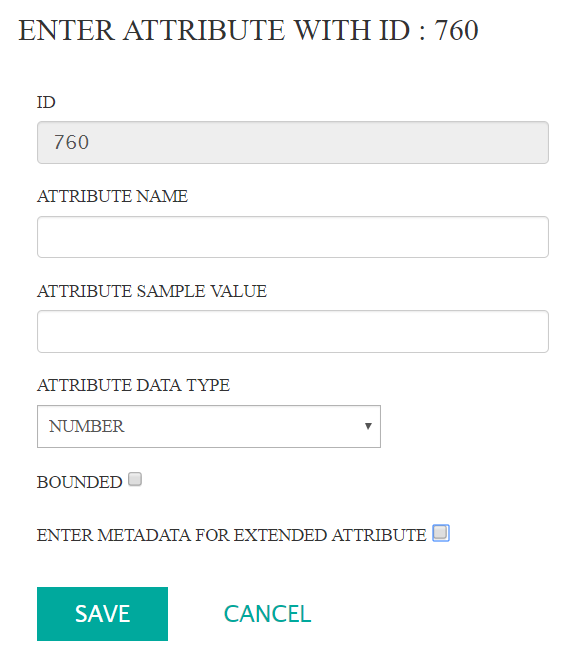
- Enter the attribute details:
- Attribute Name: A unique name for the attribute
- Attribute Sample Value: A sample valid value for the attribute
- Attribute Data Type: The type of data being stored by the attribute (e.g. Date, Number, String)
- Bounded: Bound list of valid values for the attribute
that are selected by the user. Clicking the Bounded
checkbox displays the Bounded Values Enter the valid
values into the Bounded Values box with each value on
a separate line.
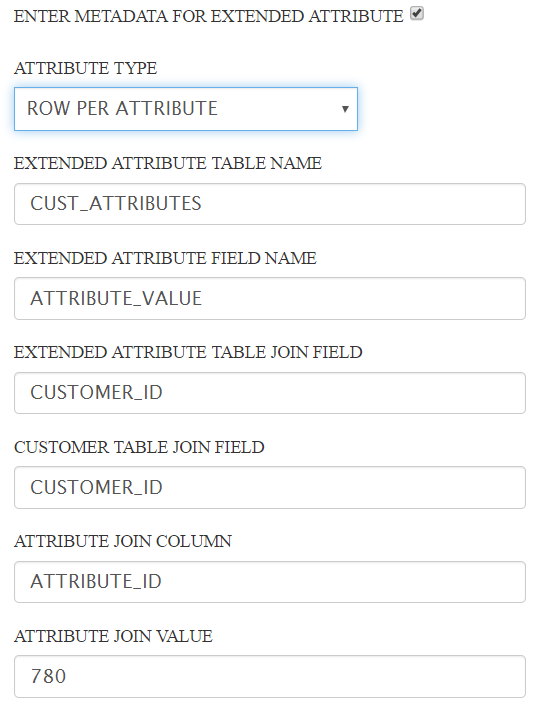
- Enter Metadata for Extended Attribute: Metadata
attributes to further extend the behaviour of the attribute
with Connect. Clicking the Enter Metadata for Extended
Attribute checkbox displays metadata attributes:
- Attribute Type: Determines whether the attribute values will be stored per row or per column in the designated table
- Extended Attribute Table Name: The name of the table storing the extended attributes values
- Extended Attribute Field Name: The name of the field storing the extended attribute values
- Extended Attribute Table Join Field: The field name enabling a table join for the extended attribute
- Customer Table Join Field: The field name joining the extended attribute values to the Customer table
- Attribute Join Column: The attribute join column used to link to the customer table
- Attribute Join Value: The attribute value
used to join to the Customer tableNote: The behaviour of Connect can be severely affected by the values entered into the extended attribute metadata. Ensure that the values being entered into these fields is accurate and correct.
- To cancel without saving the changes to the attribute value, click the Cancel button. The Enter Attribute section disappears. The attribute is not saved.
- Click the Save button. The new attribute is displayed in the Address Attribute ID field.
- Click the New Attribute button. The Enter Attribute
section appears.
- To remove the attribute value, click the Remove Attribute button. The attribute is removed from the Address Attribute ID field.
- Enter the desired customer preference associated with the customer address
in the Address Preference ID field.
- To add a new MultiAddress preference:
- Click the New MultiAddress Button. The Enter Preference
Information section displays.
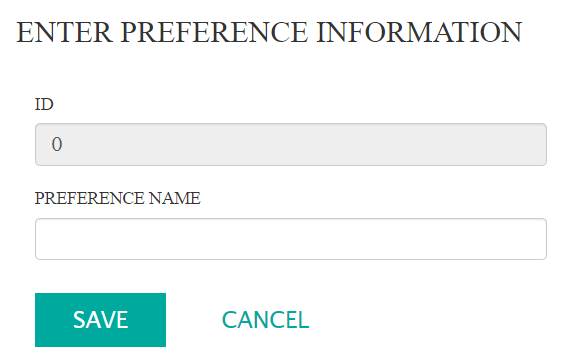
- Enter the name of the MultiAddress preference in the Preference Name: field.
- To cancel without saving the MultiAddress preference name, click the Cancel button. The Enter Preference Information section disappears. The preference is not saved.
- Click the Save button. The MultiAddress preference is saved
and displayed in the Preference Name field.Note: You cannot use both an attribute and a MultiAddress for the delivery channel. Ensure only one or the other is used for the delivery channel.
- Click the New MultiAddress Button. The Enter Preference
Information section displays.
- To edit the MultiAdd preference:
- Click the Edit MultiAddress button. The Enter Preference Information section displays with the preference name displayed.
- Change the name of the preference as necessary.
- To cancel without saving any changes to the preference, click the Cancel button. The Enter Preference Information section disappears. The preference changes are not saved.
- Click the Save button. The Enter Preference Information section disappears. The changes to the preference are saved.
- To remove the MultiAdd preference:
- Click the Remove Preference button. The preference name is removed from the Address Preference ID field.
- To upload the P12 certificate for the delivery channel:
- Click the Upload button. The file browser appears.
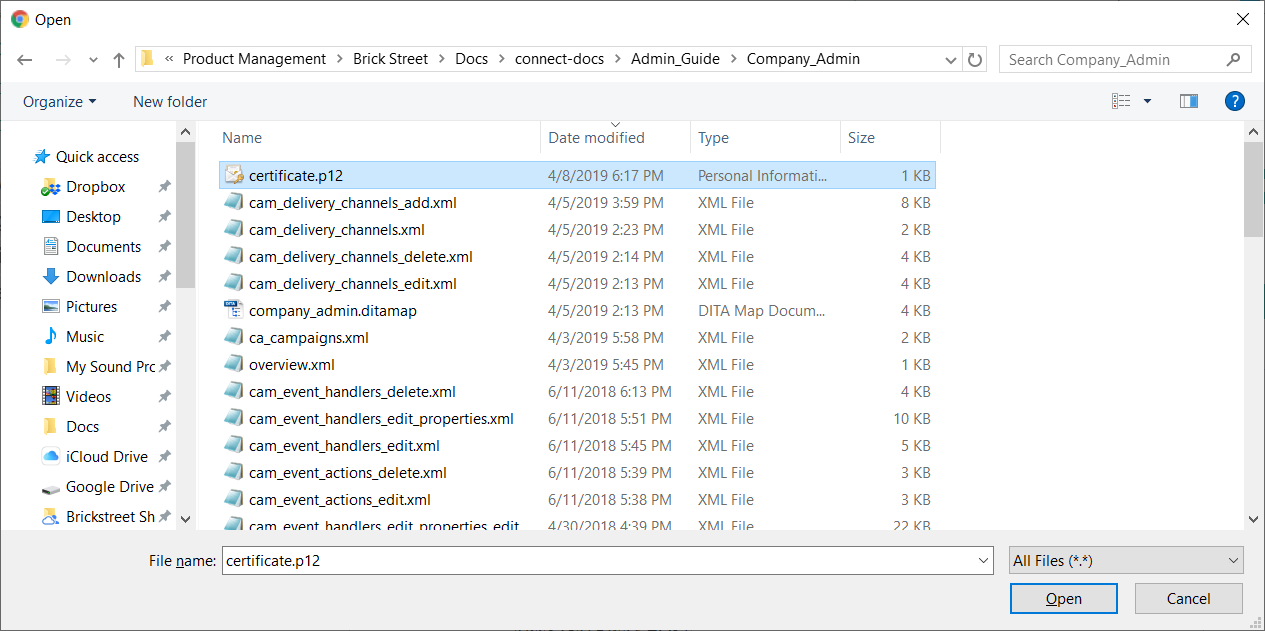
- Select the desired certificate file and click Open. The file
is uploaded to the delivery channel.
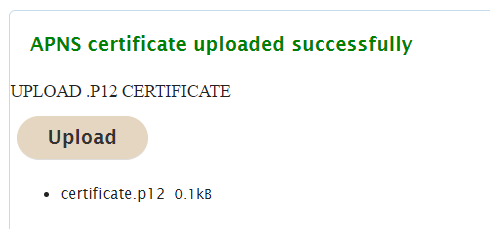 Note: Connect only allows certificate files to be uploaded with a '*.p12' suffix. Ensure the certificate is of this format.
- Click the Upload button. The file browser appears.
- Enter the General Settings, Proxy Settings and the Internal
Settings for the delivery channel in the appropriate sections. These
sections will vary based on the type of delivery channel selected in the
Type dropdown.Note: You must ensure that you have all of the correct information for the different setting sections in order for Connect to interface correctly with the delivery channel. Validate that you have all of the necessary information for the different settings. For a list of the needed setting values needed for each delivery channel type, please see Delivery Channel Settings.
- To cancel without saving the delivery channel, click the Cancel button. You are returned to the Delivery Channels screen. The delivery channel is not saved.
- Click the Save button. The newly created delivery channel is
displayed in the Delivery Channels list.