Each conversation has default information such as such as the from address, opt-out forms, and DKIM signature information (DKIM) to digitally sign outgoing email messages.
Follow these directions to add a new conversation.
- From the Conversations screen, click Command > New Conversation.
The Add Conversations screen appears.
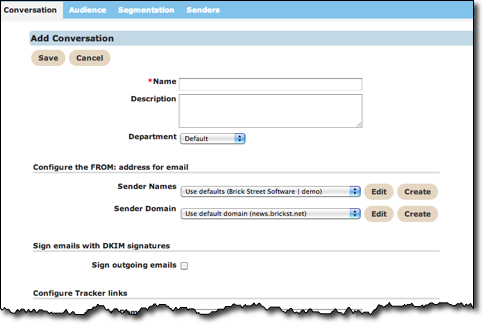
- In the Name field, type a unique name for the conversation.
- In the Description field, describe the conversation.
- From the Department drop-down list, select the appropriate department.
- In the Configure the FROM: address for email section, do the following:
- From the Sender Names drop-down list, select a sender name.
- From the Sender Domains drop-down list, select a domain.
- In the Sign emails with DKIM signatures click the Sign outgoing
emails checkbox to activate DKIM.
Note: The DKIM private key and selector must also be configured for the Sender Domain in the Lists > Senders tab.
- In the Configure Tracker links section, do the following:

- In the Tracker Domain Name field, type the URL for a tracker. If you want to use the default tracker domain name, leave this field blank.
- In Default Tracker Link field leave the default tracker link or click the search icon to change the default tracker. The Default Tracker Links is a URL that is used when a customer clicks on an unknown or invalid link. It typically points to a home page or some other generic landing page.
- In the Configure where incoming email replies are sent section, in the
Replies go to these email addresses, type one or more email addresses
in the field. Separate the email addresses with a semi-colon.

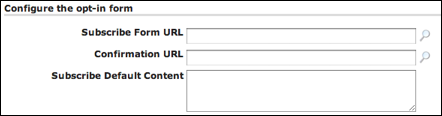
- In the Configure the opt-in form section, do the following:
- In the Subscribe Form URL field, type the URL for the unsubscribe form or click the search icon to browse to the form.
- In the Confirmation URL field, type the URL for the unsubscribe confirmation message or click the search icon to browse to the message.
- In the Subscribe Default Content, type the unsubscribe message if
there is no confirmation form.
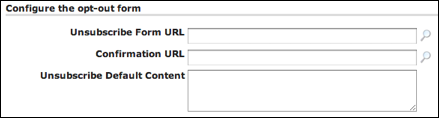
- In the Configure the opt-out form section, do the following:
- In the Unsubscribe Form URL field, type the URL for the unsubscribe form or click the search icon to browse to the form.
- In the Confirmation URL field, type the URL for the unsubscribe confirmation message or click the search icon to browse to the message.
- In the Unsubscribe Default Content, type the unsubscribe message
if there is no confirmation form.
- In the Configure the refer-a-friend form section, do the following:
- In the Refer Form URL field, type the URL for the refer-a-friend form or click the search icon to browse to the form.
- In the Confirmation URL field, type the URL for the confirmation form or click the search icon to browse to the form.
- In the Refer Default Content, type a refer-a-friend message if
there is no confirmation form.

- Click the Save button to save the information.
Create New Sender Name
When creating a new conversation, you need to include sender names. You do not need
to leave the screen to create new names. The Sender Name field appears in the
Configure the FROM: address for email section. Follow these directions to
add a new sender name.
- At the end of the Sender Names field, click the Create button.
The screen expands to display the Define Sender fields.

- In the Name field, type a unique name for the sender.
- From the insert merge tag drop-down list, select a tag to include if needed.
- In the Email Address field, type an email address for the new sender.
- Click the Default checkbox to make the sender the default sender.
- From the Department drop-down list, select the department to associate with the sender.
- Click the Save button to save the sender. The screen collapses to display your sender name.
Edit Sender Name
Follow these directions to edit the sender information.
- At the end of the Sender Names field, click the Edit button. The screen expands to display the Define Sender fields.
- Make your changes.
- Click the Save button to save the changes. The screen contracts.
Create New Sender Domain
In addition to including sender names in a conversation, you also need to include
sender domains. The Sender Domains field appears in the Configure the
From: address for email section. Follow these directions to add a new sender domain.
- At the end of the Sender Domains field, click the Create
button. The screen expands to display the Define Sender Domain fields.
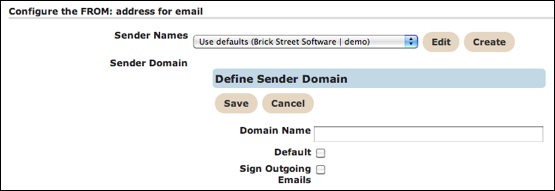
- In the Domain Name field, type a domain name.
- Click the Default checkbox to make the new domain the default domain.
- Click the Sign Outgoing Emails checkbox to sign emails. The screen
expands to display the signature fields.
- From the Sign Emails Using drop-down list, select the domain signature.
- In the Selector field, type a selector.
- In the Enter Signing Key for outbound emails field, type the appropriate signing key.
- Click the Save button to save the domain. The screen contracts to display the domain name.
Edit Sender Name
Follow these directions to edit the sender domain.
- At the end of the Sender Domain field, click the Edit button. The screen expands to display the Define Sender Domain fields.
- Make your changes.
- Click the Save button to save the changes. The screen collapses.