From the Preferences screen, you can add a new preference or edit an existing preference.

Add New Preference
Follow these directions to create a new preference:
- From the Customers tabCustomer Preferences screen, click
Commands > New Preference. The Enter preference
information screen appears.
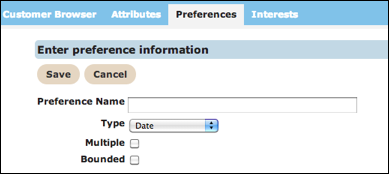
- In the Preference Name field, type a unique name for the new preference.
- From the Type drop-down list, select the preference type. Options are:
- Date - Date preference.
- Number - Takes numeric values only.
- String - Alpha-numeric content.
- Single Characters - A single character or number.
- In the Multiple check box, click to display multiple values per customer if you want to associate multiple preferences to the customer.
- In the Bounded check box, click to add bounded values. The Bounded Values field appears.
- Type the bounded values.
- Click Save to save the preference and return to the Customer Preferences screen.
Edit Preference
Follow these directions to edit a preference.
- From the Customers tab Customer Preferences screen, click Actions > Edit on the row with the preference you want to edit. The Enter preference information screen appears.
- Make your changes.
- Click Save to save the changes and return to the Customer Preferences screen.