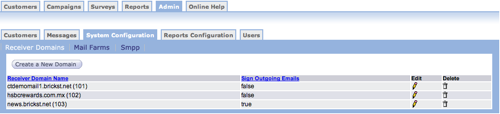
Administrators can create receiver domains for use in the e-mail From field. In the Receiver Domains screen, you can create, edit or delete a receiver domain.
Create a Receiver Domain
Follow these directions to create a receiver domain.
- From the main Connect screen, select Admin > System Configuration > Receiver Domains. The Receiver Domains screen appears.
- In the Receiver Domains screen, click the Create a New Domain
button. The Receiver Domain details screen appears.
- In the Receiver Domain Name field, type a unique receiver domain
name.
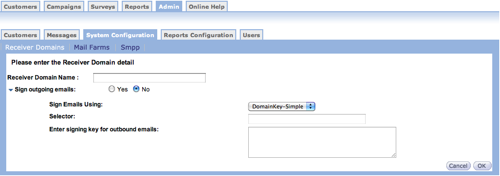
- In the Sign outgoing email field, click Yes to sign the outgoing e-mail messages or click No to avoid signing the outgoing mails.
- In the Sign E-Mails Using field, select the option you want to use to
sign outgoing email messages. The options are:
- DomainKey-Simple
- DomainKey-nofws
- DKIM-Simple
- In the Selector field, type the appropriate selector. A selector allows a domain to have more than one public-key in the DNS. The current Connect release supports only one selector for a receiver domain.
- In the Enter signing key for outboud emails field, type the signing key.
- Click OK to save the receiver domain details. The signing key is automatically encrypted and stored in the Connect database.
Edit a Receiver Domain
Follow these directions to edit a receiver domain.
- From the main Connect screen, select Admin > System Configuration > Receiver Domains. The Receiver Domains screen appears.
- In the Receiver Domain window, click the edit icon
 beside the receiver domain you want to
modify.
beside the receiver domain you want to
modify. - Make your changes.
- Click OK to save your changes. Note: You cannot modify the name of the receiver domains assigned to conversations after a message is launched.
Delete a Receiver Domain
Follow these directions to delete a receiver domain.- From the main Connect screen, select Admin > System Configuration > Receiver Domains. The Receiver Domains screen appears.
- In the Receiver Domain window, click the delete icon
 beside the receiver domain you want to
delete. A confirmation dialog box appears.
beside the receiver domain you want to
delete. A confirmation dialog box appears. - In the confirmation dialog box, click OK to delete the receiver domain.
Note: You cannot delete a receiver domain assigned to a conversation.
Upgrading from a Previous Release
Customers upgrading from previous versions of Connect see the following changes:
- A new table Receiver_Domain_Master is created.
- For every unique receiver domain available in the Conversation_Master table, a new receiver domain is created in the Receiver_Domain_Master table. By default, signing is turned off for all receiver domains created when upgrading Connect from prior releases.
- The following columns are added to the Conversation_Master table:
- RECVDOMAIN_ID: This column is populated with the corresponding recvdomain_id.
- FLAG: This column is populated with N to indicate that signing is turned off at the conversation level. Administrators can edit existing conversations to enable signing at the conversation level. For more information about message signing at the conversation level, see Message Signing at the Conversation Level.
- The RECEIVER_DOMAIN column is dropped from the Conversation_Master table.