Creating a Segmentation Model
To create a segmentation model:
- In the Campaigns screen, click on the Segmentation sub-tab. The
Segmentation Models screen appears.
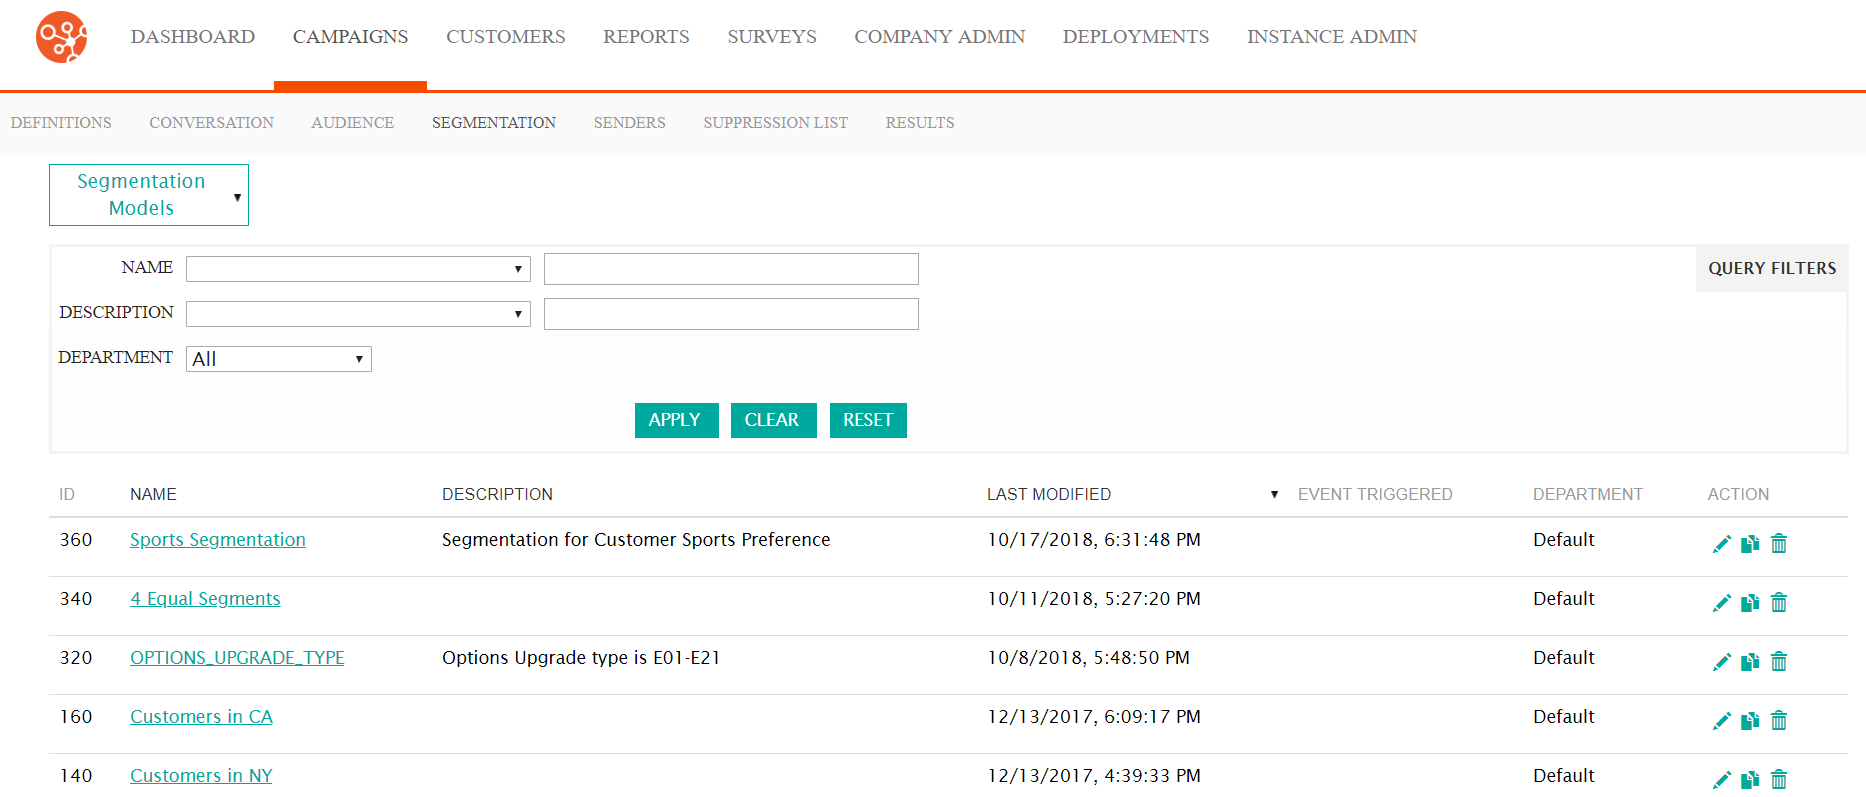
- Select the Segmentation Models dropdown, and select 'New
Segmentation'. The Create Segmentation Model
appears.

- Enter the basic information for the segmentation model:
- Name: The unique name for the segmentation model
- Objective: The internally used objective or description for the segmentation model
- Department: The department to which the segmentation will be associated
- If the segmentation is associated to an event-triggered campaign, you are able
to associate the segmentation to an event parameter. To do so:
- Click the 'None link in the Segmentation Models for
Event-Triggered Campaigns can use Event Parameters section.
The Associated Event section expands.
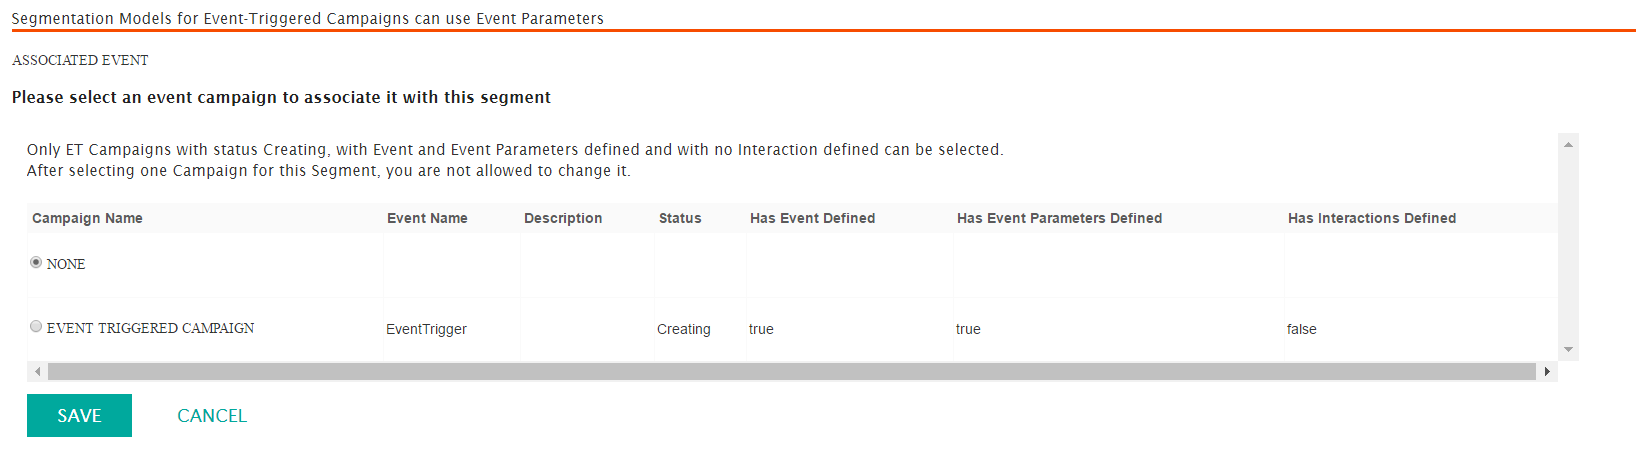
- Select the radio button beside the desired event-triggered
campaign.Note: Only event-triggered campaigns without interactions already defined (i.e. 'Has Interactions Defined is indicated as 'false') are able to be selected.
- To cancel the event-triggered campaign association, click the Cancel button. The Associated Event section disappears. No event is associated to the segmentation.
- Click the Save button. The Associated Event section disappears. The desired event is displayed in the Associated Event section.
- Click the 'None link in the Segmentation Models for
Event-Triggered Campaigns can use Event Parameters section.
The Associated Event section expands.
- Determine how you wish to determine the segmentation model partitions and/or
sizes:
- To determine segmentation model partitions based on customer
profiles:
- Select 'Customer Profiles in the Based On
dropdown of the Segmentation Models may partition based
on Customer Profile data or random groups section.
The Customer Profile segmentation model generator
appears.
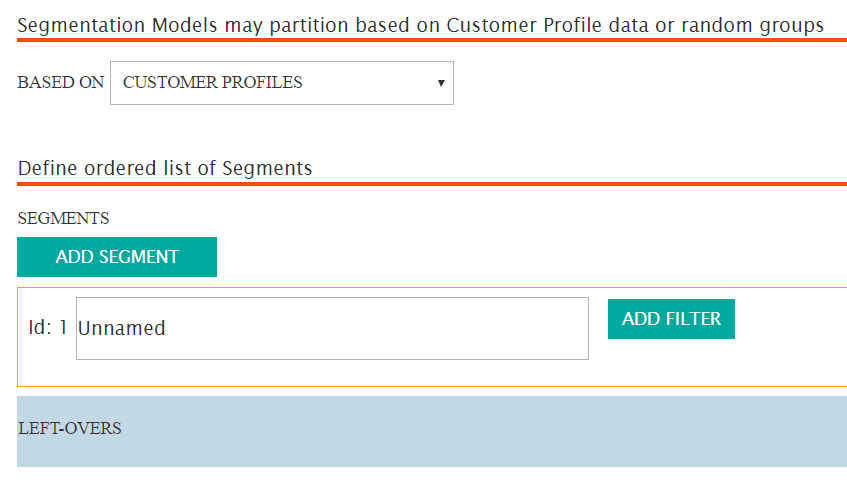
- Enter a name for the segmentation in the Id field.
- Click the Add Filter button. The Create Filter
section appears.
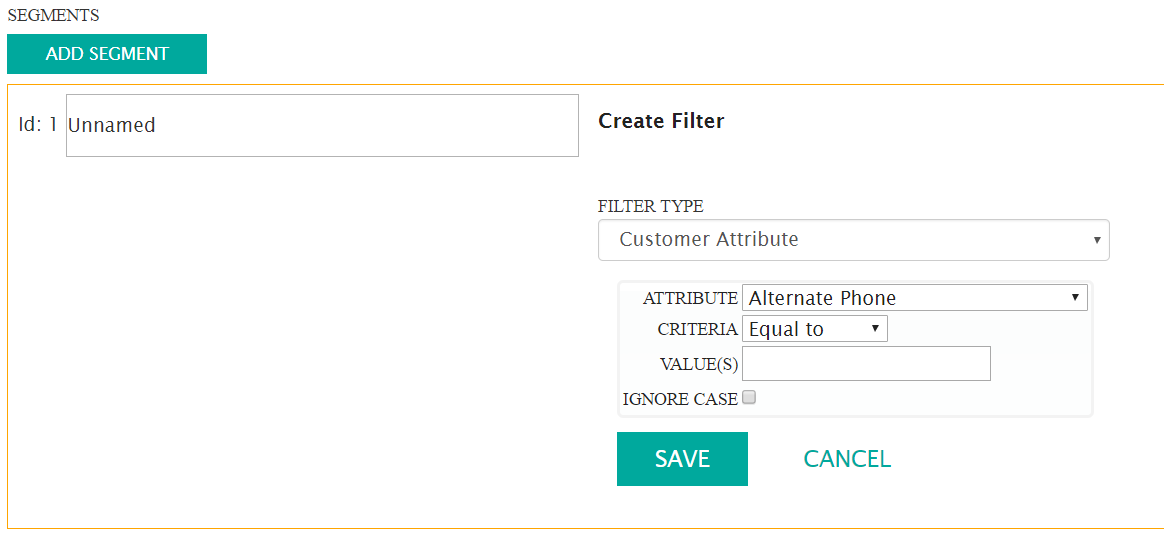
- Enter the information for the filter:
- Filter Type: The group of related attributes used to pare down the number of customers from the conversation for the segmentation. The different types of segmentation filters are developed from customer attributes and behaviours.
- Attribute: The specific customer attribute to segment customers (e.g. city of residence, percentage of links clicked)
- Values: The attribute values used in the segmentation filter
- Ignore Case: Ignores the case sensitivity of the attribute value
Note: Once a filter type is selected, it will dynamically determine the appropriate attribute values associated with it. The attribute will in turn determine the means by which the attribute value can be entered.For example, selecting the filter type 'Customer Attribute' allows you to select the attribute value 'City', with criteria of 'Equal To'. You can then enter the value of 'Toronto' in the value field to create a segmentation of customers living in Toronto.
To see which filter types determine which attributes and criteria, see Filter Types, Attributes and Criteria.
- To cancel and not save the filter information, click the Cancel button. The filter information disappears.
- Click the Save button. The filter is added to the segmentation model
- To add another filter to the segmentation model, repeat steps iii to vi above.
- To delete an erroneously created filter:
- Click the delete filter icon (
 ). A deletion warning
message appears.
). A deletion warning
message appears.
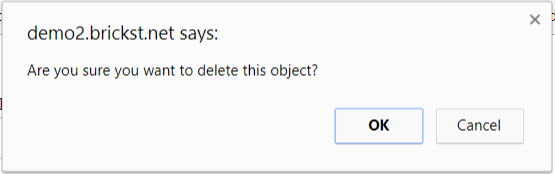
- To return without deleting the filter, click the Cancel button. The filter has not been deleted.
- Click OK. The filter is deleted.
- Click the delete filter icon (
- To add another segmentation model, click the Add Segment button. Another segment appears in the Segments section. Repeat steps ii to vi above.
- Customers are only allowed to appear in one segment. If a
customer could be associated to more than one segment, the
customer will be placed into the first ordered segment for
which they qualify. To order your segments, use either the
up-arrow icon (
 ) or the down-arrow (
 ) on the desired segmentation
models to place the segments in the appropriate order.
) on the desired segmentation
models to place the segments in the appropriate order. - To delete an erroneously created segmentation:
- Click the delete segment icon (). A deletion warning
message appears.
- To return without deleting the segment, click the Cancel button. The segment has not been deleted.
- Click OK. The segment is deleted.
- Click the delete segment icon (
- Select 'Customer Profiles in the Based On
dropdown of the Segmentation Models may partition based
on Customer Profile data or random groups section.
The Customer Profile segmentation model generator
appears.
- To determine segmentation model partitions based on equal
sized segments randomly selected:
- Select 'Equal Sized Segments Randomly Selected in the
Based On dropdown of the Segmentation Models
may partition based on Customer Profile data or random
groups section. The Define ordered list of
segments section appears.
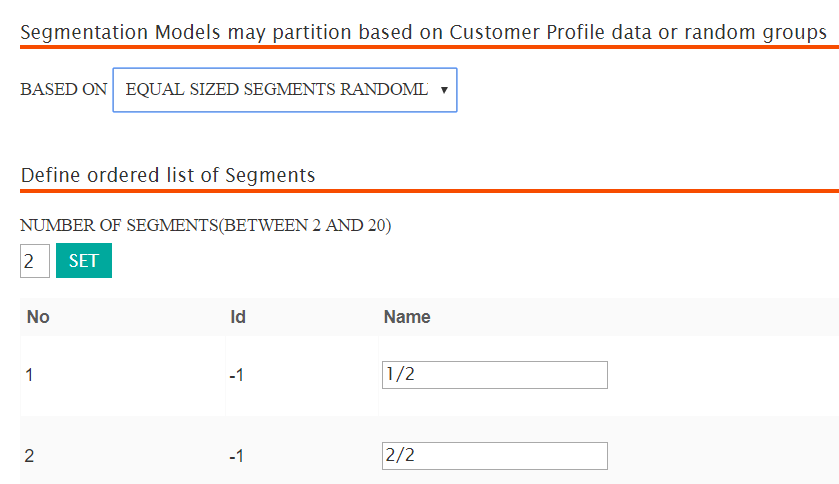
- Enter the desired number of segments in the Number of Segments (between 2 and 20) field and click the Set button. The number of segments are created and displayed.
- If you realize you have created the incorrect number of segments, re-enter the correct number in the Number of Segments (between 2 and 20) field and click the Set button. The correct number of segments are displayed.
- In each of the segments listed, edit the Name field to a name appropriate to your segments.
- Select 'Equal Sized Segments Randomly Selected in the
Based On dropdown of the Segmentation Models
may partition based on Customer Profile data or random
groups section. The Define ordered list of
segments section appears.
- To determine segmentation model partitions based on custom
sized segments randomly selected:
- Select 'Custom Sized Segments Randomly Selected in
the Based On dropdown of the Segmentation Models
may partition based on Customer Profile data or random
groups section. The Define ordered list of
segments section appears.
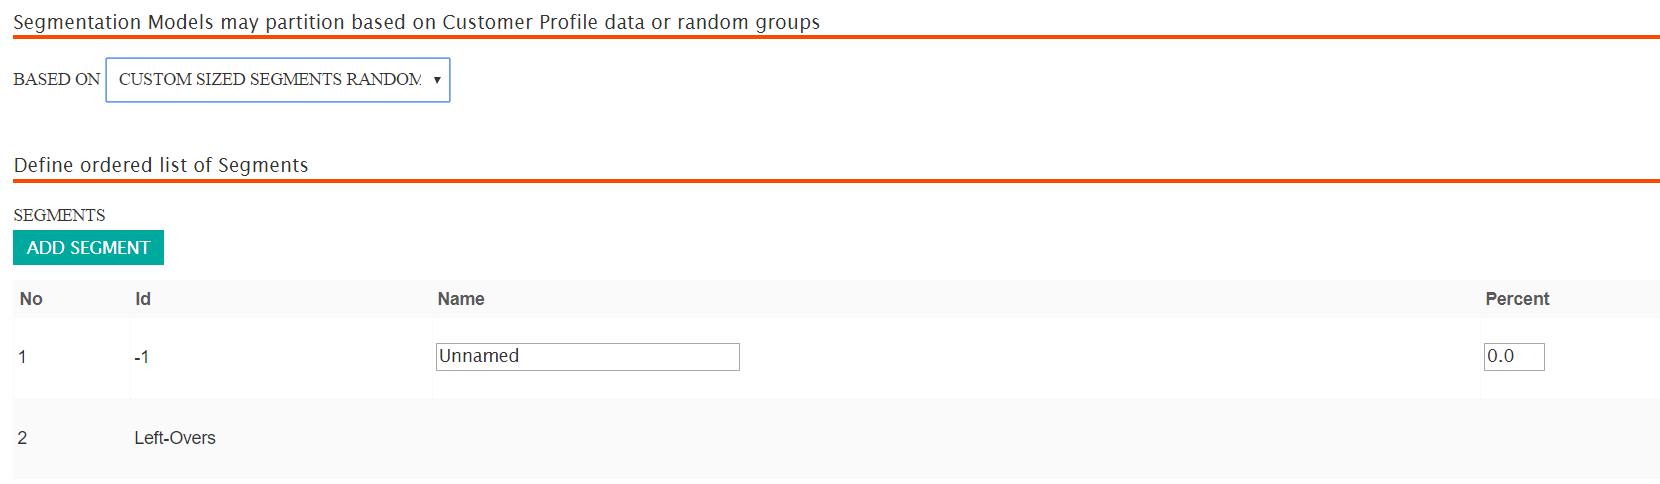
- Enter a name for the segmentation in the Name field.
- Enter the percentage of the audience that the segment should represent in the Percent field (e.g. '25.0').
- To add another segment, click the Add Segment button.
Another segment row appears in the list of segments.
Enter the Name and Percent values for the segment.
- To delete an erroneously created filter:
- Click the delete filter icon () for the desired segment.
A deletion warning message appears.
- To return without deleting the filter, click the Cancel button. The filter has not been deleted.
- Click OK. The filter is deleted.
- Click the delete filter icon (
- Select 'Custom Sized Segments Randomly Selected in
the Based On dropdown of the Segmentation Models
may partition based on Customer Profile data or random
groups section. The Define ordered list of
segments section appears.
- To determine segmentation model partitions based on customer
profiles:
- Click the Save button. The segmentation model is saved and the Segmentation Models screen appears.
