Once created, there may be a need to delete a purge scheduler entry that is either no longer needed or was created erroneously.

Deleting a Purge Scheduler Entry
To delete a purge scheduler entry:- Navigate to the Instance Admin screen. The System Parameters
screen displays.
- Click on the Purge Scheduler sub-menu in the menu bar on the left. The
Purge Modules screed displays.
- Click on the purge module name link from the list of purge modules or click on
the Edit icon (
 ) beside the desired purge module. The Edit
Schedule screen for the selected purge module appears.
) beside the desired purge module. The Edit
Schedule screen for the selected purge module appears.
- Click on the Delete icon (
 ) beside the desired purge scheduler entry. The
deletion confirmation message appears.
) beside the desired purge scheduler entry. The
deletion confirmation message appears.
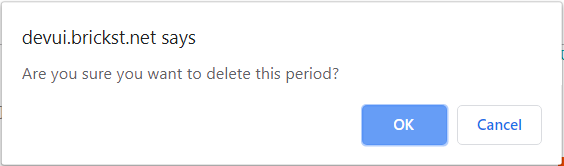
- To cancel without deleting the purge scheduler entry, click the Cancel button. The purge scheduler entry is not deleted.
- Click the OK button. The purge scheduler entry is deleted and no longer displays in the list of entries.
