Connect allows you to create reports as well. The reports you create can help you customize your reporting view for your instance of Connect.
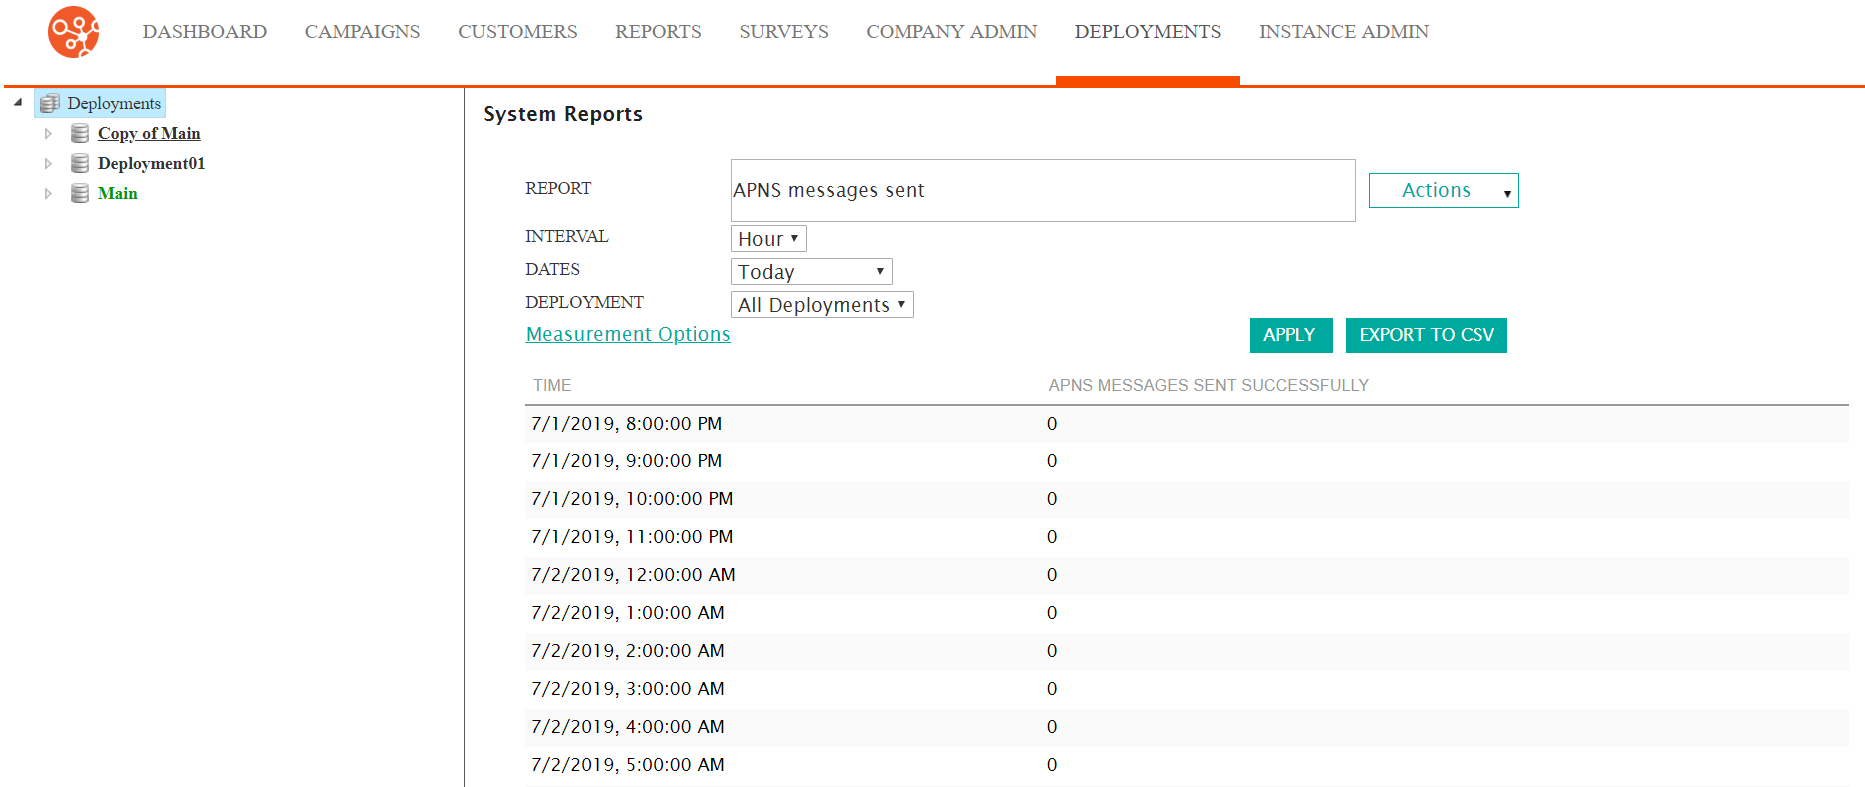
Creating System Reports
To create a new system report:
- Navigate to the Deployments screen. The Deployment Editor
screen displays.
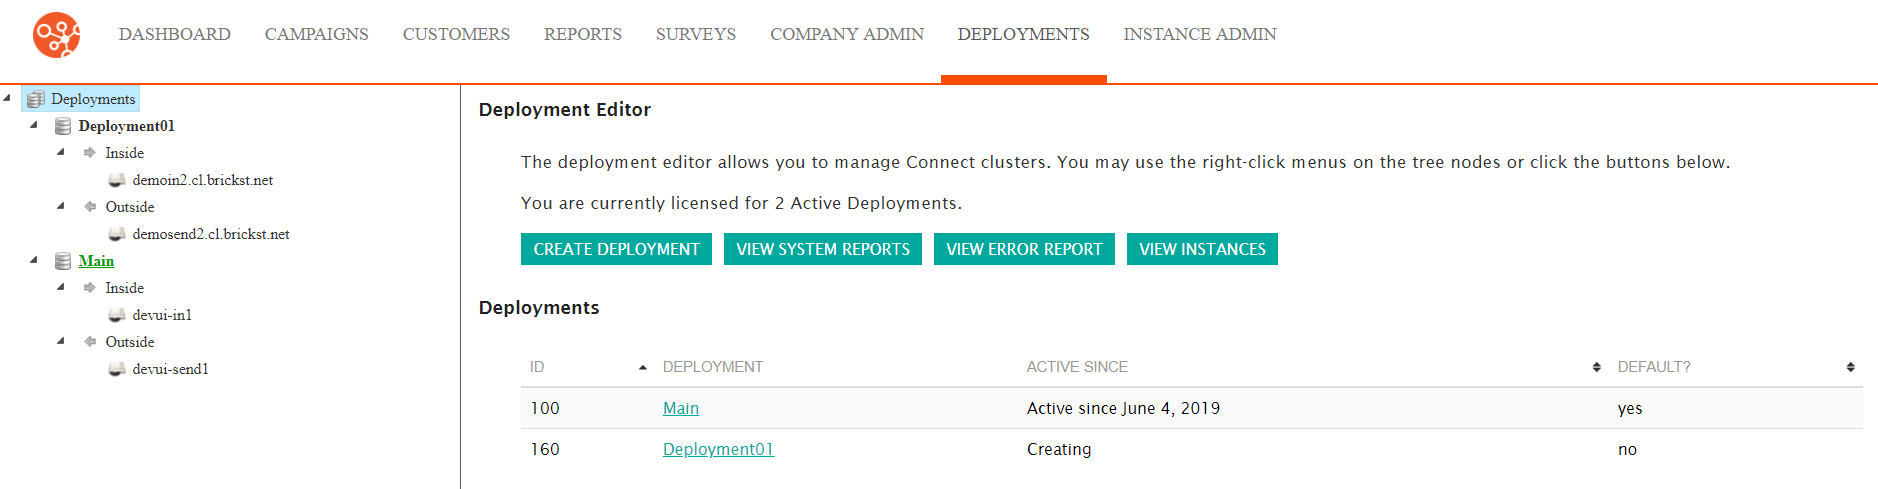
- Click the View System Reports button. The System Reports
screen appears.
- In the Actions dropdown, select New Report.
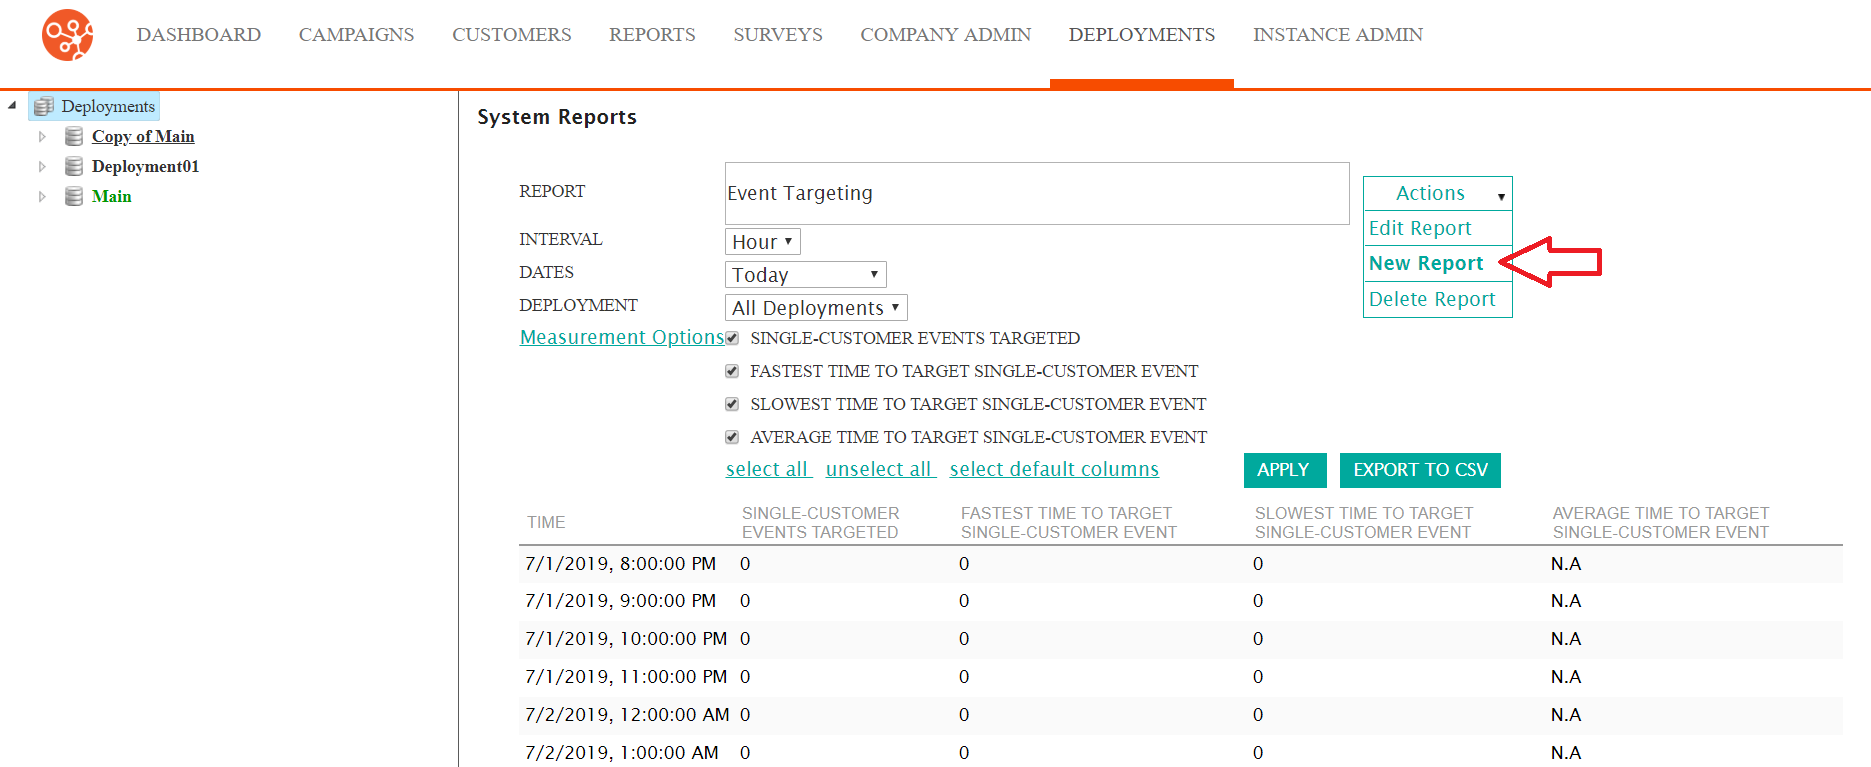
The Edit Report screen appears.
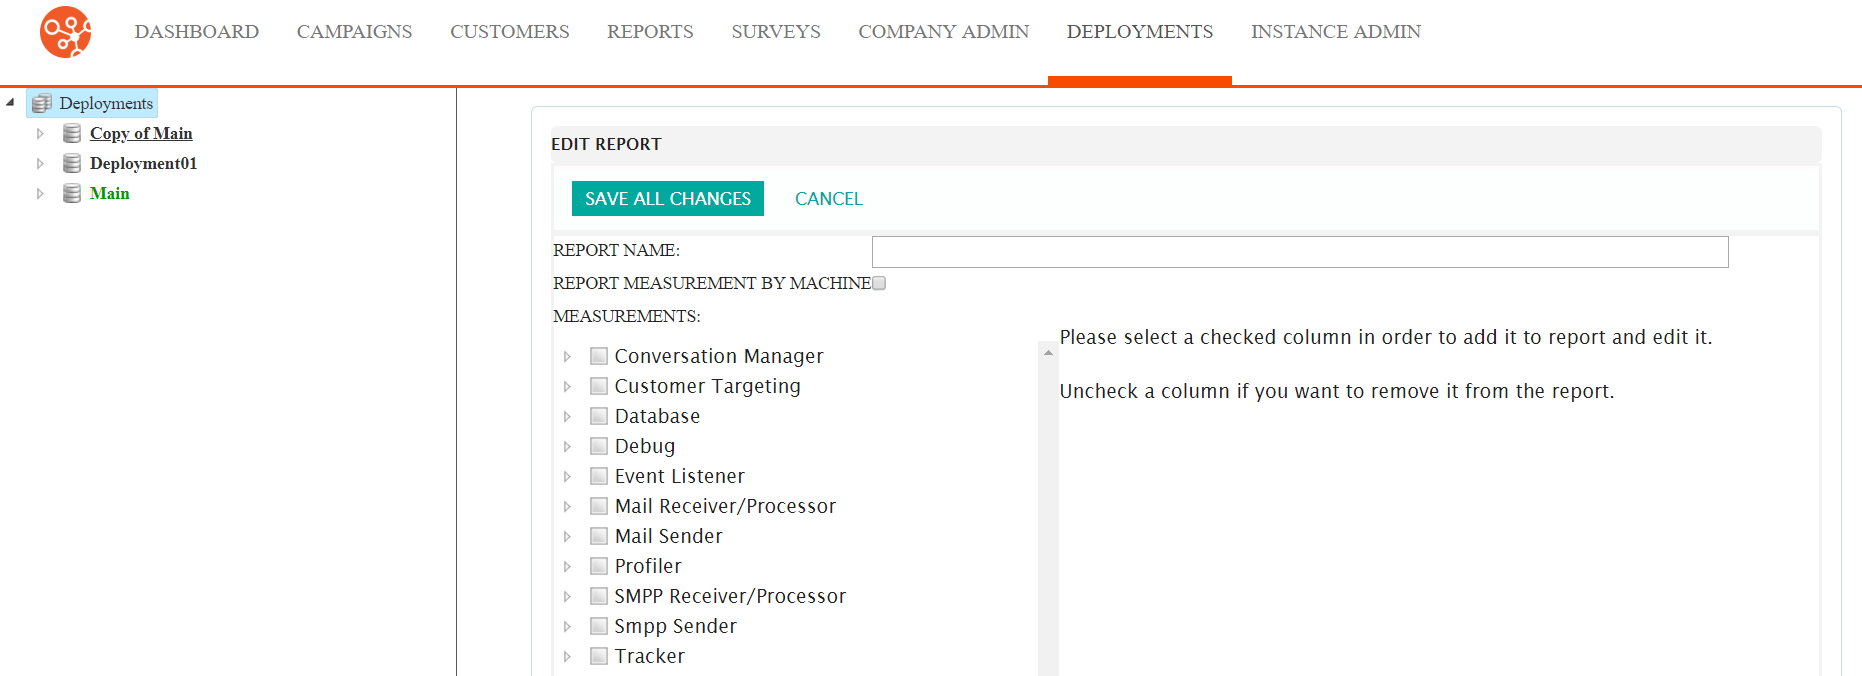
- Enter the report details:
- Report Name: The name for the report
- Report Measurement by Machine: Flag indicating that the results will be broken out by each machine
- To add reporting components to the report:
- To expand a reporting category, select the Expand Category icon
(
 ). The underlying report components for
the report category display.
). The underlying report components for
the report category display. - To contract a reporting category, select the Contract Category icon
(
 ). The underlying report components are
hidden beneath the report category.
). The underlying report components are
hidden beneath the report category. - Select the desired reporting component. The details for the reporing
component display in the right-side panel.
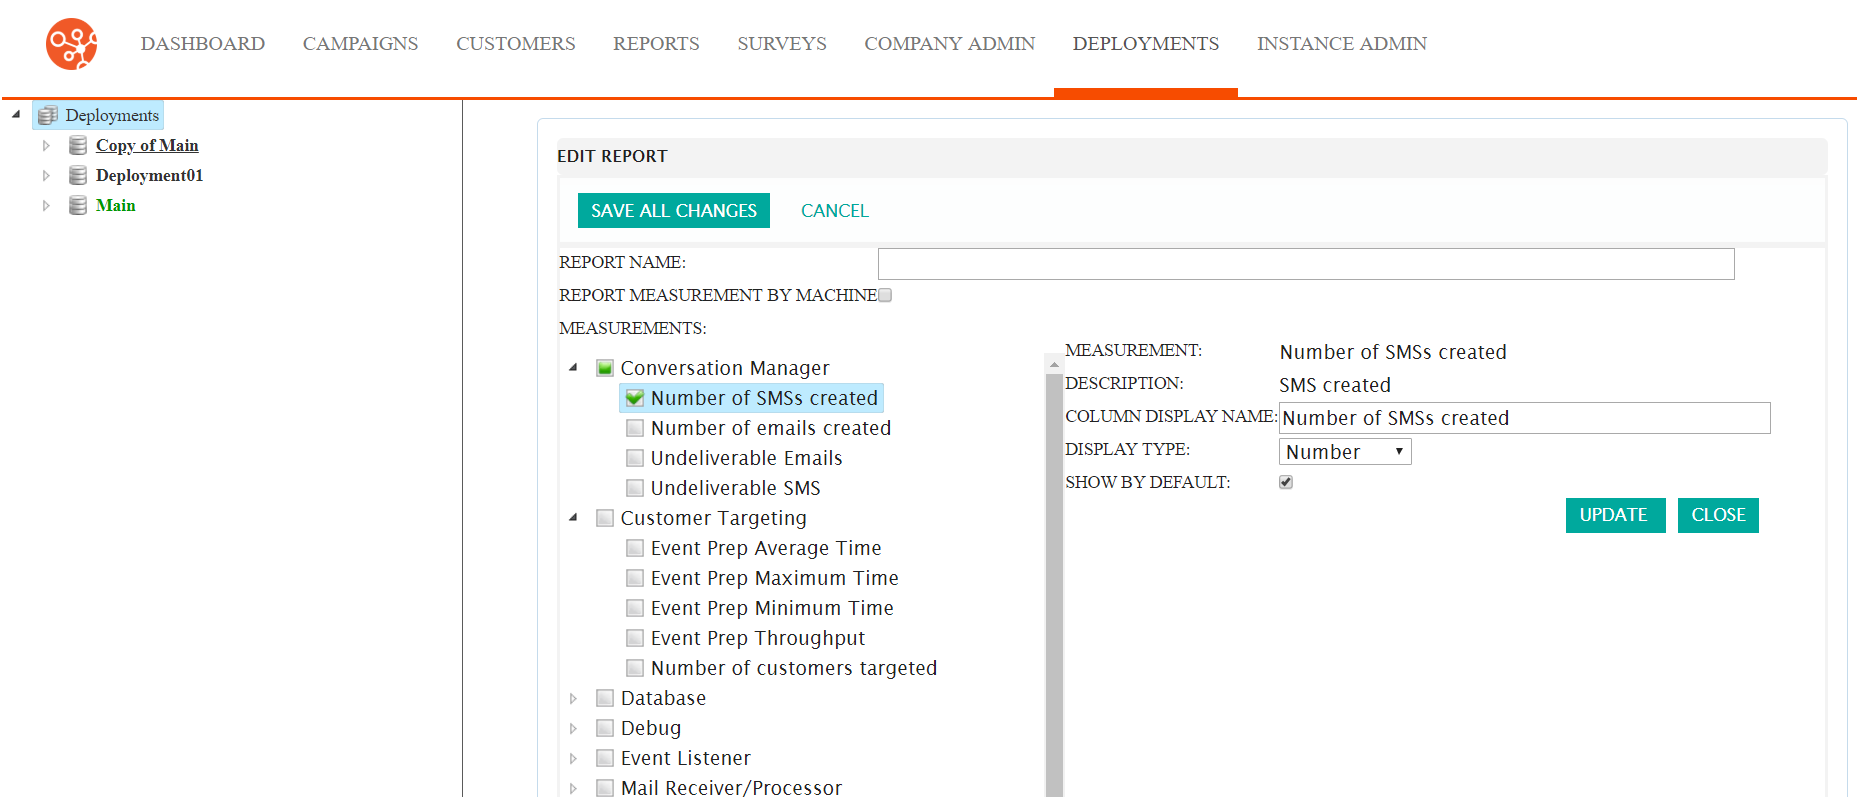
- Edit the values of the report component as desired:
- Column Display Name: The name for the column that will display in the report
- Display Type: The data type that will be displayed (e.g. 'Number', 'Decimal')
- Show By Default: Indicates whether this column will display as a default for the report
- To close without including the report value in the report, click the Close button. The report value is removed from the right-side pane.
- Click the Update button. The measurement is updated and added to the report.
- To expand a reporting category, select the Expand Category icon
(
- To cancel without saving the report, click the Cancel button. The System Reports screen displays. The report is not saved.
- Click the Save All Changes button. The System Reports screen displays. The report is saved and now displays in the list of reports.
