Prior to using the system, a Connect user must have a user profile created for them that is associated to them. Once the user logs into their user profile, they will have access to Connect according to their associated profile.

Creating a New User Profile
To create a new user profile:
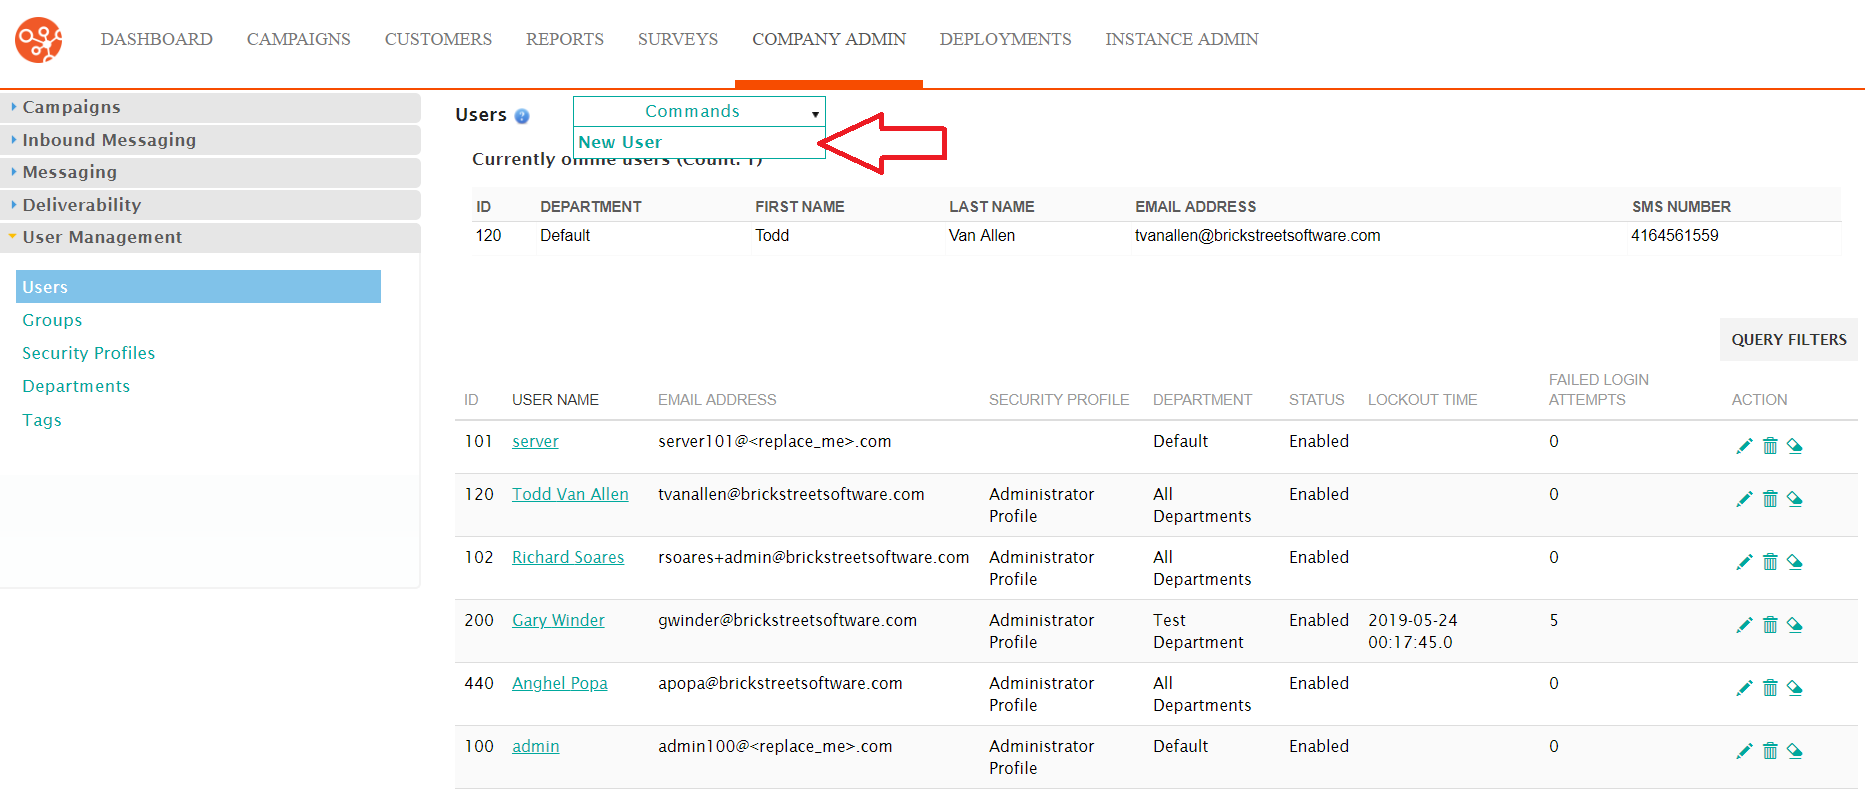
- Navigate to the Company Admin screen.
- Click on the User Management sub-menu in the menu bar on the left,
followed by the Users menu option. The Users screen
appears.
- From the Commands dropdown, select New User.
The Enter User Information screen appears.
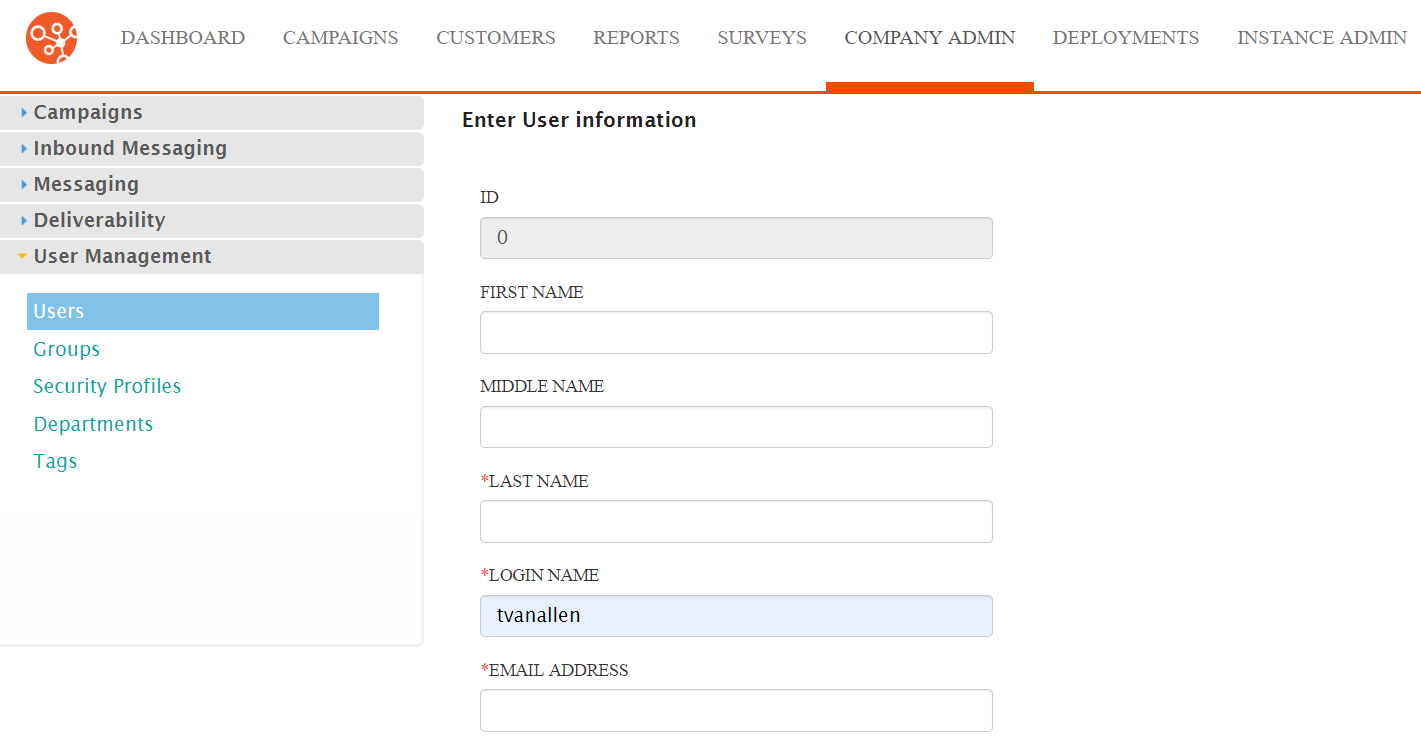
- Enter the user profile information:
- First Name: The user's first name
- Middle Name: The user's middle name
- Last Name: The user's last name
- Login Name: The name the user will use, and will be known as, in Connect
- Email Address: The user's email address
- Alternate ID: An alternate identifier for the user (e.g. login name in legacy system)
- SMS Number: The SMS or mobile phone number or the user
- Password: The password the user will enter to access Connect
- Confirm Password: The confirmation for the password to ensure that the password is entered correctly
- Departments: A series of checkboxes indicating which departments the user is associated to
- Security Profiles: The security profile that is associated with the user
- Default Department for Security Profile: The user's default department which will be used under the associated security profile
- Disabled: Indicates whether the user is disabled and not active in Connect or not
- Seed List: Indicates whether the user is associated to a seed list or not
- Failed Login Attempts: This is a display-only field indicating the number of failed logins the user has performed
- To cancel without saving the user profile, click the Cancel button. The Users screen displays. The user profile is not saved and does not appear in the list of users.
- Click Save. The Users screen appears with the newly created user profile saved and added to the list.
