Once created, the details of a group are able to be edited if they have changed or need to be altered for reasons such as changes in department association.
Editing a Group
To edit a group:
- Navigate to the Company Admin screen.
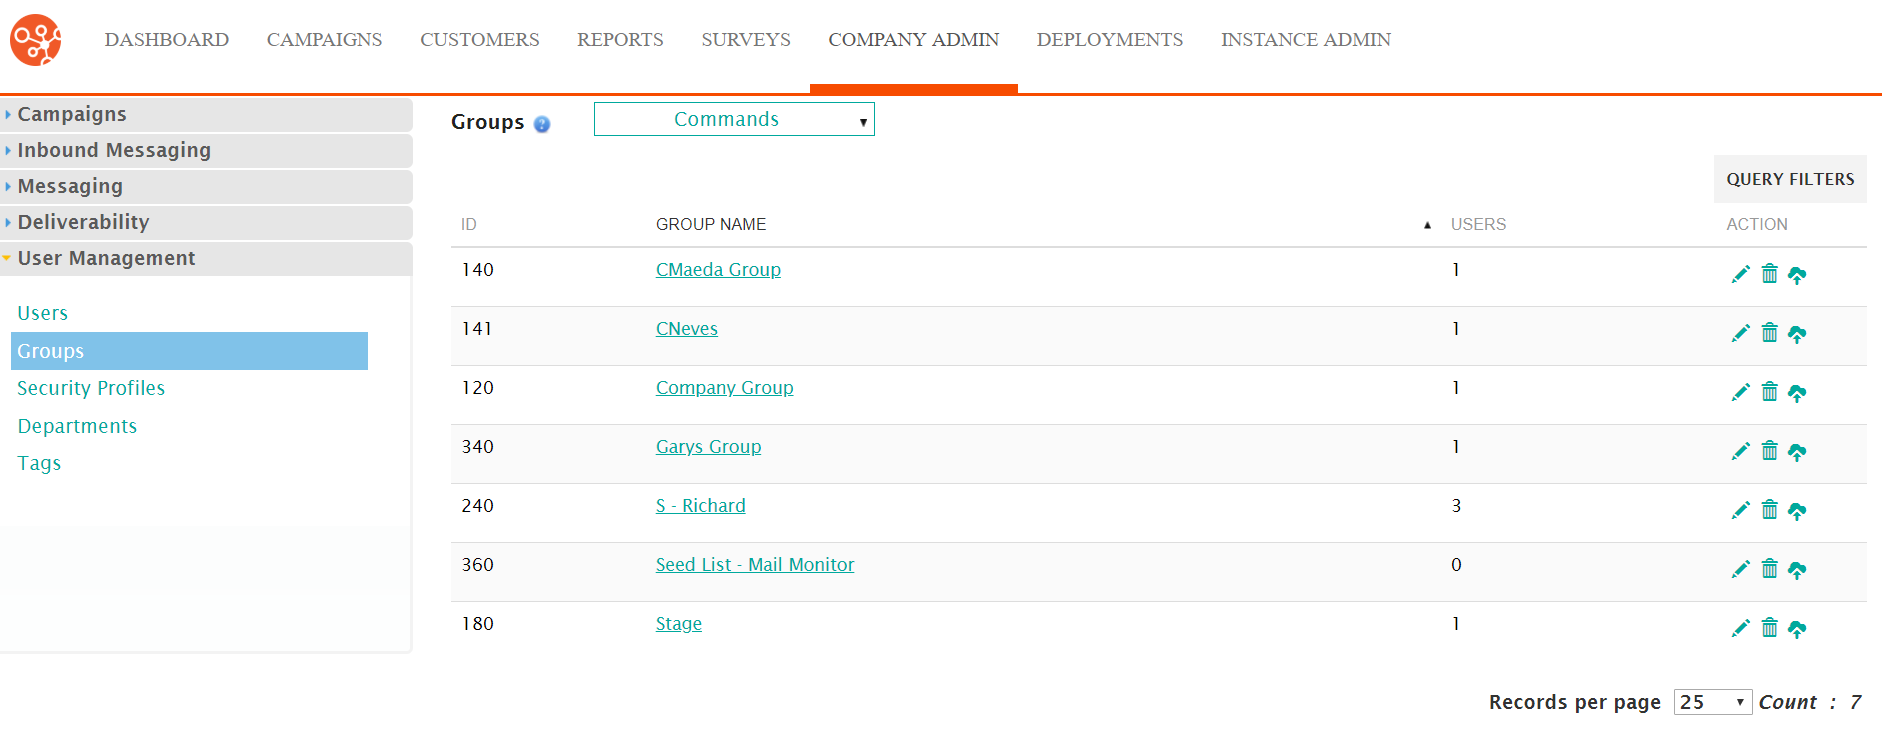
- Click on the User Management sub-menu in the menu bar on the left,
followed by the Groups menu option. The Groups screen
appears.
- Click on the desired group name link from the list of groups or click on the
Edit icon (
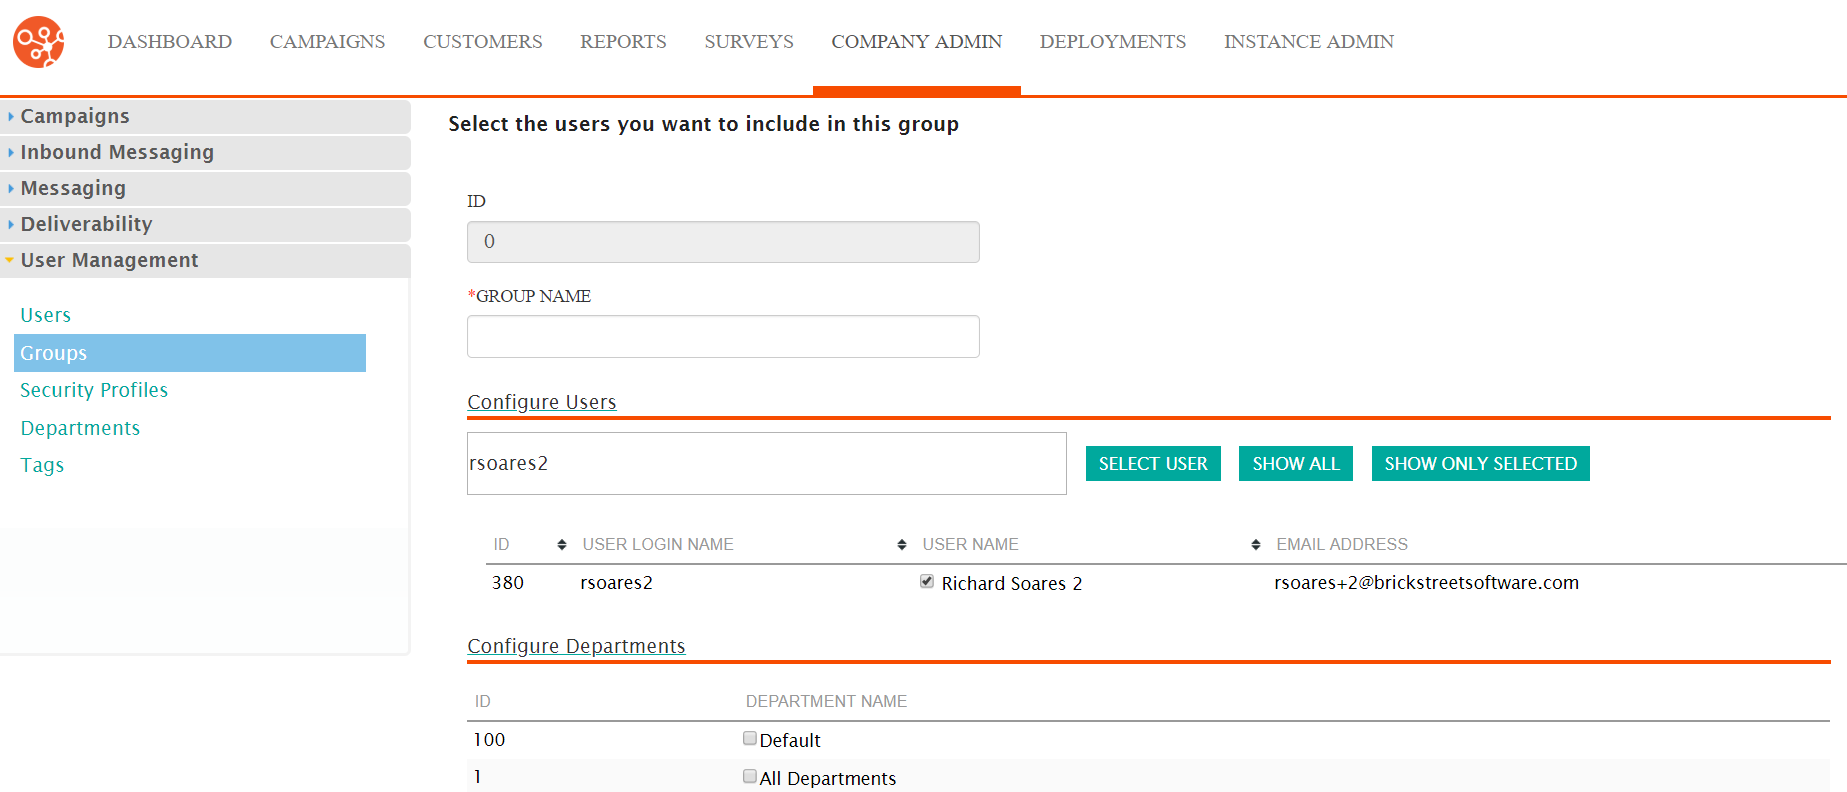
 ) beside the desired group. The Select the
Users You Want to Include in This Group screen appears displaying
the details of the group.
) beside the desired group. The Select the
Users You Want to Include in This Group screen appears displaying
the details of the group.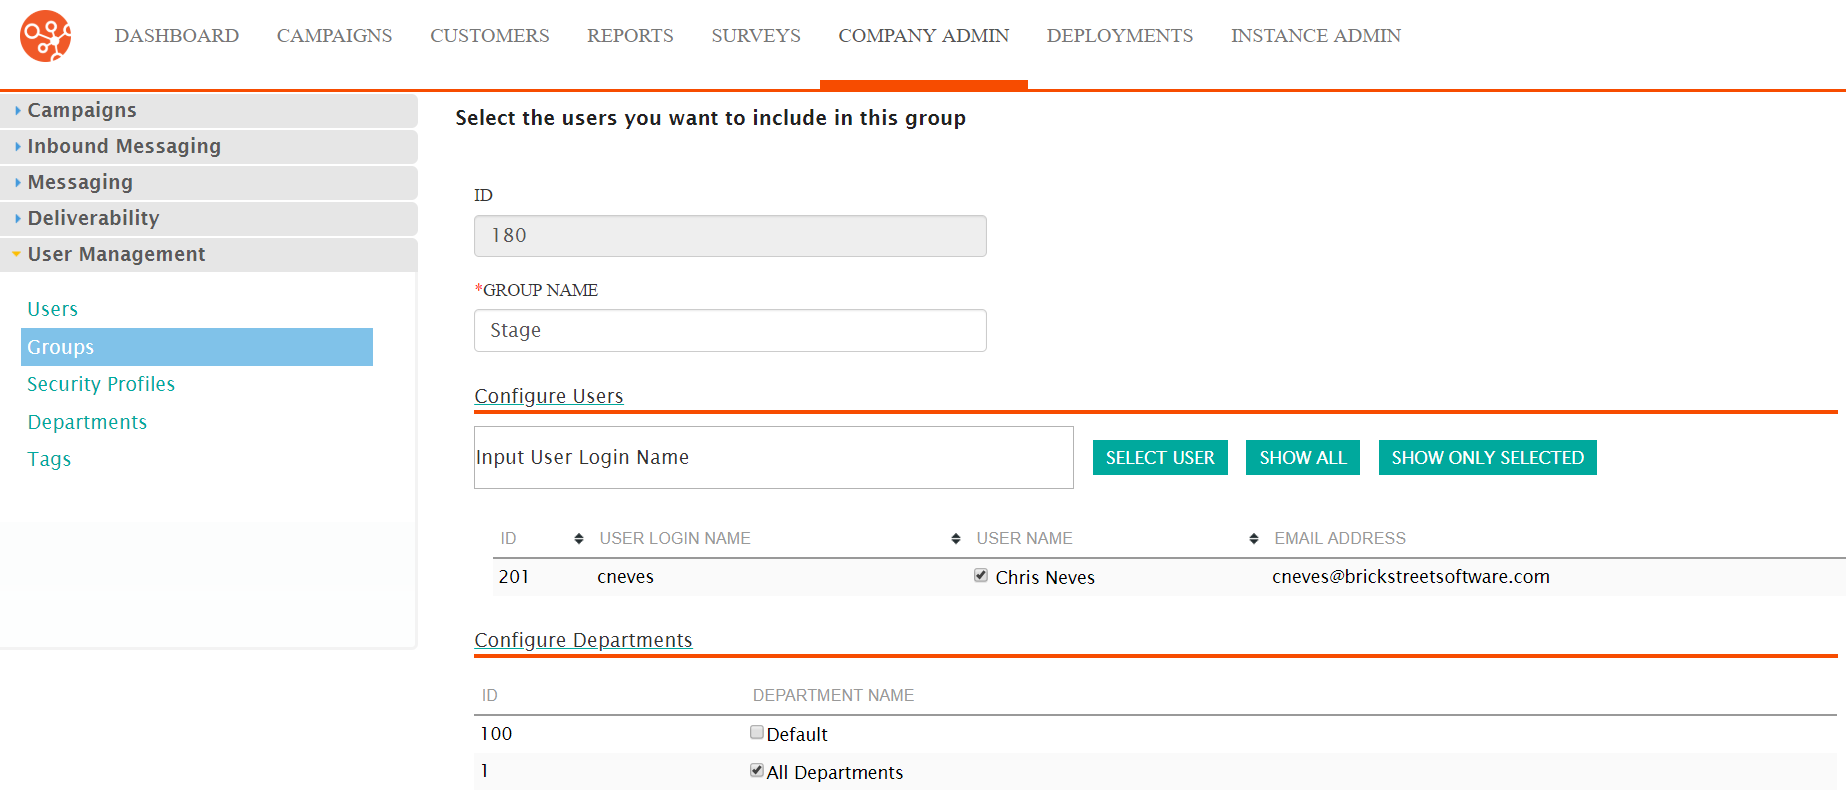
- Edit the name for the group in the Group Name field if necessary.
- To add more users to the group:
- Place the cursor in the Configure Users field and type the
first letter of the user ID of the user. A list of available users
appears.
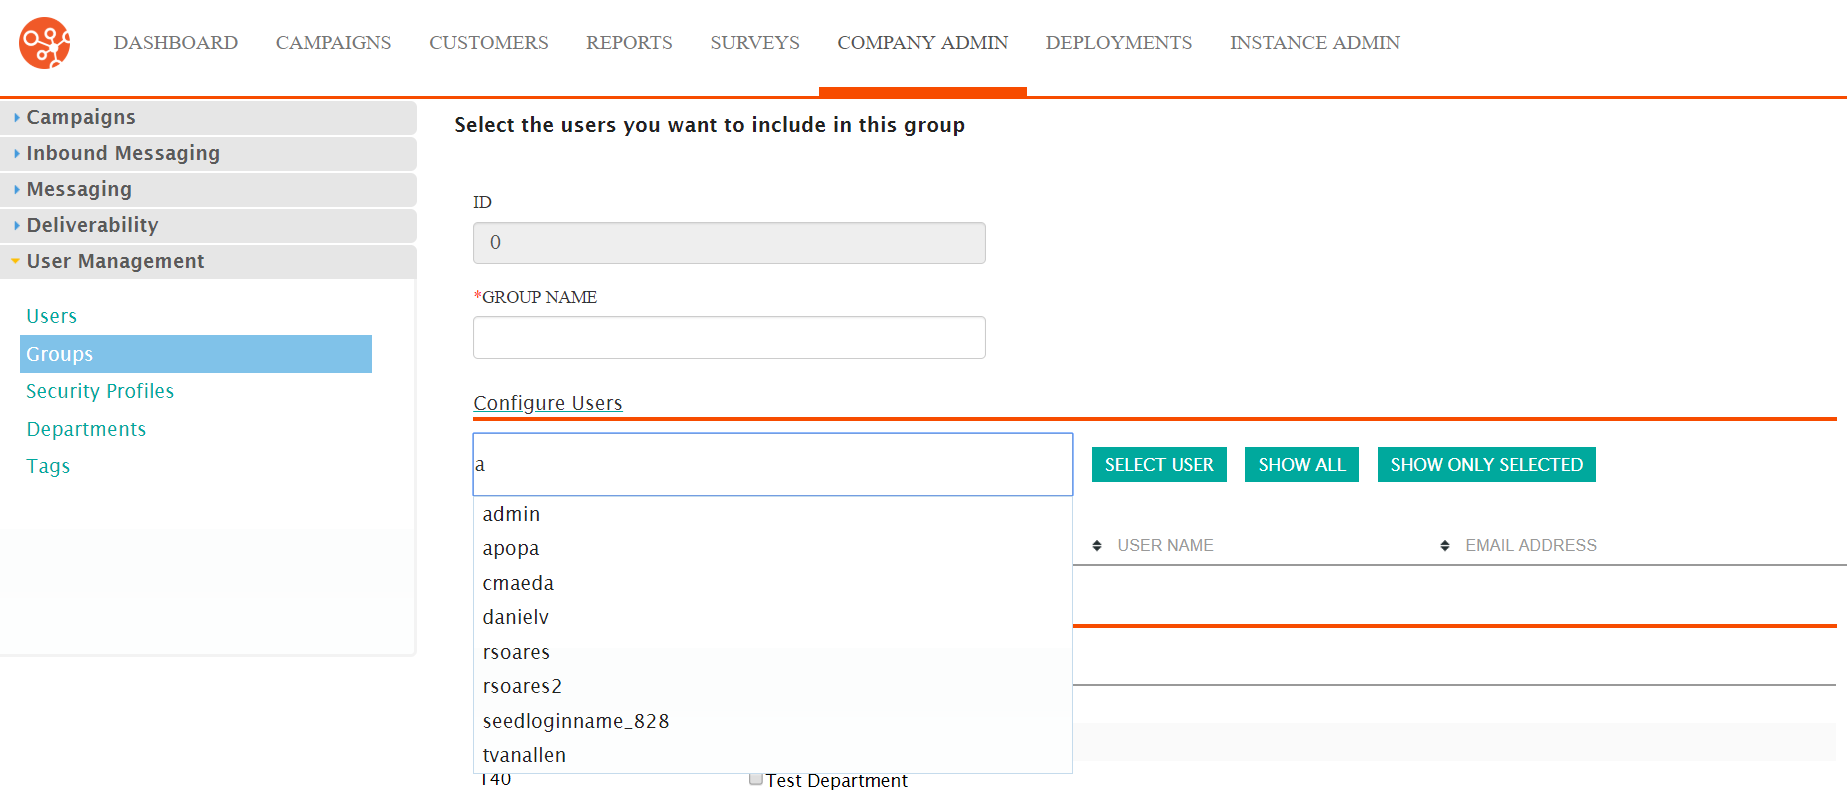
- Select the desired user and click on the Select User button. The user appears in the list of users for the group.
- Place the cursor in the Configure Users field and type the
first letter of the user ID of the user. A list of available users
appears.
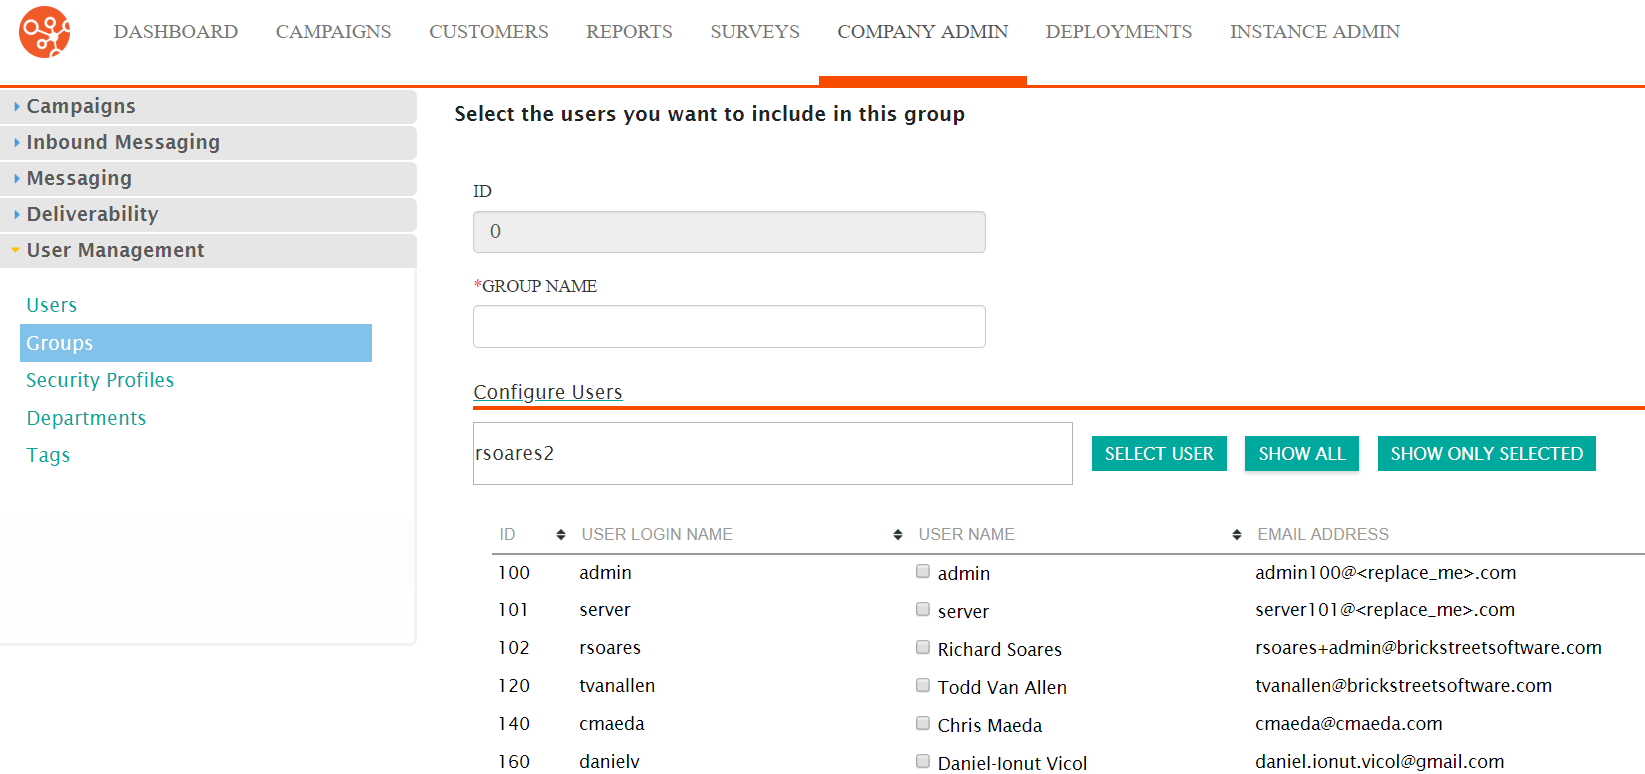
- To show a list of all users, click the Show All button. The list of
all Connect users appears. You are able to select the checkboxes beside the
desired users to add them to the group.
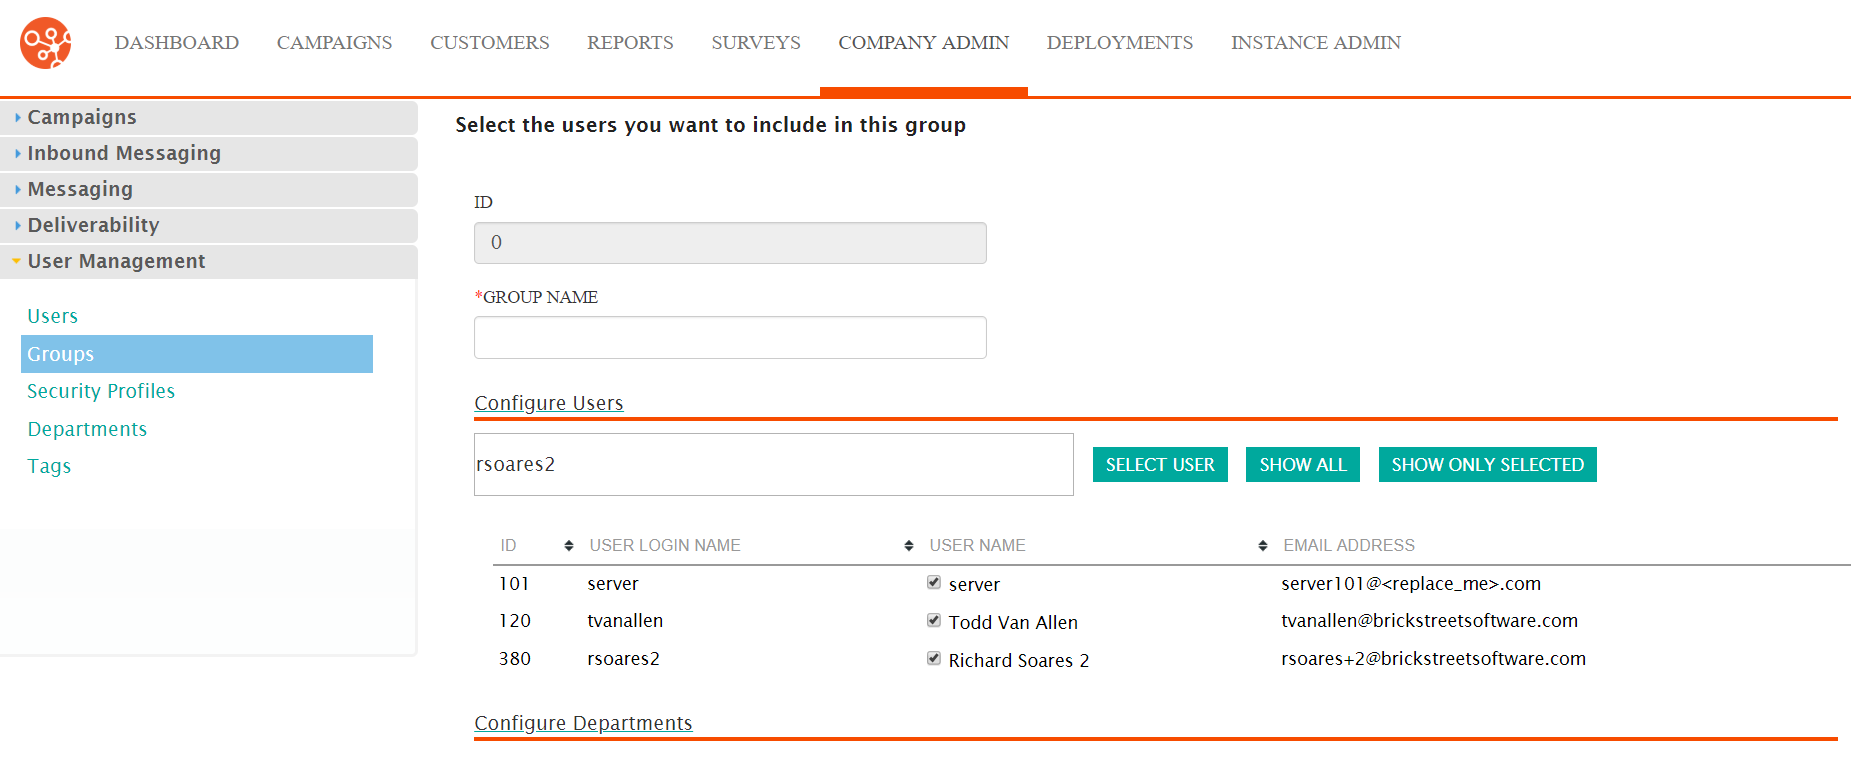
- To reduce the list of users to only those selected for the group, click the
Show Only Selected button. Only the list of users associated with
the group will display.
- Select the desired departments that will be associated to the group in the Configure Departments section.
- To cancel without saving the changes to the group, click the Cancel button. The Groups screen displays. The changes to the group are not saved.
- Click Save. The Groups screen appears with the changes to the group are saved.
