Preparing WebSphere for Connect
In order to deploy the Connect UI in WebSphere, you must configure a JDBC Provider, a data source, and a security provider. Once these have been configured, the Connect UI can be deployed. In the remainder of this section, we will explain how to accomplish these tasks in the WebSphere Administrative Console
Configure JDBC Driver
After logging into the WebSphere Administrative Console, click on the Environment item in the left naviation menu. With the Environment item expanded, select "WebSphere variables" from the menu. Find the value of WAS_INSTALL ROOT (e.g. /opt/IBM/WebSphere/AppServer). If you examine this directory, there will be a subdirectory named lib. Copy the jar files for the JDBC Driver to this lib subdirectory.
For Oracle, there will be a variable named ORACLE_JDBC_DRIVER_PATH. For Microsoft SQL Server, the correct variable will be MICROSOFT_JDBC_DRIVER_PATH. Set the value of this variable to "${WAS_INSTALL_ROOT}/lib". Save your changes to the master configuration.
Configure Authentication Provider
Connect includes a WebSphere authentication provider that performs username and password checking using the records in the USER_MASTER table. The authentication provider is in $KCHOME/import/websphere/connect_auth.jar. The authentication provider uses the same JNDI data source used by the Connect UI.
cd $KCHOME/import/websphere
unzip connect_auth.jar crypto.properties
cp $KCHOME/crypto.properties .
zip connect_auth.jar crypto.properties
Once the connect_auth.jar file has been prepared, copy it from $KCHOME/import/websphere to ${WAS_INSTALL_ROOT}/lib/ext
Configure JNDI Data Source
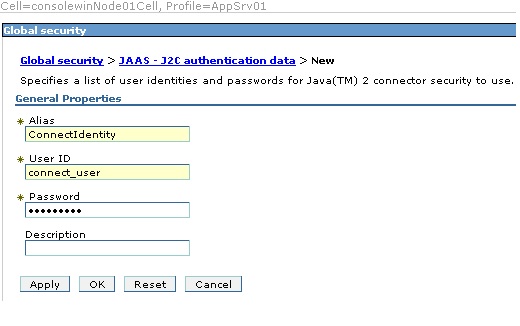
Click the Security item in the Administrative Console. When it expands, click "Global security." Then expand the "Java Authentication and Authorization Service" item (in the Authentication box) and click "J2C authentication data." You will see a list of authentication identities. Click New to define a new identity that will be used by the Connect UI. As shown in the screen shot below, supply an alias for the identify, and the user name and password for the database. Then click OK or Apply, and save your changes to the master configuration.
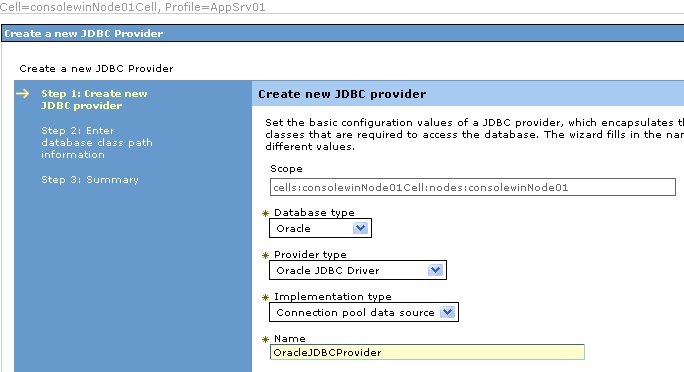
Next, expand the Resources item, and then expand the JDBC item under Resources. Click
on "JDBC providers" to see a list of JDBC providers. In the Scope section, select
the Node level from the drop-down list. Then click New to create a new JDBC
provider. As shown in the screen shot below, specify the Database type, Provider
type, Implementation type, and Name. Click Next until you reach step 3, and review
the configuration. Finally, save your changes to the master configuration.
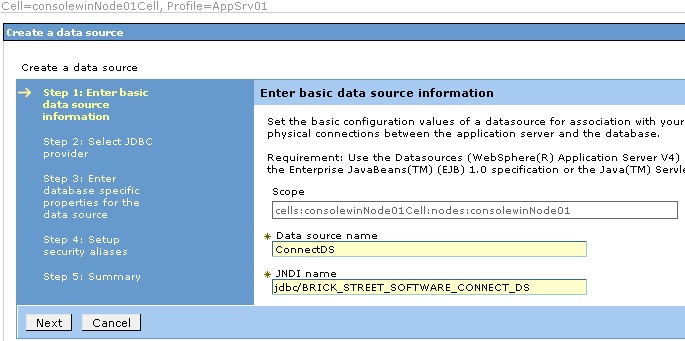
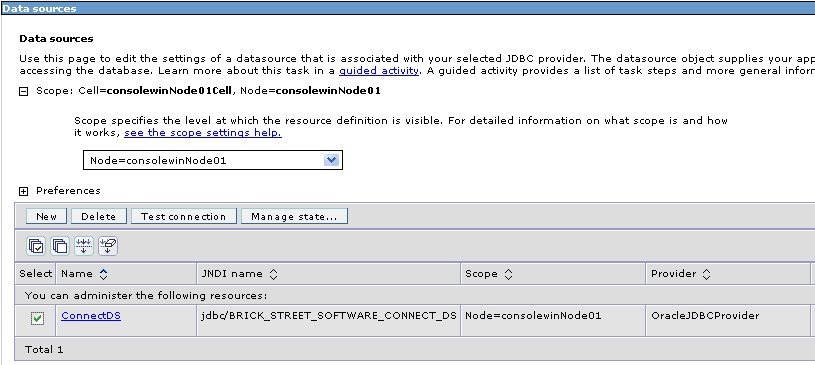
Now we can create the JNDI Data Source. In the Resources item, JDBC subitem, click
"Data sources." In the Scope section, select the Node level from the drop-down list.
Then click New to create a data source. As shown below, provide the data source name
and the JNDI name. The JNDI name must be "jdbc/BRICK_STREET_SOFTWARE_CONNECT_DS".
Click Next to continue.
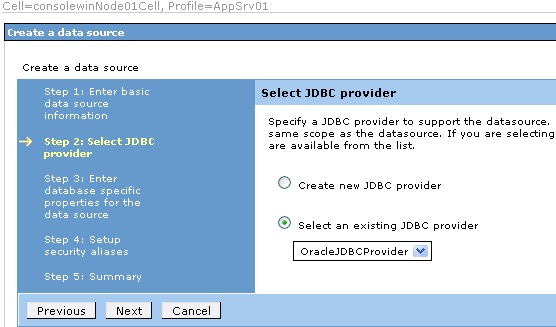
In this screen, select the radio button for "Select an existing JDBC provider" and
select the JDBC provider configured previously.
In the next screen, enter the URL of the database; for example, jdbc:oracle:thin:@localhost:1521:ORCL for an Oracle database. Also, deselect the checkbox with the “Use this data source in container managed persistence (CMP)” label and click Next.
In the next screen, "Setup security aliases," in the “Component-managed
authentication alias” and “Container-managed authentication alias” drop-down lists,
choose the J2C identity name previously defined.
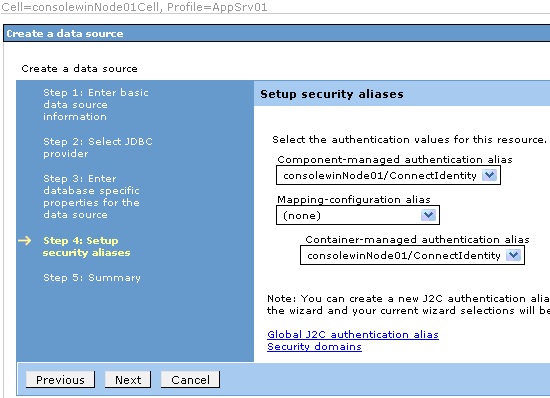
Finally, click Next to review the data source settings. Then click Finish and save to
the master configuration. In the data source list screen, test the connection to
make sure it was configured properly.
Configure WebSphere Security Provider
Expand the Security item in the left navigation bar. Then click "Global security."
Ensure that the checkboxes "Enable administrative security" and "Enable application
security" are both clicked. Save any changes to the global configuration.

Expand the "Users and Groups" item on the left navigation bar and click "Manage groups." Click the Create button and define a new group named CONNECT_ADMIN_GROUP.
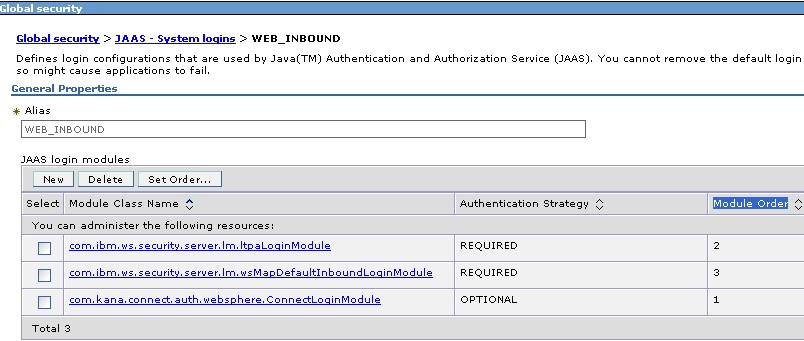
From the left navigation, expand Security and click Global Security. In the screen that appears, expand the Java Authentication and Authorization Service on the right part of the page, and then click on System logins. On the next page, click the “WEB_INBOUND” link. Then on the next page, click New. For the Module class name field, enter com.kana.connect.auth.websphere.ConnectLoginModule and select the Authentication strategy as OPTIONAL from the drop-down list. Save changes to the master configuration.
Next click the "Set Order" button to reorder the JAAS login modules. Click the radio
button for the ConnectLoginModule and click "Move Up" until it is at the top of the
list. Save changes to the master configuration. Your JAAS provider list should look
exactly like this:
Deploying the Connect UI
To deploy the Connect UI, expand the Applications navigation item and click "New Application." The click "New Enterprise Application." In the next screen, you tell WebSphere where to find the brickst.war file. Click the Browse button and select the location of the brickst.war file, then click Next. In the next screen, select the Fast Path and click Next.
In the next screen:
In Step 1: Select installation options, keep the default values and click Next.
In Step 2: Map modules to servers, select the checkbox for the war module and click next.
In Step 3: Map virtual hosts for web modules, select the checkbox for the war module and click next.
In Step 4: Map context roots for Web modules, set the context root to "/brickst" then click Next.
In Step 5: Summary, review the deployment settings and click Finish. If WebSphere is able to deploy the application successfully, save changes to the master configuration.
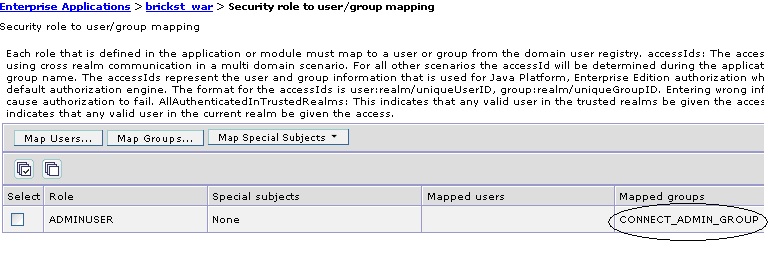
Configure Security Mappings for the Connect UI
Expand the Applications navigation item and click "Websphere enterprise
applications." You should see a list of deployed applications. Click
brickst.war. Then click "Security role to user/group mapping." You should
see the ADMINUSER security role as shown below. Check the box by ADMINUSER and click
"Map Groups."
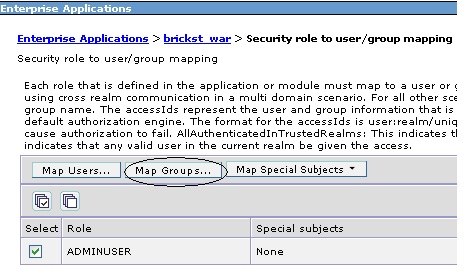
On the next page, click the Search button. In the Available list, you should see the
CONNECT_ADMIN_GROUP. Select it and click the Add arrow. Now the CONNECT_ADMIN_GROUP
should be in the right list called Selected. Click OK. On the next page, click OK
again. The screen should look like the image below. Save changes to the master
configuration.
Test Connect UI
Once all changes have been made, restart the application server and ensure that the brickst war is started. Then go to http://server:9080/brickst/ and log in.