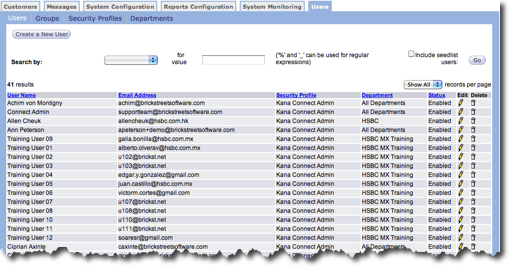
In the Users screen you can create new user records and edit existing records. The
following columns appear in the user table.
- User Name - Name for each user record.
- E-mail Address - E-mail address associated with each user record.
- Department - Department name associated with each user record.
- Security Profile - Security Profile assigned to each user record. Security Profiles are defined in the Security Profiles screen.
- Status - Current status for each user record.
- Edit - Click to make changes to the user record.
- Delete - Click to remove the user record.
Create New User
Follow these directions to create a new user.
- From the Users tab Users screen, click the Create a New
User button. The User screen appears.
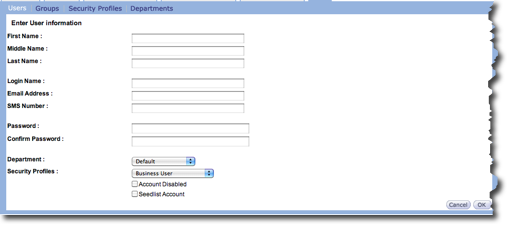
- In the First Name, Middle Name, and Last Name fields, type the user's name. The middle name is optional.
- In the Login Name field, type the user's login name. Make a note of the login name to give to the user.
- In the Email Address field, type the user's email address.
- In the SMS Number field, type the user's cell phone number.
- In the Password and Confirm Password field, type a temporary password. Make a note of the password to give to the user.
- In the Department field, select the department from the drop-down list.
- In the Security Profiles field, select the user's profile from the drop-down list. This field controls the user's access.
- If the account is part of the seedlist, click the Seedlist Account check box.
- Click the OK button. The user is added to the user list and the User screen appears.
Edit User
Follow these directions to edit an existing user.
- From the Users tab Users screen, click the edit icon
 on the row you want to edit. The User
Information screen appears.
on the row you want to edit. The User
Information screen appears. - Make your changes.
- Click the OK button to save your changes. The User screen appears.
Search for a User
If you want to make changes to a specific user, you can search for the user. The search fields appear above the user table. Follow these directions to search for a user.
- In the Search by field, select the criteria from the drop-down list.
- In the For Value field, type the entire value or a part of the value.
- Click the Include seedlist users check box to include those users.
- Click the Go button. The results appear in the list.
Disable Account
Follow these directions to disable an account.
- From the Users tab Users screen, click the edit icon on the row you want to disable. The User
Information screen appears.
- At the bottom of the screen, click the Account Disabled checkbox.
- Click the OK button. The account is disabled and the User screen appears.
Delete User
Follow these directions to delete an account.
- From the Users tab Users screen, click the delete icon on the user's row you want to delete. A confirmation box appears.
- In the confirmation, click the OK button. The user is removed from the list.