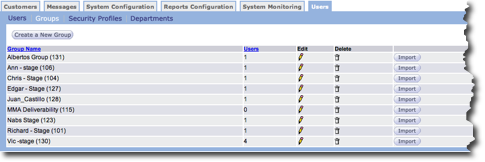
The Groups screen on the User tab is where you create and define new user groups and edit existing groups. By defining user groups you can target multiple members of your organization for campaign rollouts, and so on, without specifying them individually.
If your organization uses Response you can create user groups that include your Response agents. When you roll out a campaign that affects the Response users, you can select their user group for notification.
Create New User Group
- From the Users tab Group screen, click the Create a New
Group button. The New Group screen appears.
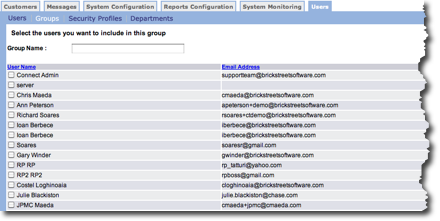
- In the Group Name field, type a unique and descriptive name for the new group.
- In the user list, click the check box for every person you want to include in the group.
- Click the OK button to save the new group. The new group is added to the list.
Edit User Group
- From the Users tab Group screen, click the edit icon
 on the row with the group you
want to edit. The Group screen appears.
on the row with the group you
want to edit. The Group screen appears. - In the Group screen, you can change the group name and add or remove people from the group.
- Click the OK button to save your changes. The Group screen appears.
Delete User Group
- From the Users tab Group screen, click the delete icon
 on the row with the group you
want to delete. A confirmation dialog box appears.
on the row with the group you
want to delete. A confirmation dialog box appears. - Click OK in the dialog box. The group is removed from the list.
Import Users into Group
If you need to import users into a group, you can only import a comma separated values (csv) file. CSV files are usually created using a spreadsheet application or a text editor. Follow these directions to import users into a group.
- From the menu Users tab Group screen, click the Import
button. The Import users screen appears.
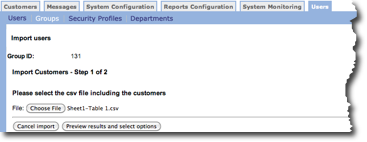
- In the Please select the csv file including the customers, click the Choose File button. The Open dialog box appears.
- In the Open dialog box, locate the .csv file you want to import.
- Click OK in the Open dialog box. The dialog box closes and the file name appears in the File field.
- Click the Preview results and select options button. The file is
imported and the content appears in the screen.
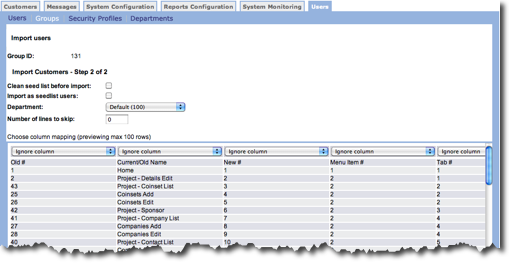
- In the Clean seed list before import field, click the check box if you want to clean the seed list.
- To Import as seed list users, click the check box.
- In the Department field, click to select the department from the drop-down list.
- In the Number of lines to skip field, type the number of lines you want to skip if needed.
- In the fields at the top of each column, you can do the following:
- Select a column heading.
- Select Ignore column if you do not want to include the column content in the database.
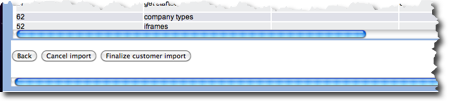
- At the bottom of the screen, click the Finalize customer import
button to save your changes and import the file.