The System Monitoring option provides information about different parts of the system.
Real-Time Viewer
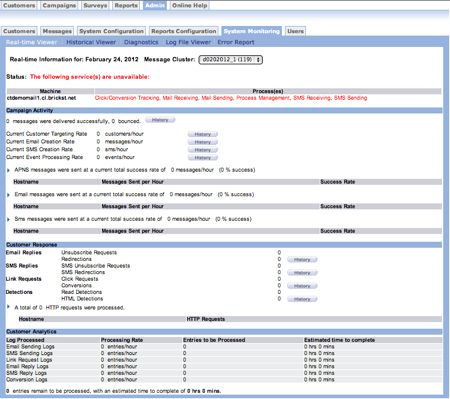
The Real-Time Viewer option displays an overview of system activity related to campaigns and customer activity including a summary of customer analytics.
Historical Viewer
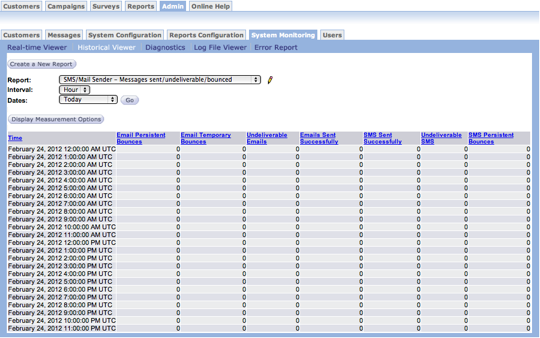
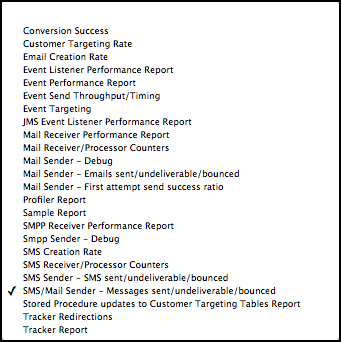
The Historical Viewer option provides different information based on the report you select. Predefined reports appears in the Report field drop-down list. The list of available reports appear following the Historical Viewer image.
Follow these directions to create a new historical viewer report.
- From the the main Connect screen, click Admin. The Admin options appear.
- Click System Monitoring. The System Monitoring screen appears with the Real-Time Viewer report active.
- Click Historical Viewer. The Historical Viewer screen appears. The SMS/MailSender - Messages sent/undeliverable/bounced report appears by default.
- In the Report field, select a report from the drop-down list. The screen changes to display the information from the selected report.
- In the Interval field, select how you want to view the content. You can view information by day or by hour.
- In the Dates field, select the time period with the information you
want to view. Options include:
- Today
- Yesterday
- Last 3 Days
- This Week
- Last 7 Days
- Previous Week
- This Month
- Last 30 Days
- Click the Go button. The report updates to display the interval and dates you selected.
Edit a Report
You can make changes to the information displayed in the reports by turning columns on and off or deleting columns. This procedure assumes that you are viewing an historical report. Follow these directions to edit a report.
- In the Report Name field, select the historical report you want to view.
- Click the edit icon
 beside the Report
field. The Edit screen appears.
beside the Report
field. The Edit screen appears.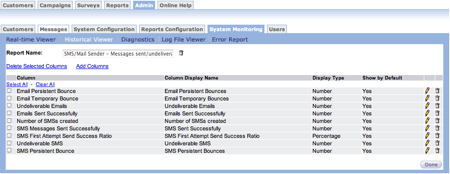
- Click the checkbox beside the column on which you want to perform some action.
- Below the Report Name field, click the Delete Selected Columns link. A confirmation dialog box appears.
- Click OK to remove the columns from the report.
Measurement Options
The following groups of measurements and counters are available in Connect.
SMS Sender
- First Attempt SMS Handled
- First Attempt SMS Messages Handle Time
- Retry SMS Messages Handle Time
- Retry SMS Messages Handled
- SMS Event Send Throughput
- SMS Event Send Average Time
- SMS Event Send Failure
- SMS Event Send Maximum Time
- SMS Event Send Minimum Time
- SMS First Attempt Send Success Ratio
- SMS Messages Sent Successfully
- SMS Retry Send Success Ratio
SMS Receiver
The SMS Receiver Counter specifies the total number of SMS messages received by the SMPP receiver including delivery confirmations. For more granular information, use the SMS Delivery Notification Received counter. SMS Delivery Notification Received specifies the number of delivery receipts received.
- SMS Persistent Bounce
- SMS Redirected reply
- SMS Unsubscribe
- SMS process Average Time
- SMS process Maximum Time
- SMS process Minimum Time
- SMS received
- SMS Delivery Notification
Conversation manager
- Number of SMS created
- Undeliverable SMS
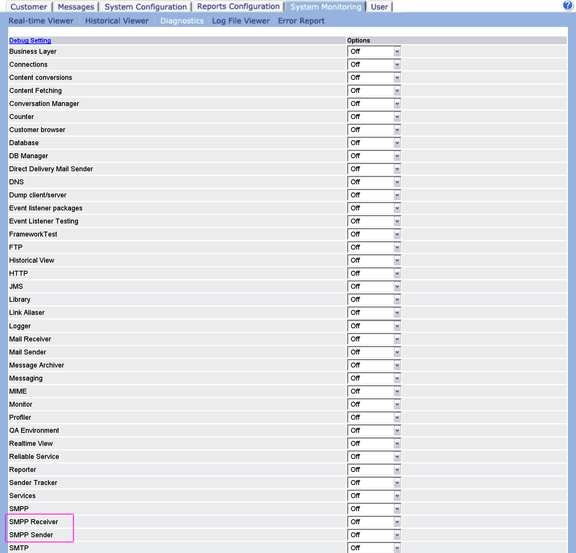
Diagnostics
Diagnostics works in the same way as MailSender and MailReceiver, with two new sections for SMPP debugging added to the diagnostics page.
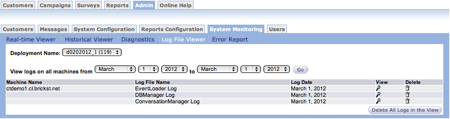
Log File Viewer
The log files for the SMS Sender and SMS Receiver are accessible from this section if the SMS Sender and SMS Receiver are added to the deployment.
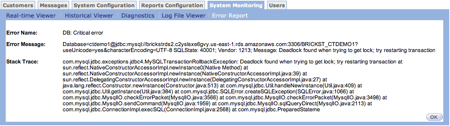
Error Report
The errors, alerts and warnings reported by the SMS Sender and Receiver are available in the Error Reports section. In the top right corner above the error list, you can choose a time period and display all errors within that time period.
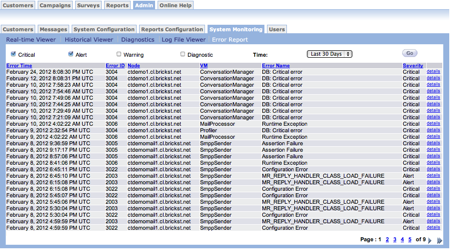
In the last column, click the Details link to see more informtion about an individual error.