Whether you're creating a new conversation or editing an existing one, you'll use the Conversation Edit page shown here to name and define it. The system displays this page whenever you select a conversation to edit, or click a Create a New Conversation button anywhere in Connect.
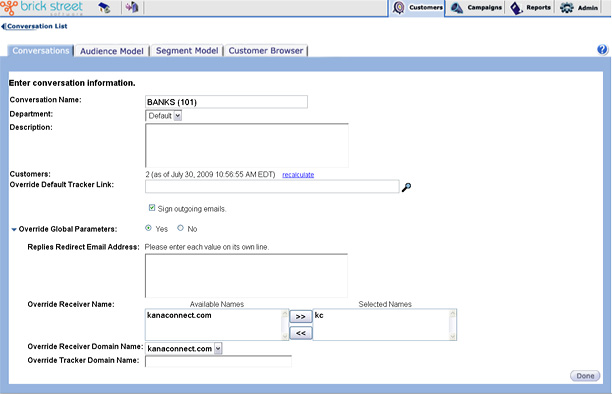
Enter a descriptive, memorable Conversation Name. The name you enter here will identify this conversation in reports and on other pages in your Connect system.
Enter a Description that reflects the purpose and goal of the conversation. This description is for reference purposes only. It does not appear on reports.
The Department drop down box will contain only the department of the user logged-in. If you are a user with access to “All Departments” the drop down box will display all the available departments and you can choose an appropriate department for the conversation. If you change the department when editing a conversation, all the campaigns associated with the conversation will be assigned to the new department.
Customers displays the number of customers associated with the conversation as of the last date that the customer count was calculated. To recalculate this number, click Recalculate. For more information on calculating customer counts, see Performing Calculations.
Overriding Global Parameters
- e-mail addresses to which your customer replies are routed.
- system's mail receiver name.
- system's mail receiver domain name.
- system's tracker domain name.
If your enterprise is known to some customers by one name and to other customers by another name, you may want your e-mail to reflect these distinctions. And you may want customer replies to reflect these distinctions as well. For this reason you have the option to override these defaults for each conversation you define.
To Override Global Parameters, select Yes and specify the preferred parameters in the fields provided.
If you choose not to override global parameters, select No and leave the remaining fields on this page blank.
In Replies Redirect E-mail Address, specify each e-mail address to which you want customer replies redirected to for this conversation. Be sure to enter each on its own line.
In Override Receiver Name, enter the mail receiver name you want identified with customer replies for this conversation.
In Override Receiver Domain Name, enter the mail receiver domain name you want identified with customer replies for this conversation.
In Override Tracker Domain Name enter the tracker domain name you want identified with customer replies for this conversation.
When you've finished creating or editing the conversation, click Done to return to the Conversation List page.